94
Performing with an external MIDI device
* If you “daisy-chain” three or more MIDI devices using IN
→
THRU
→
IN
→
THRU ..., the MIDI signal may become garbled, and data
errors may occur. In such cases, use a MIDI Patcher. MIDI Patcher are
devices that allow a single stream of MIDI data to be sent to a large
number of MIDI devices without causing data errors.
1.
Before starting the connection procedure, make sure that
the power to all devices has been turned off.
2.
After reading “Connecting the JUNO-D to external
equipment” (p. 14), connect an audio device/system or
headphones.
3.
Connect the external MIDI sound device with the MIDI cable
as shown in the figure above.
4.
As described in “Turning on the power” (p. 15), turn on the
power of each device.
Set the keyboard transmit channel
When you have finished connecting the external MIDI device, match
the keyboard’s Transmit channel and the Receive channel for each of
the external MIDI sound generator’s Parts. Here we will explain the
settings for using the JUNO-D in Patch mode.
1.
Press [SYSTEM] so it is lit.
2.
Use PAGE/CURSOR [ ]/[ ] to select “Patch Tx Ch.”
fig.r10-08_40
By holding down [SHIFT] and using PAGE/CURSOR [ ]/
[] you can quickly select the “SYSTEM|MIDI” group (p. 88).
3.
Use VALUE [-]/[+] to modify the value.
Value
1–16:
Performance data from the JUNO-D will be
transmitted on the selected channel.
RxCH:
Performance data will be transmitted on the same
channel as the Receive Channel (p. 57) of the part.
OFF:
Performance data will not be transmitted.
Normally, you will use the “RxCH” setting.
4.
Press [WRITE] to save the settings.
For further information, refer to
“How to make the system
function settings”
(p. 88).
Press [EXIT] to cancel the operation and return to the previous page.
With the above settings, when the JUNO-D’s keyboard is played,
sounds are simultaneously played by the JUNO-D and the external
MIDI sound generator.
For instructions on setting the Receive channel for each of the Parts
of the external MIDI sound generator, refer to the owner’s manual
that came with the device.
* If you want sounds to be played only by the external MIDI sound
generator, set Local control to OFF (p. 96).
When you select a patch or rhythm set on the JUNO-D, a bank
number and program number will be transmitted to the external
MIDI sound module as described in the
“Bank number/
program number correspondence table”
(p. 95). This will
switch sounds on the external MIDI sound module, but if the
external MIDI sound module receives a bank number for which
it provides no sounds, it may choose a substitute sound or may
produce no sound at all. In order to select a sound reliably, you
may wish to first select the sound group on your external MIDI
sound module, and then transmit only a program number. This
will allow you to switch sounds within the same group.
If you want to transmit only the program number, turn
“Tx
Bank Sel (Transmit Bank Select Switch)”
(p. 90) off.
Playing the JUNO-D’s sound
generator from an external
MIDI device
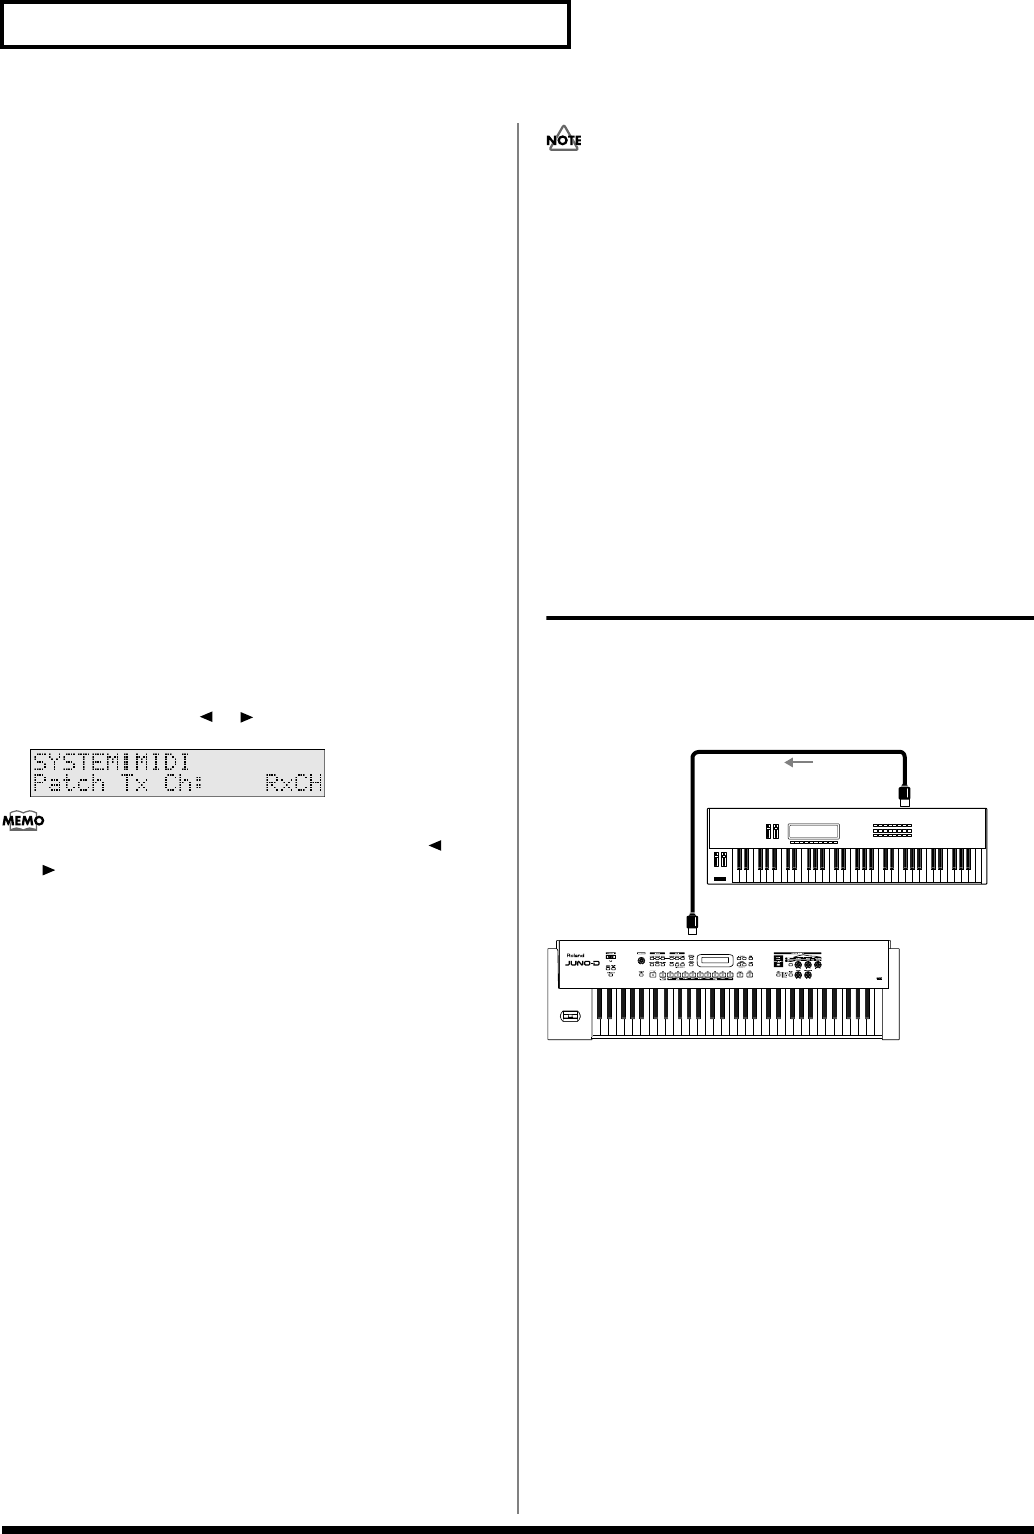
Next, try playing the JUNO-D from an external MIDI device.
Connecting an external MIDI device
fig.r10-10.e
1.
Before starting the connection procedure, make sure that
the power to all devices has been turned off.
2.
After reading “Connecting the JUNO-D to external
equipment” (p. 14), connect an audio device/system or
headphones.
3.
Connect the external MIDI sound device with the MIDI cable
as shown in the figure below.
4.
As described in “Turning on the power” (p. 15), turn on the
power of each device.
MIDI IN
MIDI OUT
MIDI Keyboard
JUNO-D
JUNO-D_e.book 94 ページ 2004年6月11日 金曜日 午後1時21分


