


42
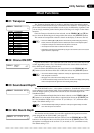
The 44 “utility functions” described in this chapter
include effect, disk, MIDI, and general functions that
significantly enhance the versatility and flexibility of
the CVP-89.
Utility Functions
■ Selecting & Using the Utility Functions
BEAT
MAX
MIN
MASTER VOLUME
DEMOLEFT PEDAL
UTILITYREVERB
PROGRAM
CUSTOM
RHYTHM
TEMPO
TAP
METRONOME
–
+
–
/ NO
+ / YES
MEMORY
REGIST-
RATION
RHYTHMBASS 1 CHORD 2
AUTO ACCOMPANIMENT
MAX
MIN
STYLE
POP 16BEAT
DANCE
POP
BOOGIE
SLOW
ROCK
SWING
JAZZ
BALLAD
BOSSARHUMBA
MARCH
STYLE
COUNTRY
WALTZ
STYLE
13-50
DISK
STYLE
1
2
START/STOP
INTRO/
ENDING
SYNCHRO
START
SOLO
STYLEPLAY
NORMAL
FILL TO
NORMAL
VARIATION
FILL TO
VARIATION
FULL
KEYBOARD
A B C
SINGLE/
FINGERED
A B C
VOICE
PIANO
CLAVINOVA
TONE
E. PIANO
HARPSI-
CHORD
VIBES GUITARSTRINGSORGAN CHOIR
UPRIGHT
BASS
ELEC
BASS
DRUMS
VOICE
13-60
SPLIT
1
23
4
5
6
7
89
0
VOICE
SONG/PHRASE
NUMBER
START/STOP
REW
FF
REC
CHORD
SEQUENCE
PHRASE
REPEAT
GUIDE
LAMP
CANCEL
SONG SELECT
1
2
3-10
DISK ORCHESTRA
PAUSE
RIGHT
LEFT
ORCH
RHYTHM
UTILITY
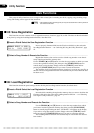
Most of the CVP-89 utility functions are selected and set in the same way for consistent, easy operation. The general
selection and setting procedure is as follows:
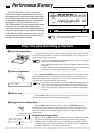
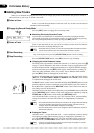
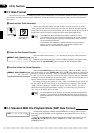
ZSelect a Utility Function .........................................................................................................................
While holding the [UTILITY] button use the [TAP] and/or [METRONOME]
buttons to select the desired utility function display. It is also possible to step
through the utility functions by repeatedly pressing the [UTILITY] button (the
utility display will remain for about one second after the [UTILITY] button is
released).
The [UTILITY] button must be held until after you’ve set the function, below.
NOTES
• You can cancel the selected function at this point and exit from the utility mode
simply be releasing the [UTILITY] button.
• The last utility function selected is automatically re-selected when the [UTILITY]
button is pressed (“01: Transpose” is always the first utility function selected after
the power has been turned on).
• When some functions are selected “NO/YES” will flash on the display. In such
cases press the TEMPO [
s
] (YES) button to actually engage the selected func-
tion or the TEMPO [
t
] (NO) button to cancel. You can release the [UTILITY]
button once you’ve pressed the TEMPO [
s
] button.
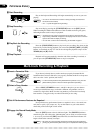
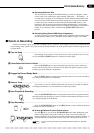
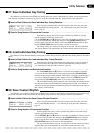
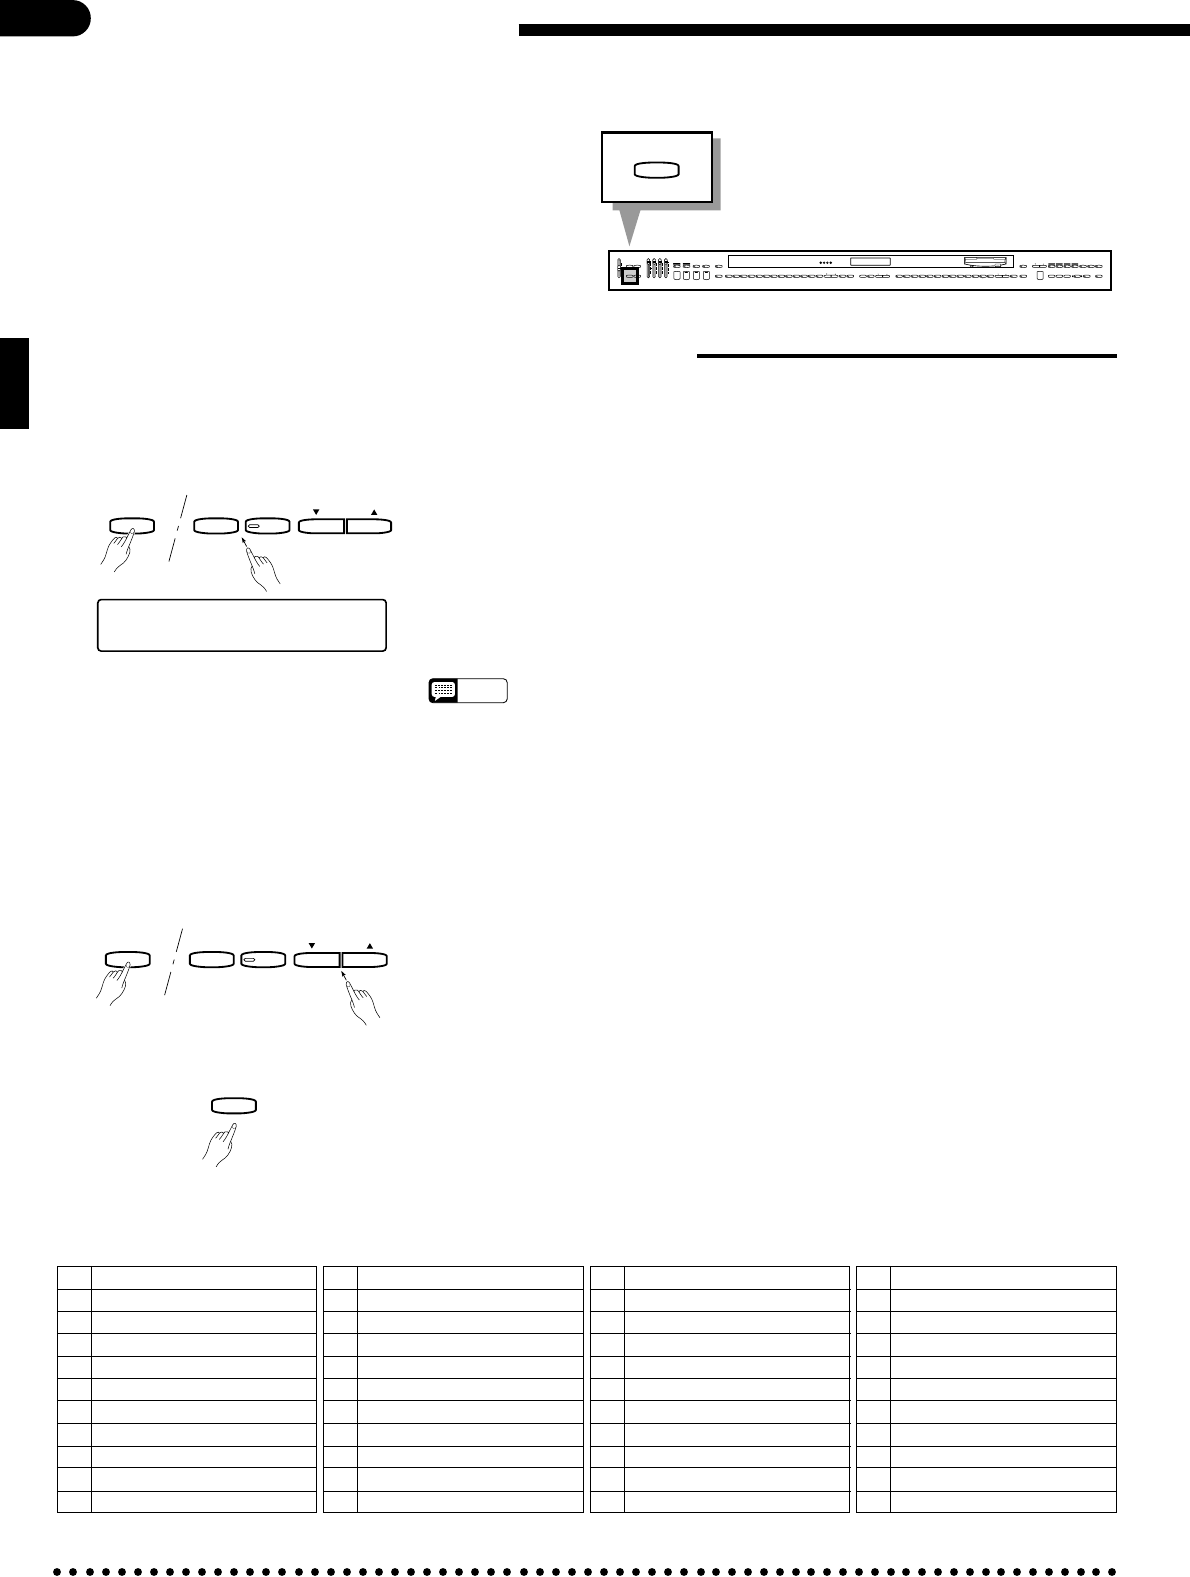
XSet as Required ......................................................................................................................................
Use the TEMPO [s] and [t] buttons while still holding the [UTILITY] but-
ton to select the required setting, or follow the procedure given below for the se-
lected function.
• You can jump directly to the first utility func-
tion in each group by pressing the corre-
sponding STYLE selector while holding the
[UTILITY] button:
[POP] m 02: Chorus ON/OFF
[16BEAT] m 05: Save Registration
[DANCE POP]
m 15: Quantize Song Data
[BOOGIE] m 21: Send Channel Select
[SLOW ROCK]
m 32:
Individual Key Tuning
⁄¤‹›‚02 CHORUS
Piano OFF
01 Transpose
02 Chorus ON/OFF
03 Soundboard Depth
04 Mic Reverb Depth
05 Save Registration
06 Load Registration
07 Save Individual Key Tuning
08 Load Individual Key Tuning
09 Save Custom Rhythm
10 Load Custom Rhythm
11 Song Copy
12 Song Delete
13 Disk Format
14
Standard MIDI File Playback Mode
15 Quantize Song Data
16 Track Mix
17 Volume Control
18 Song Name
19 Convert to DOC
20 Convert to SMF
21 Send Channel Select
22 Receive Channel Select
23 Local Control ON/OFF
24
Program Change ON/CANCEL
25 Control Change ON/CANCEL
26 The Multi-Timbre Mode
27 The Split Send Mode
28 MIDI Clock Select
29 Panel Data Send
30 MIDI Transpose Transmit
31 GM Drum Kit
32 Individual Key Tuning
33 Touch Sensitivity
34
Accompaniment Volume Mode
35 Style Tempo Switching
36 Auto Synchro Start Switching
37 Random All Song Repeat
38 Damper Pedal Mode
39 Pitch Bend Range
40 Edit Drum Instrument
41 Split Left Octave
42 Registration Tempo
43 ABC Auto Mute
44 Minor Harmonization
TEMPO
TAP
METRONOME
–
+
– / NO
+ / YES
UTILITY
TEMPO
TAP
METRONOME
–
+
– / NO
+ / YES
UTILITY
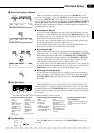
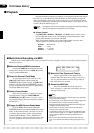
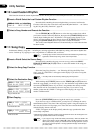
CExit ...........................................................................................................................................................
Release the [UTILITY] button to exit from the utility mode when you’ve fin-
ished making the required settings.
If you’ve used a function which is engaged by pressing the TEMPO [s]
button in response to the “NO/YES” prompt on the display (i.e. the [UTILITY]
button has already been released), press the [UTILITY] button again to exit from
the utility mode.
UTILITY
The Utility Mode Functions