


58
Utility Functions
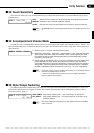
■ 27: The Split Send Mode
In the split send mode notes played on the left-hand section of the keyboard (to the left of and including the split point
key — see “Changing the Split Point” on page 10) are transmitted on MIDI channel 2, while the upper keyboard section
transmits on the MIDI channel set using the Send Channel Select function described earlier. In this mode the left- and right-
hand sections of the keyboard can be used to play separate external keyboards or tone generators set to receive on the ap-
propriate channels. The Split Send Mode is automatically turned OFF when the power is initially turned on.
ZSelect the Split Send Mode Function ...................................................................................................
Select the Split Send Mode function as described in “Selecting & Using the Utility
Functions” (page 42), or press [STRINGS] while holding [UTILITY].
⁄¤‹›‚27 MIDI SPLIT
OFF
XTurn Split Send ON or OFF ....................................................................................................................
Use the TEMPO [s] and [t] buttons or the [STRINGS] button to turn split send
ON or OFF as required.
7
STRINGS
7
STRINGS
= Split Send Mode ON.
= Split Send Mode OFF.
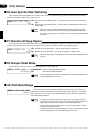
■ 29: Panel Data Send
This function causes all the current Clavinova panel settings (selected voice, etc.) to be transmitted via the MIDI OUT
connector. This is particularly useful if you will be recording performances to a MIDI sequence recorder which will be used
to control the Clavinova on playback. By transmitting the Clavinova panel settings and recording them on the MIDI se-
quence recorder prior to the actual performance data, the Clavinova will be automatically restored to the same settings when
the performance is played back.
ZSelect the Panel Data Send Function ...................................................................................................
Select the Panel Data Send function as described in “Selecting & Using the Utility
Functions” (page 42), or press [CHOIR] while holding [UTILITY] to send the data
immediately (in the latter case the next step is not required).
⁄¤‹›‚29 SEND PANEL DATA
PRESS [START]
XSend the Panel Data ...............................................................................................................................
Press the [START/STOP] button to begin transmission of the panel data.
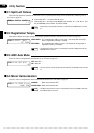
■ 28: MIDI Clock Select
This function determines whether the Clavinova’s rhythm and ABC timing is controlled by the Clavinova’s own internal
clock or an external MIDI clock signal received from external equipment connected to the MIDI IN connector. The Clock
Mode is automatically set to INTERNAL when the power is initially turned on.
ZSelect the MIDI Clock Select Function .................................................................................................
Select the MIDI Clock Select function as described in “Selecting & Using the Util-
ity Functions” (page 42), or press [ORGAN] while holding [UTILITY].
⁄¤‹›‚28 MIDI CLOCK
INTERNAL
XSet the MIDI Clock to INTERNAL or MIDI IN .........................................................................................
Use the TEMPO [s] and [t] buttons or the [ORGAN] button to set the MIDI
clock to INTERNAL or MIDI IN as required.
NOTES
• If the Clock Mode is set to MIDI IN and a MIDI clock signal is not being received from
an external source, the rhythm, ABC and other clock-dependent features will not
operate.
= MIDI IN.
= INTERNAL.
8
ORGAN
8
ORGAN