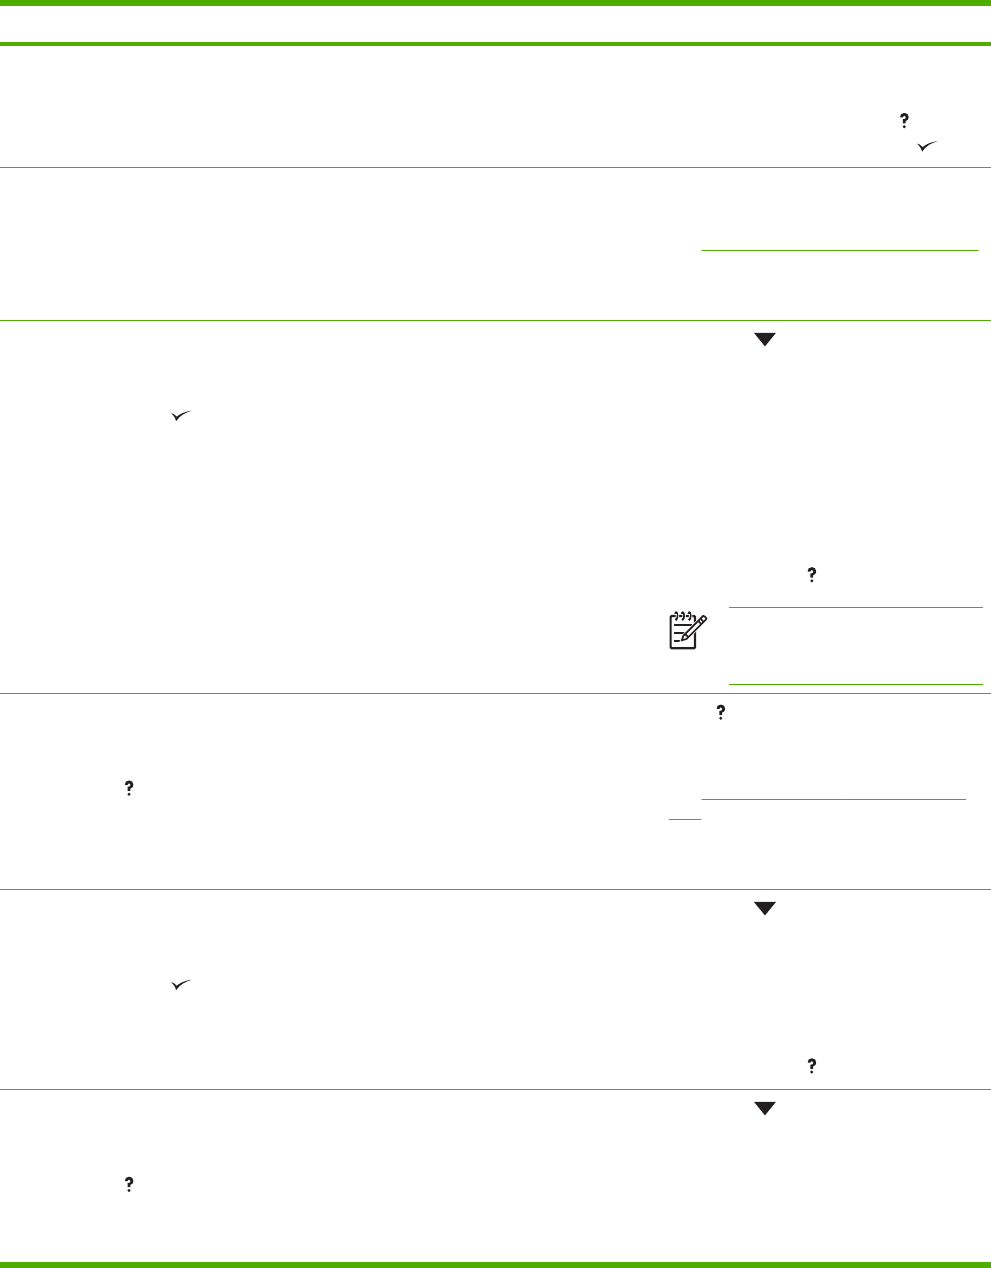
Control panel message Description Recommended action
width guides, and confirm that the
guides are in the correct position.
5.
To continue printing, press
to clear
the message, and then press
.
13.XX.YY JAM IN TRAY 2 A page is jammed in tray 2. Remove tray 2, clear the jam, and then
reinstall tray 2.
See
Clearing jams from the input-tray areas.
If the message persists after clearing all
pages, contact HP Support.
13.XX.YY JAM IN TRAY X
alternates with
Clear jam then press
A page is jammed in the tray indicated. 1.
Press
to see step-by-step
information.
2. Remove the tray indicated.
3. Confirm that the media guides and dial
are in the correct position and match
the media that is loaded in the tray.
4. Remove all media found in the printer,
and then reinstall the tray.
5.
To exit, press
.
NOTE To avoid jams with heavier
media, use tray 1 and the rear
output bin.
13.XX.YY JAM INSIDE FRONT DOOR
alternates with
For help press
A jam has occurred inside the front door.
Press for help.
or
See
Clearing jams from the print-cartridge
area.
If the message persists after clearing all
pages and exiting Help, contact HP Support.
13.XX.YY JAM INSIDE REAR DOOR
alternates with
Clear jam then press
A jam has occurred in the duplex reversing
area.
1.
Press
to see step-by-step
information.
2. Open rear door, and then remove all
media found.
3. Close the rear door.
4.
To exit, press
.
13.XX.YY JAM INSIDE REAR DOOR
alternates with
For help press
A jam has occurred in the rear door area. 1.
Press
to see step-by-step
information.
2. Open the rear door.
3. Release the four tabs in the center of
the black paper guide inside the lower
rear door.
108 Chapter 7 Problem solving ENWW
