2
3
5
25
3
3
5
2
3
5
2
1
2
3
4
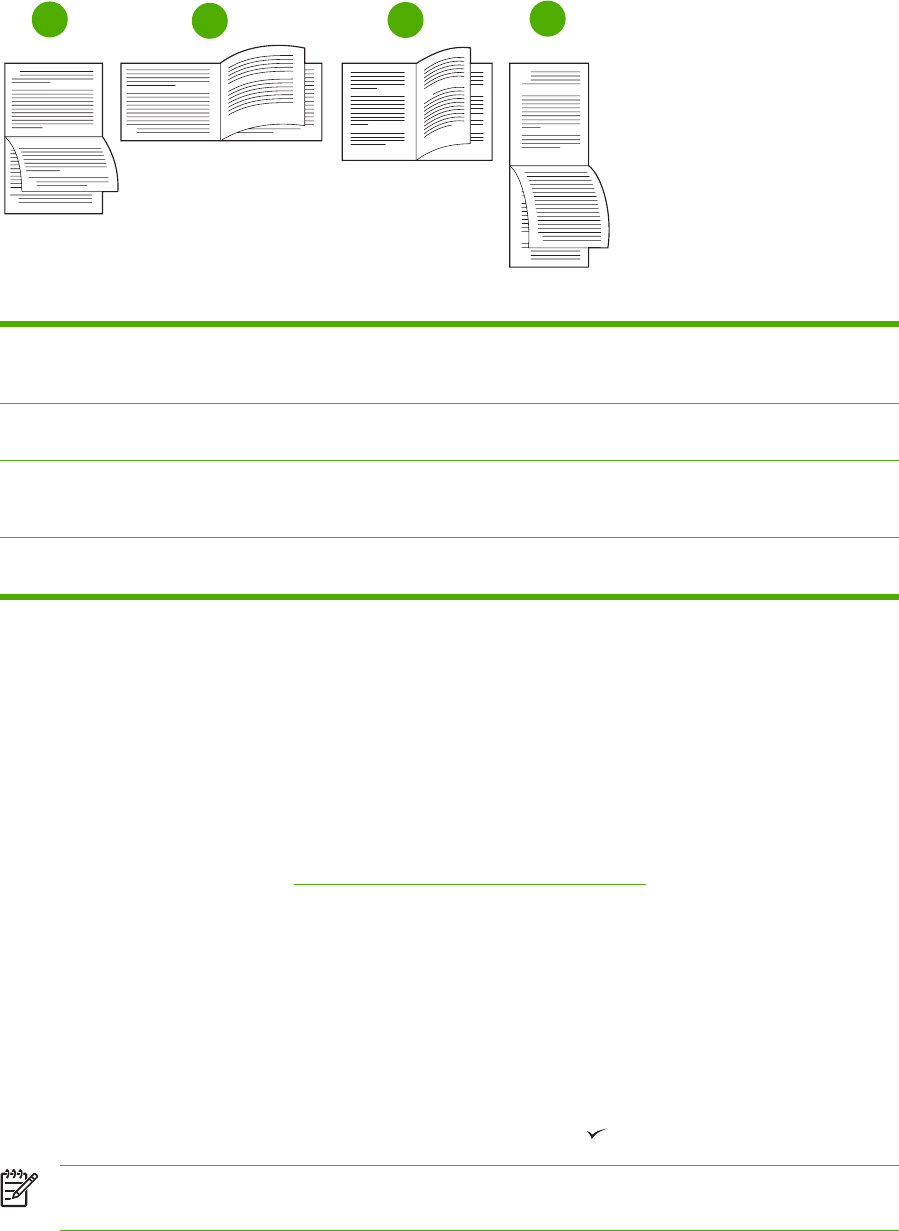
1. Long-edge landscape
1
This layout is often used in accounting, data processing, and spreadsheet
programs. Every other printed image is oriented upside-down. Facing pages are
read continuously from top to bottom.
2. Short-edge landscape Each printed image is oriented right-side-up. Facing pages are read from top to
bottom on the left page, then from top to bottom on the right page.
3. Long-edge portrait This is the default printer setting, and the most common layout used, with every
printed image oriented right-side-up. Facing pages are read from top to bottom on
the left page, then from top to bottom on the right page.
4. Short-edge portrait* This layout is often used with clipboards. Every other printed image is oriented
upside-down. Facing pages are read continuously from top to bottom.
1
When using Windows drivers, select Flip Pages Up to get the designated binding options.
To print on both sides
1. Insert enough paper into one of the trays to accommodate the print job. If you are loading
special paper such as letterhead, load it in one of the following ways:
●
For tray 1, load the letterhead paper with the front side down, bottom-edge first.
●
For tray 2, load the letterhead paper with first side up, top edge toward the back of the tray.
2. Open the printer driver (see
Gaining access to printer driver settings).
3. On the Finishing tab, select Print on Both Sides.
4. Click OK.
5. Send the print job to the printer.
6. Go to the printer. Remove any blank paper that is in tray 1. Insert the printed stack with the
blank side up, with the top-edge feeding into the printer first. You must print the second side
from tray 1.
7.
If prompted by a message at the control panel-display, press
.
NOTE If the number of total sheets exceeds the tray 1 capacity for duplex jobs, you must
repeat steps 6 and 7 each time that paper is inserted, until the duplexing job is complete.
ENWW Printing on both sides (duplexing) 71


