


Europa Firmware Update Utility
Europa Firmware Update UtilityEuropa Firmware Update Utility
Europa Firmware Update Utility
Europa User Guide
Europa User GuideEuropa User Guide
Europa User Guide
Page 54
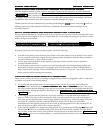
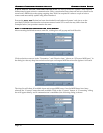
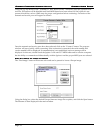
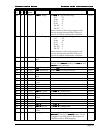
Using the pop up menus on the “Transmit to:” and “Receive from:” selections, select the Jupiter 6 from
each list. All buttons will be disabled until both MIDI buses have been selected. If the Jupiter 6 is not
present in both lists, refer to OMS setup for proper configuration before continuing. A selection of the
transmit and receive ports will appear as follows:
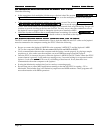
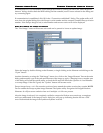
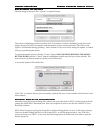
Once the transmit and receive ports have been selected, click on the “Connect” button. The progress
window will open, briefly, while connecting. If the connection is successful, the serial number and
version number will be displayed. If communication is not established, an error message will be
displayed. In this case, double check the Jupiter 6’s IN and OUT MIDI cables and be sure the computer
has the ability to communicate bidirectionally with the Jupiter 6 and the proper MIDI ports are selected.
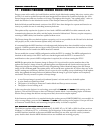
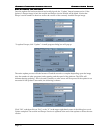
Step 2: Locate an image to update
Step 2: Locate an image to updateStep 2: Locate an image to update
Step 2: Locate an image to update
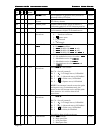
The “Find image” button will become active and can be pressed to locate a Europa image:
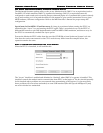
Using the dialog box, select the desired Europa firmware image file to update, and click the Open button.
The filename is then displayed in the main window.