


Using the ‘Melody Intell(igence)’ function
Backing Keyboard BK-5
r
43
Using the ‘Melody Intell(igence)’
function
The Arranger can add a counter-melody to the notes
you play with the Upper1 part (UP1). Those automatic
harmonies are based on the chords you play in the
chord recognition area.
The counter-melody is played by the MELODY INTELL
part. There are 18 harmony types to choose from.
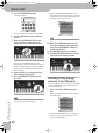
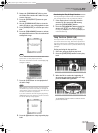
1.
Press the [MELODY INTELL] button (so that
it lights).
This adds a harmony to the notes you play.
2.
Press the [MELODY INTELL] button again (its
indicator goes dark) to switch off the
counter-melody.
NOTE
Press and hold the [MELODY INTELL] button to open the
window where you can change the “Melody Intelligence”
settings (see p. 64).
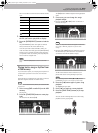
Using Split mode
In Split mode, the BK-5’s keyboard transmits notes
played to the left of the split point to the Arranger parts.
The notes to the right of the split point, however, are
played back by the real-time parts..
NOTE
In most cases, the default setting for the split point is note
number 60 (C4). You can change the split point to a different
note (see “Split Point” on p. 61).
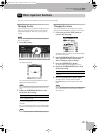
1.
Press the [SPLIT] button (its indicator
lights).
The BK-5 is now in Split mode: note numbers below
the split point (see “Split” on p. 56) are used to trans-
pose rhythm playback in real-time and to play the
LWR part (if it is active). Note numbers above the
split point can be used to play melodies using the
UP1 and/or UP2 part.
In Split mode, the “Type” parameter (see p. 62) is
automatically set to “Intelligent”.
NOTE
See page 24 for how to select the real-time parts you want
to use.
NOTE
You can activate a “Hold” function for the LWR part. See
“Lower Hold” on p. 62.
2.
Press the [SPLIT] button again.
The BK-5 leaves Split mode, the [SPLIT] indicator goes
dark and chord recognition (see “Type” on p. 62) is set
to “Pianist2”.
Setting the volume of the real-time
parts
The BK-5 provides an easy way to change the volume
balance of the Upper1, Upper2 and Lower parts.
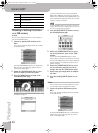
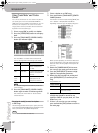
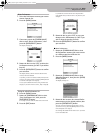
1.
Simultaneously press the [LWR] and [UP2]
buttons to call up the “Parts Volume” page.
The “Volume” value of the last part you selected (on
the main page) is already highlighted.
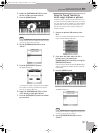
2.
Rotate the [CURSOR÷VALUE] dial to set the
desired volume for that part (0~127).
3.
Press the [UP2] button to select the “UP2
Volume” value.
Pressing it again selects the “UP1 Volume” value.
4.
Repeat step (2) above.
5.
Press the [LWR] button to select the “LWR
Volume” value.
6.
Repeat step (2) above.
BK-5_US.book Page 43 Monday, November 14, 2011 12:43 PM