45
Special Application (Punch In/Out Recording)
Locate
Locate
Stop here.
Auto Punch In point
Auto Punch Out point
The FD-4 stops at a point that precedes the Auto
Punch In point by the specified preroll time. (0~10
seconds)
Auto Punch In point
Auto Punch Out point
AUTO RTN START point
AUTO RTN END point
Rehearsal area
5. When you are satisfied with your rehearsal, press the STOP
button.
<Hint 1>
Locating a point slightly before the Auto Punch In point
To locate the playback start point for rehearsal, press the AUTO
PUNCH IN key, then press the LOCATE key.
The FD-4 displays the time (position) stored in the AUTO PUNCH
IN key, and locates the point and stops.
Press the REWIND button to go backward. If you have set the preroll
time as described on page 85, you can locate a point that precedes
the Auto Punch In point by the specified preroll value. For more
information, see “Setting a preroll time” on page 85.
<Hint 2>
Quick and easy operation for repeated rehearsal
Using the Auto Return function and the Auto Play function enables
you to rehearse repeatedly.
As shown below, set the AUTO RTN START and END points for
Auto Return and Auto Play. In this way, you can repeat rehearsal
easily, while checking the recording level and concentrating on your
performance.
Refer to page 63 for more information on setting the AUTO RTN
START/END points.
<Note>
If the FD-4 display [Over] when you turn on Auto Punch mode, the
disk does not have enough free space for Auto Punch In/Out. You
need to erase part of the Program data, then try again.
Playback starts from the AUTO RTN START point,
and you can rehearse Auto Punch In/Out.
When the AUTO RTN END point is reached, the FD-4 locates
the AUTO RTN START point.
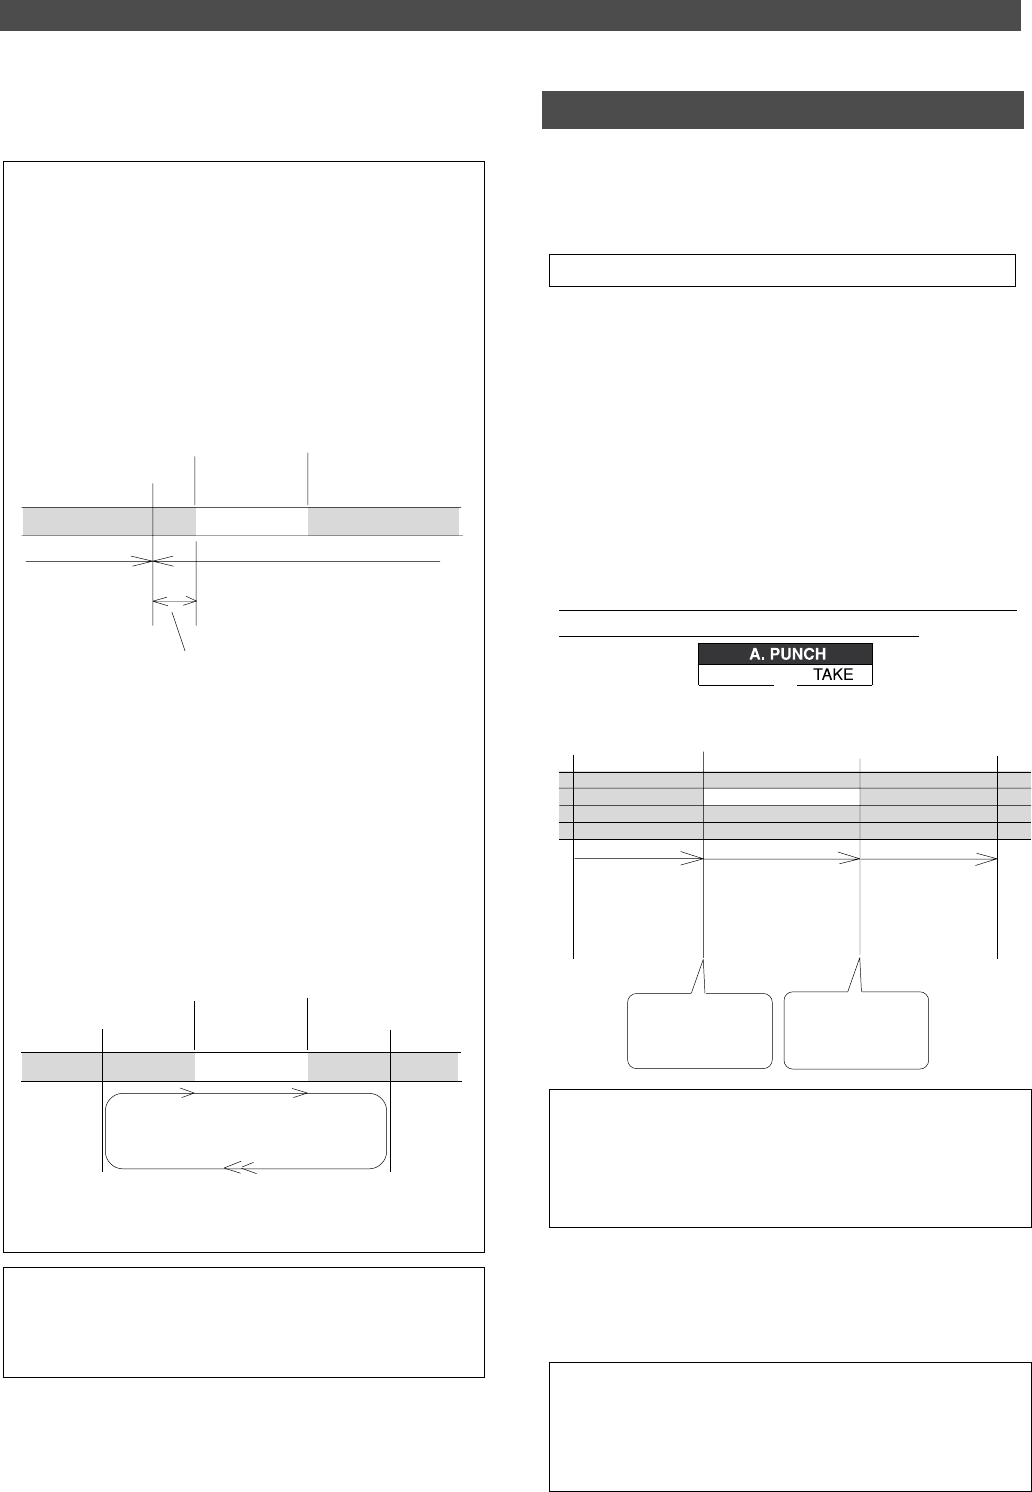
Auto Punch In/Out Take
After you are satisfied with your rehearsal, you can pro-
ceed to an actual take of Auto Punch In/Out. You can undo
or redo Auto Punch In/Out recording if you change your
mind.
• The control panel settings are the same as those for rehearsal.
1. Locate a point slightly before the Auto Punch In point.
2. Confirm that Auto Punch mode is turned on.
If it is not on, press the RECORD button while holding
down the SHIFT key.
3. Press the RECORD TRACK select key [3/L] to set track 3 to
READY.
4. Press the RECORD button while holding down the PLAY
button.
The flashing [RHSL] on the display changes to an
illuminated [TAKE], and recording starts.
The FD-4 operates as follows. To record, hold down the
PLAY button and press the RECORD button.
Track 1
Track 2
Track 3
Track 4
This part is changed.
Playback
start point
Playback
end point
Auto Punch In point
(Rehearsal in)
Auto Punch Out point
(Rehearsal out)
All tracks are in playback
monitoring mode.
Only track 3 is in input
monitoring mode, and data
will be recorded.
The Record button LED
flashes in this area.
All tracks are in playback
monitoring mode.
The FD-4 punches in
automatically at the
Punch In point.
The FD-4 punches out
automatically at the
Punch Out point.
• The LED of the REC RACK select key 3/L remains steadily lit
between the Punch In and Out points. Otherwise, it flashes.
• When the Auto Punch Out point is passed, the FD-4 cancels
Auto Punch mode automatically, and nothing appears in the
A. PUNCH display area.
5. Hold down the PLAY button and press the RECORD button.
6. When you finish recording, press the STOP button.
7. Play track 3 to check the result of the Auto Punch In/Out
operation.
<Caution after Punch Out>
At “Take” of punch out, the punch-in recording track will not immedi-
ately enter the repro monitor mode from the input monitor mode
enter the repro monitor mode about two seconds after mute play-
back. This is a functional feature of FD-4 and not a malfunction.


