Editing Tracks
59
ABS 0
Real track
AUTO PUNCH IN point
AUTO PUNCH OUT point
(REC END)
ABS 0
Real track
REC END
AUTO PUNCH IN point
AUTO PUNCH OUT point
(REC END)
ABS 0
Real track
ABS 0
Real track
REC END
REC END
1
2
3
4
1
2
3
4
1
2
3
4
1
2
3
4
DRIVE
AUTO A.PUNCH
SYNC OUT
CLK
SCSI
DRIVE
AUTO A.PUNCH
SYNC OUT
CLK
SCSI
SURE ?
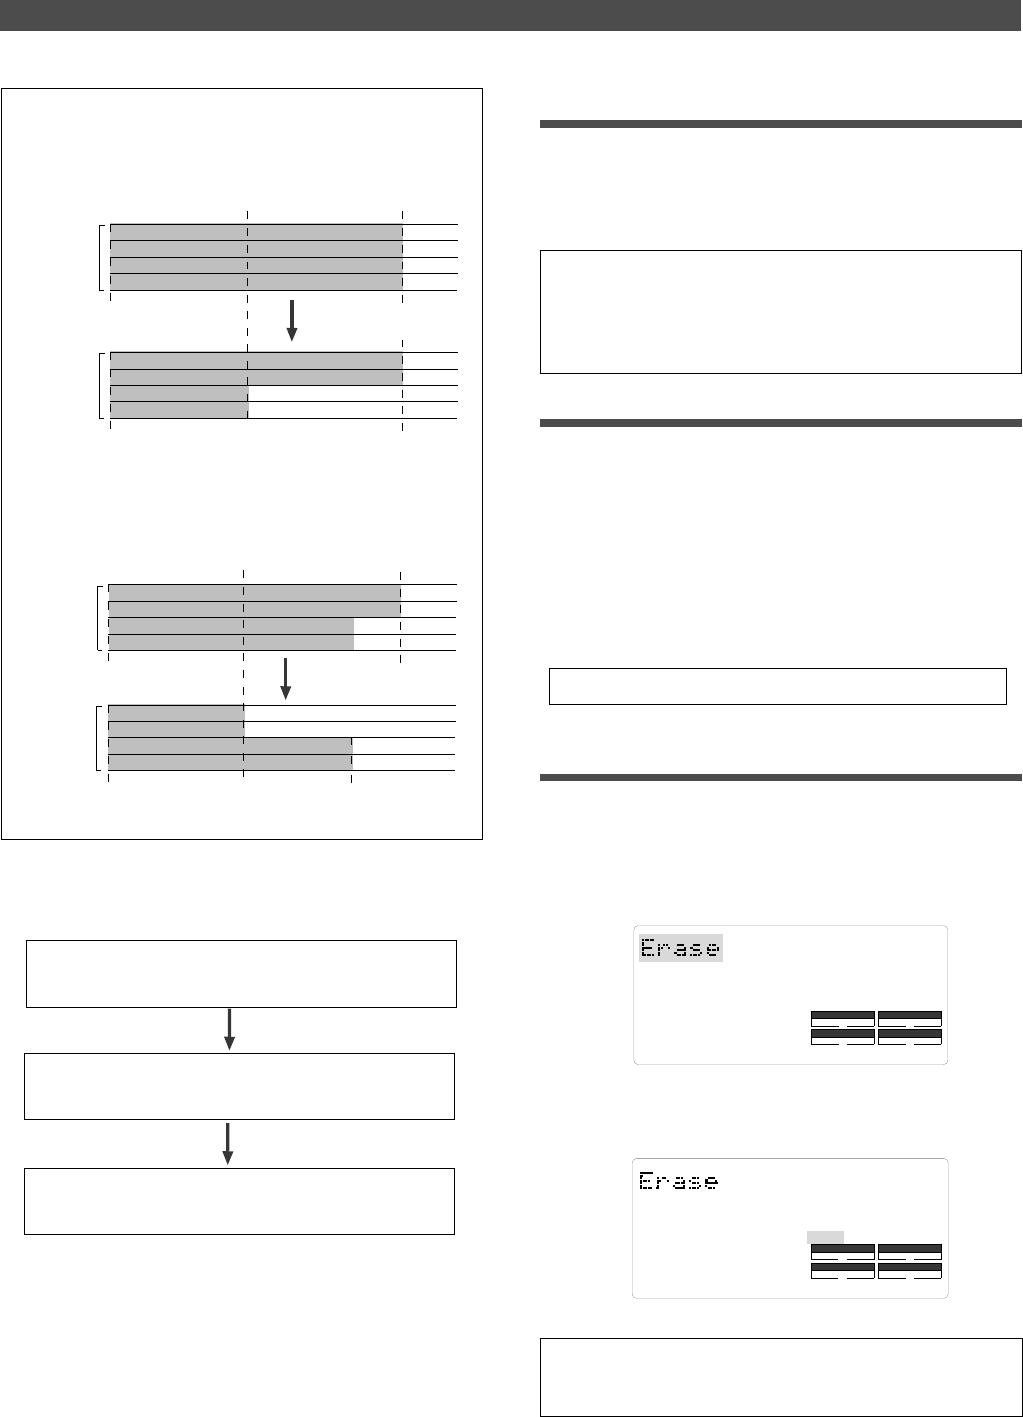
<Note>
If all Real tracks contain data as shown below, erasing data on
tracks 1 and 2 will not affect the position of REC END.
Storing the edit points
1. Refer to the “Storing and editing the locate points to the
memory keys” section for information on storing the erase
start and end points.
Store the erase start point to the CLIPBOARD IN key, and
the end point to the CLIPBOARD OUT key.
On the other hand, if all Real tracks contain data as shown below,
erasing data on tracks 3 and 4 will move up REC END to the end
point of tracks 1 and 2.
Follow the steps below to erase data:
Store the erase start point (AUTO PUNCH IN point) and
the erase end point (AUTO PUNCH OUT point).
Use the Preview function to check the stored edit points
and adjust them if necessary.
Specify a track to erase and execute the function.
• If you wish to erase the data from a specific point, store the REC
END or later point as the erase end point. Refer to the note above
for information on storing the REC END point.
• See “Storing and editing the locate points to the memory keys” on
page 63.
Checking and adjusting the edit points
After you store the edit points, you can check them on the
display by pressing the corresponding keys.
You may also adjust the points.
1. While the recorder section is stopped, press and hold down
the SHIFT key and press the memory key for which you wish
to check the edit point.
You can preview “fade-out” at the AUTO PUNCH IN point
and “fade-in” at AUTO PUNCH OUT point.
2. Trim the edit point while previewing.
• Refer to “Preview Function” on page 69 for more information.
Executing Erase
1. Press the RECORD TRACK select key of the track to erase
to set it READY.
You can select a mono track, multiple tracks, or all tracks.
2. Press the EDIT key repeatedly until [Erase] flashes on the
display.
3. Press the EXECUTE/YES key.
The flashing [Erase] message lights up steadily, and
[SURE ?] flashes.
• To cancel the erase operation, press the STOP button or the
EXIT/NO key while [SURE ?] flashes on the display.


