11
En
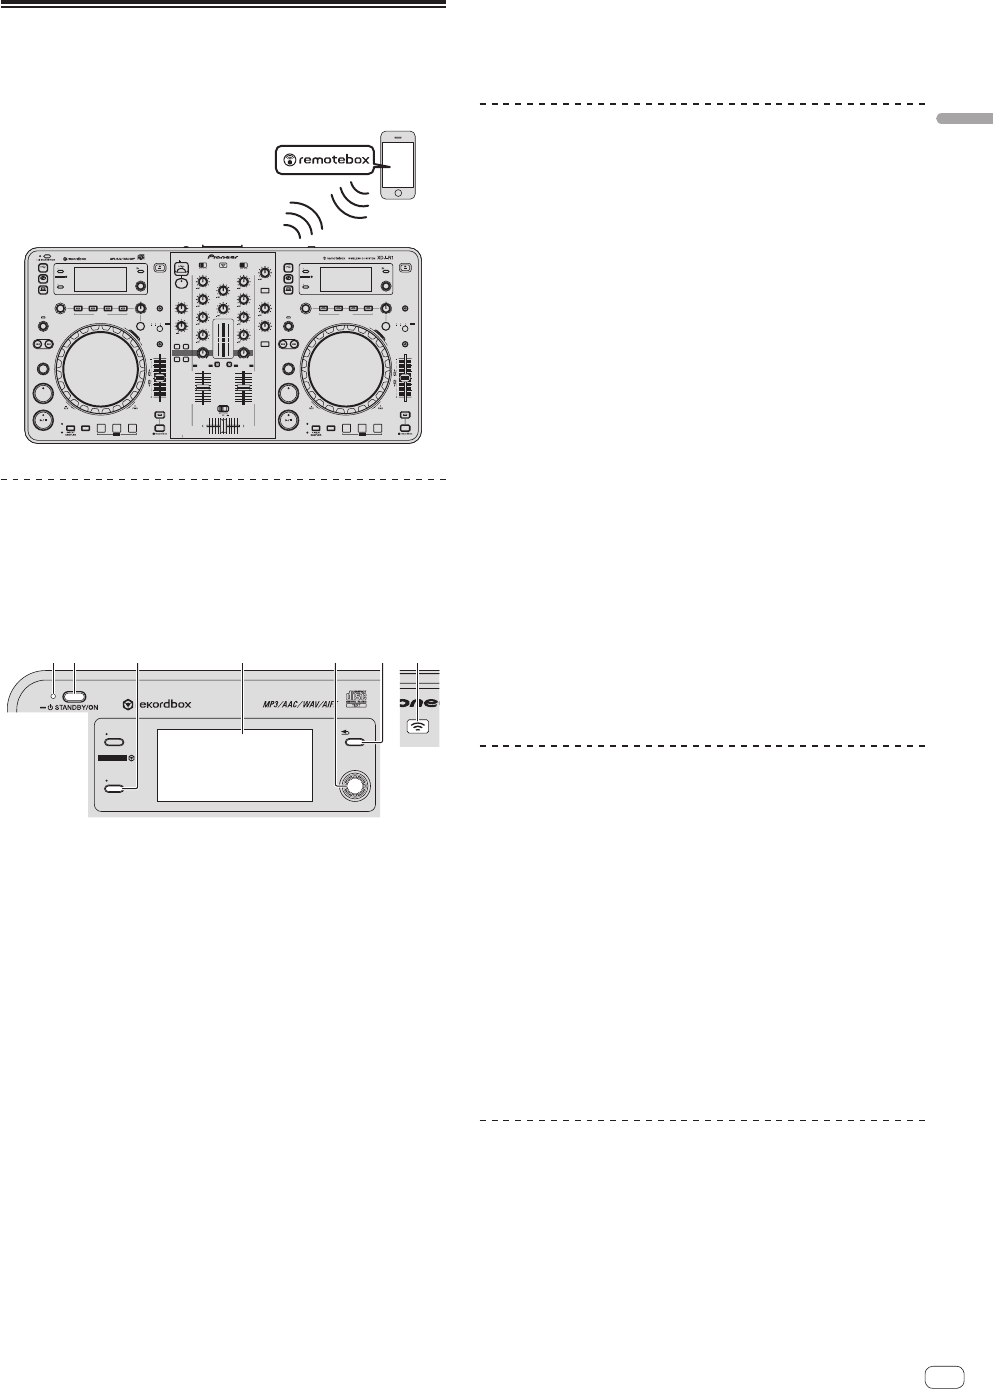
Connections
Connecting by wireless LAN
With this unit, a mobile device supporting wireless LAN connections
can be connected directly without using router, etc., to hold DJ perfor-
mances using the mobile device application (remotebox).
This unit does not support wireless LAN connection via a router.
USB
CD
MIDI
AUTO
BEAT LOOP
TRACK SEARCH
PLAY/PAUSEPLAY/PAUSE
HOT CUE
BEAT LEVEL/DEPTH
CUE
TIME
−
AUTO CUE
−
UTILITY
INFO
QUANTIZE
BACK
−
TOP
MODE
ABC
−
AUTO
TAP
VINYL MODE
MASTER
TEMPO
TEMPO
0
TEMPO
WIDE
6 / 10 / 16 /
S
E
A
R
C
H
WLAN
CUE MASTER
HEADPHONES
MIXING
EQ
LOWHI
COLOR
LOWHI
BOOTH MONITOR
0
NOISEPITCH
CRUSHFILTER
SOUND COLOR FX
LOW
+9
10
9
8
7
6
5
4
3
2
1
0
10
9
8
7
6
5
4
3
2
1
0
DECK1
PHONO1/LINE1
THRU
COLOR
LOWHI
HI
+9
DECK2
PHONO2/LINE2
AUX
LEVEL
0
MIC
LEV
EL
0
CH1 CH2
CROSS F.CURVE
AUX
ON/OFF
MIC
ON/OFF
USB
CD
MIDI
AUTO
BEAT LOOP
TRACK SEARCH
HOT CUE
BEAT
SELECT PUSH
CUE
TIME
−
AUTO CUE
−
UTILITY
INFO
QUANTIZE
BACK
−
TOP
MODE
ABC
MINMAX
LEVEL/DEPTH
−
AUTO
TAP
VINYL MODE
MASTER
TEMPO
TEMPO
0
TEMPO
WIDE
6 / 10 / 16 /
DISC
DISC
DELETE
S
E
A
R
C
H
SELECT PUSH
MINMAX
PHONES
BEAT FX
TRANS ECHO ROLLFLANGER
CH1 CH2
SYNC
MASTER
SYNC
MASTER
CH1 CH2MASTER
BEAT FX
TRANS ECHO ROLLFLANGER
SHIFTSHIFT
LEVEL
0
TRIM
+9
HI
+9
MID
+9
LOW
+9
MID
+9
TRIM
+9
MASTER
LEVEL
0
−
USB
STOP
5V 500m
A
DELETE
CALL CALL
Setting the wireless LAN function’s
operation mode
Set the wireless LAN function’s operation mode before connecting this
unit by wireless LAN.
The buttons and controls below are used for making the wireless LAN
function’s operation mode settings and wireless LAN connection
settings.
USB
CD
MIDI
SELECT PUSH
TIME
−
AUTO CUE
−
UTILITY
INFO
QUANTIZE
BACK
−
TOP
WLAN
32 5 741 6
1 STANDBY/ON indicator
2 STANDBY/ON button
3 INFO(UTILITY) button
4 Main unit display
5 Rotary selector (SELECT PUSH)
6 BACK(TOP) button
7 WLAN indicator
1 Press the [STANDBY/ON] button.
Turn on the power of this unit.
The [STANDBY/ON] indicator lights green.
2 Press the [INFO(UTILITY)] button for over 1 second.
The [UTILITY] screen is displayed.
3 Turn the rotary selector, select [WLAN SETTING], then
press the rotary selector.
See page 25 for the list of [WLAN SETTING] items.
4 Turn the rotary selector, select [MODE], then press
the rotary selector.
5 Turn the rotary selector, select the mode you want to
set, then press the rotary selector.
— [ENABLE]: Activates the wireless LAN function.
— [DISABLE]: Turns the wireless LAN function off.
6 When [APPLY CHANGES?] appears on the main unit
display, turn the rotary selector to select [YES], then
press the rotary selector.
After this, make the settings for connection in the ENABLE mode.
Making the wireless LAN connection
settings in the ENABLE mode
1 Press the [INFO(UTILITY)] button for over 1 second.
2 Turn the rotary selector, select [WLAN INFO], then
press the rotary selector.
3 Turn the rotary selector, select [SSID], then press the
rotary selector.
Make a note of the [SSID] for future reference.
! The first 9 characters of the [SSID] are displayed. Turn the rotary
selector to display the portion that is not initially displayed.
4 Press the [BACK(TOP)] button.
Press to return to the previous screen.
5 Turn the rotary selector, select [PASSWORD], then
press the rotary selector.
Make a note of the [PASSWORD] for future reference.
6 From the wireless LAN connection settings on the
mobile device or computer, display the connectable
[SSID]s.
! See your device’s operating instructions for instructions on search-
ing for or displaying connectable [SSID]s.
7 On the mobile device or computer, select the [SSID]
checked in step 3.
8 Input the password you made a note of in step 5.
! For safety, be sure to change the default password. We recommend
changing the password periodically.
Checking the current wireless LAN
settings
1 Press the [INFO(UTILITY)] button for over 1 second.
The [UTILITY] screen is displayed.
2 Turn the rotary selector, select [WLAN INFO], then
press the rotary selector.
See page 24 for the list of [WLAN INFO] items.
3 Select the item you want to check, then press the
rotary selector.
The settings are displayed.
! When the [BACK(TOP)] button is pressed, the screen returns to the
[WLAN INFO] screen.
4 Press the [INFO(UTILITY)] button.
The [UTILITY] screen closes.
Changing the SSID and password
1 Press the [INFO(UTILITY)] button for over 1 second.
The [UTILITY] screen is displayed.
2 Turn the rotary selector, select [WLAN SETTING], then
press the rotary selector.
3 Turn the rotary selector, select [NETWORK SETTING],
then press the rotary selector.


