Switching Registrations
42
Switching Registration Sets
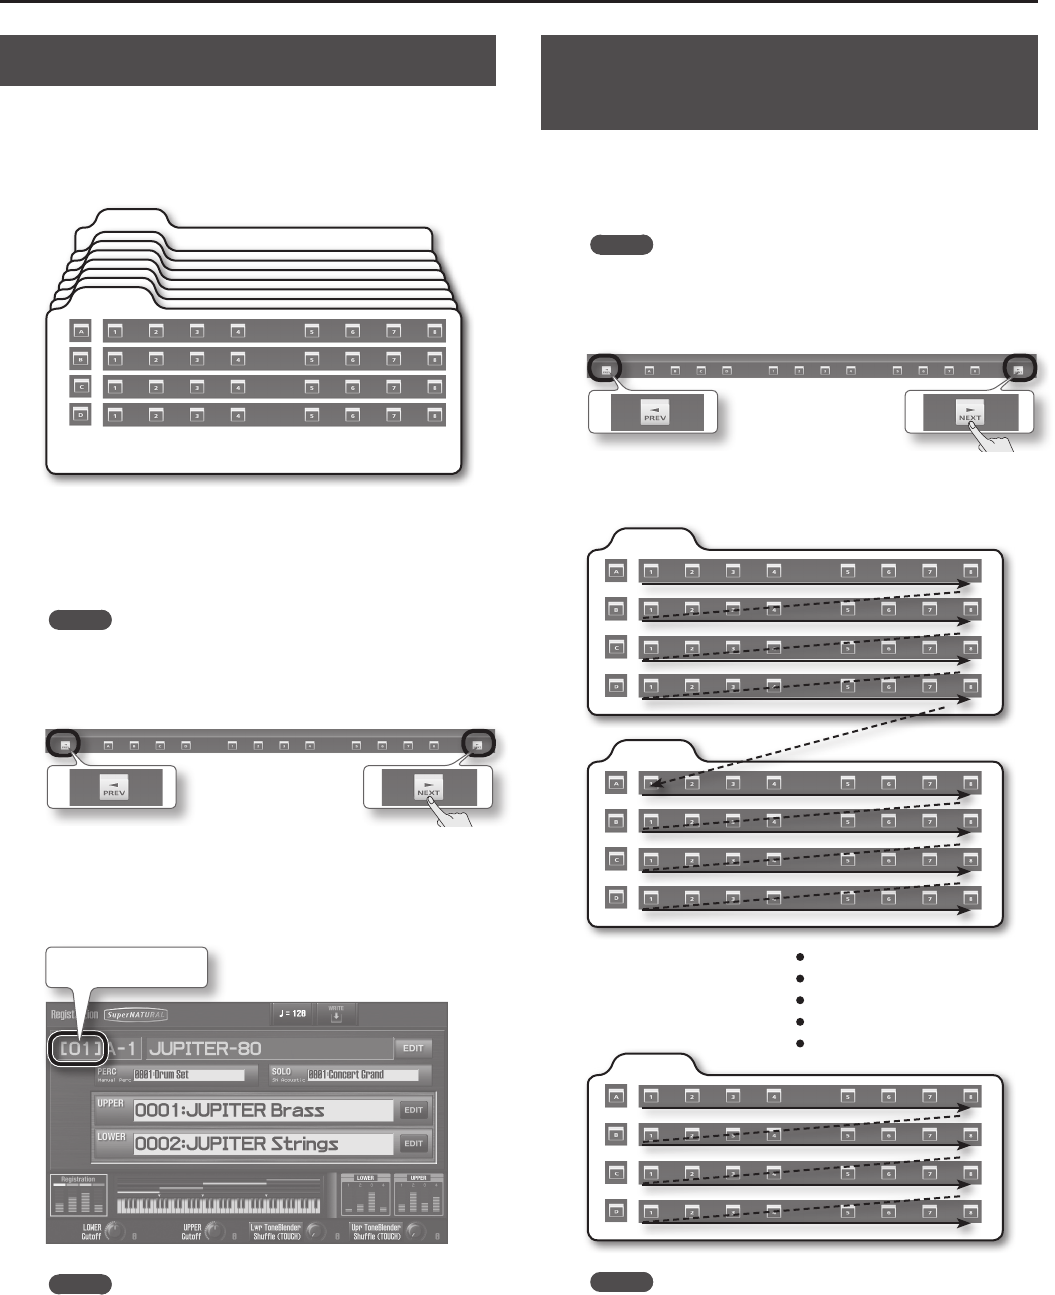
A Registration Set contains 4 banks (A–D). You can create 8
Registration Sets, meaning that 8 Registrations x 4 banks x 8 sets =
256 Registrations are available.
Here’s how to switch the Registration Set so that you can select
other banks.
Registration (1–8)
Set 1
Set 8
Bank
(A–D)
You can use the [NEXT] button and [PREV] button to switch
Registration Sets.
1. Set the system parameter “Registration Next/Prev Button”
(p. 86) to “REGISTRATION SET.”
MEMO
With the factory settings, Registration Next/Prev Button is set to
“REGISTRATION SET.”
2. Press the [NEXT] button or [PREV] button.
Pressing the [NEXT] button switches to the next Registration Set;
pressing the [PREV] button switches to the previous Registration
Set.
The display indicates the Registration Set that’s selected.
Registration Set
MEMO
• If “Registration Next/Prev Button” (p. 86) is set to “REGISTRATION,”
you can also switch Registration Sets by holding down the
[SHIFT] button and pressing the [PREV] button or [NEXT] button.
• You can use the “Registration Exchange” function (p. 82) to swap
entire sets of Registrations.
Switching Registrations
Consecutively
Here’s how to switch Registrations consecutively.
1. Set the system parameter“Registration Next/Prev Button”
(p. 86) to “REGISTRATION.”
MEMO
If you decide not to switch banks, press the [EXIT] button or the
bank button that’s blinking.
2. Press the [NEXT] button or [PREV] button.
Pressing the [NEXT] button steps you through the Registrations in
the following order.
Set 1
Set 2
Set 8
MEMO
Pressing the [PREV] button steps you through the Registrations
in the opposite order.


