83
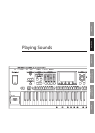
Introduction Playing Sounds Editing Sounds
Other Convenient
Functions
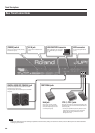
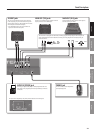
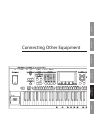
Connecting Other
Equipment
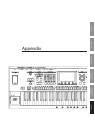
Appendix
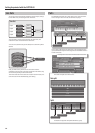
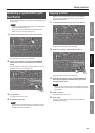
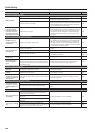
The JUPITER-80’s System Settings
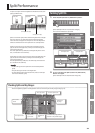
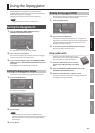
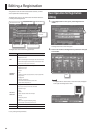
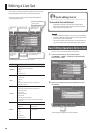
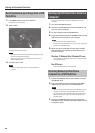
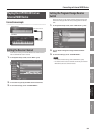
Making System Settings
These settings apply to the entire JUPITER-80; for example, here you
can set the tuning and specify how MIDI messages will be received.
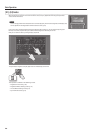
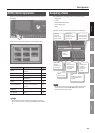
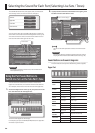
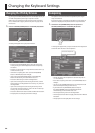
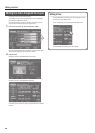
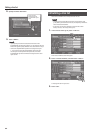
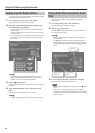
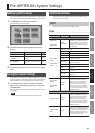
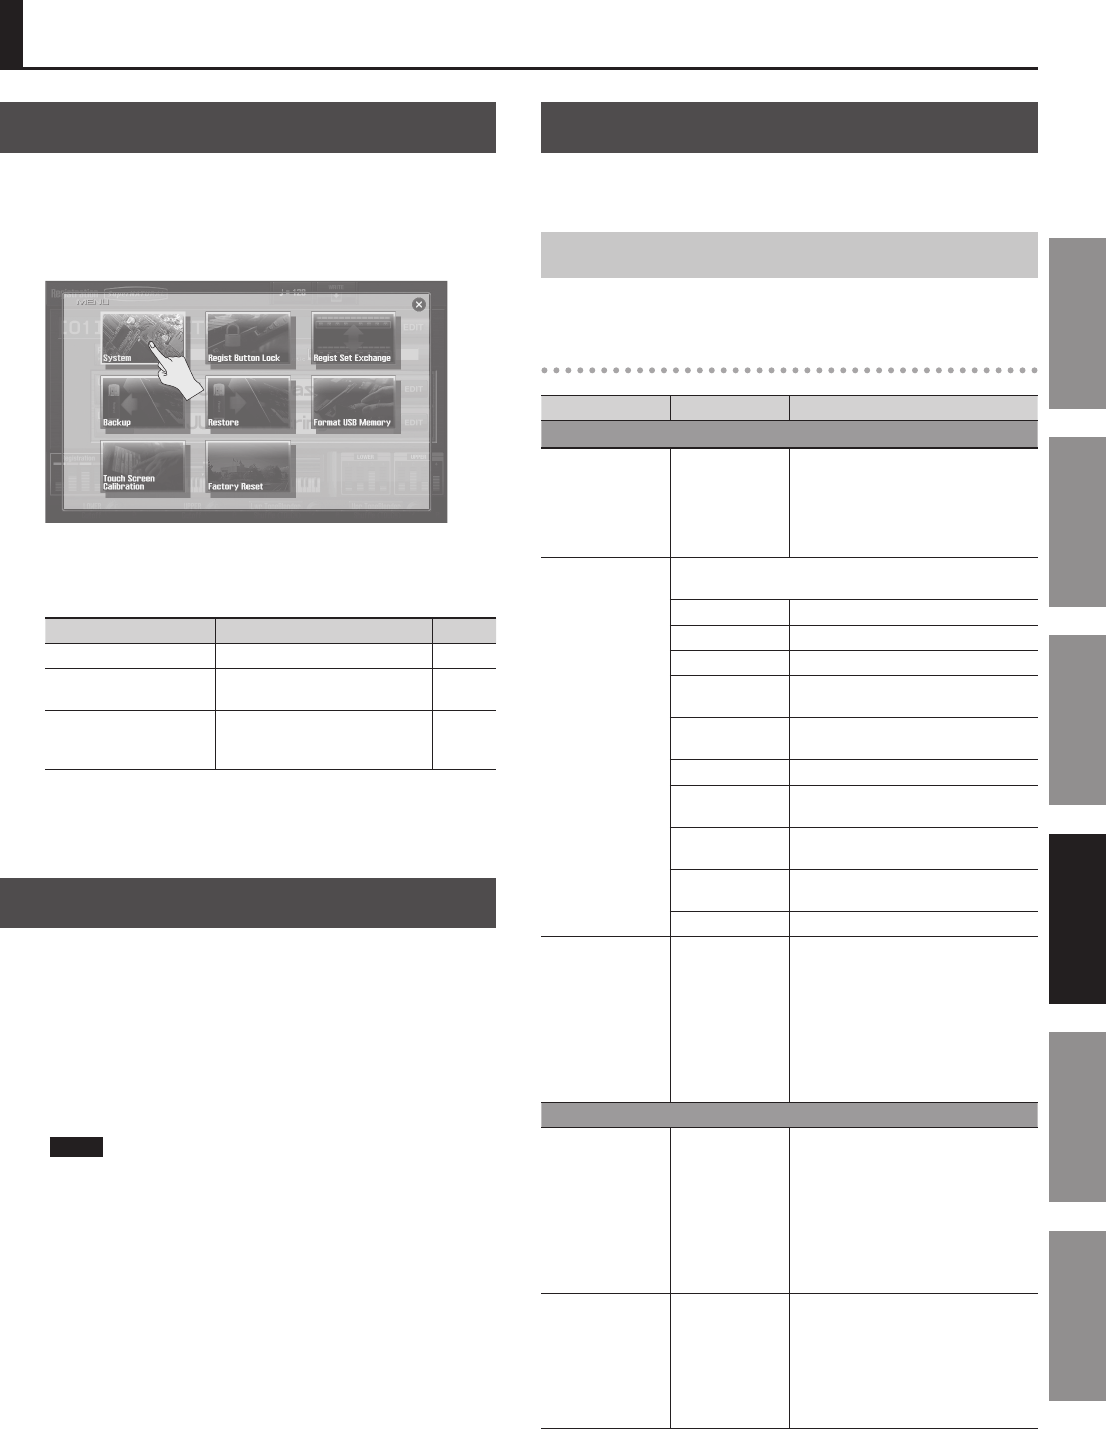
1. In the MENU screen (p. 34), touch <System>.
The System Setup screen will appear.
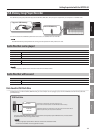
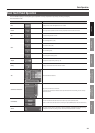
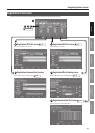
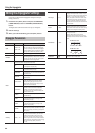
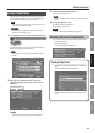
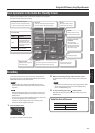
2. Touch the tab that contains the settings you want to
change.
Item Explanation Page
<SETUP> Overall settings p. 83
<LIVE SET/TONE
BUTTONS>
Sound settings for the Part sound
buttons
p. 87
<INFORMATION>
View the software version and
the USB ash drive’s available free
space
p. 87
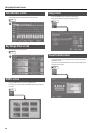
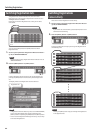
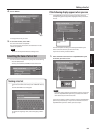
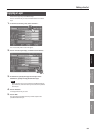
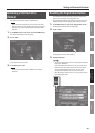
3. Touch the parameter that you want to set, and change its
value.
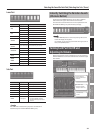
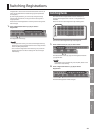
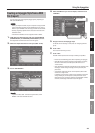
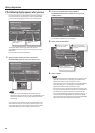
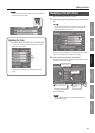
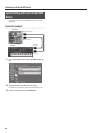
Saving the System Settings
System settings will return to their original values when you turn o
the power. If you want the settings you’ve made to be remembered
after the power is turned o, you must save the system settings.
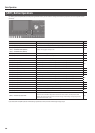
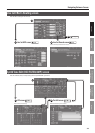
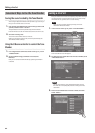
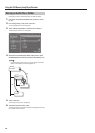
1. In the System Setup screen, the System Live Set/Tone
Buttons screen, or the System Information screen, touch
<SYSTEM WRITE>.
A message will indicate “System Write Completed!” and the settings
will be saved.
NOTE
Never turn o the power while settings are being saved.
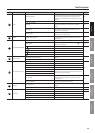
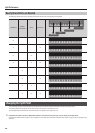
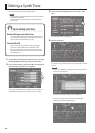
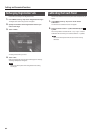
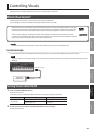
System Parameters
This section explains what each system parameter does, and how
the parameters are organized.
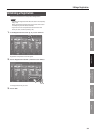
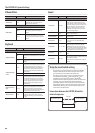
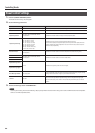
SETUP
These settings apply to the JUPITER-80 as a whole.
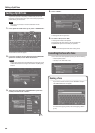
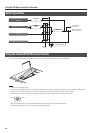
Pedal
Parameter Value Explanation
Control Pedal
Control Pedal 1
Assign Source
Control Pedal 2
Assign Source
SYSTEM,
REGISTRATION
Species whether the functions
controlled by the pedals connected to
the FOOT PEDAL CTRL 1 and 2 jacks will
be determined by the system settings
(SYSTEM) or by the Registration Settings
(REGISTRATION).
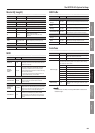
Control Pedal 1
Assign
Control Pedal 2
Assign
Functions controlled by the pedals connected to the FOOT
PEDAL CTRL 1 and 2 jacks
OFF No function is assigned.
CC01–31, CC33–95 Controller number 1–31, 33–95
AFTERTOUCH Aftertouch
BEND UP
The same eect as moving the pitch
bend lever to the right.
BEND DOWN
The same eect as moving the pitch
bend lever to the left.
REGISTRATION UP Select the next-numbered Registration.
REGISTRATION
DOWN
Select the previous-numbered
Registration.
PANEL INC
The same eect as pressing the panel
[INC] button.
PANEL DEC
The same eect as pressing the panel
[DEC] button.
START/STOP Start/stop the USB memory song player.
Control Pedal 1
Polarity
Control Pedal 2
Polarity
STANDARD,
REVERSE
Selects the polarity of the pedals
connected to the CTRL 1 and 2 jacks.
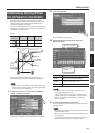
Depending on the model of pedal, the
result of depressing or releasing the
pedal might be the opposite of what
you expect. If so, choose the “REVERSE”
setting. If you’re using a Roland pedal
(that has no polarity switch), choose the
“STANDARD” setting.
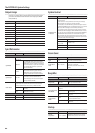
Hold Pedal
Hold Pedal Polarity
STANDARD,
REVERSE
Selects the polarity of the pedal con-
nected to the FOOT PEDAL HOLD jack.
Depending on the model of pedal, the
result of depressing or releasing the
pedal might be the opposite of what
you expect. If so, choose the “REVERSE”
setting. If you’re using a Roland pedal
(that has no polarity switch), choose the
“STANDARD” setting.
Continuous Hold
Pedal
OFF, ON
If this is ON, the HOLD jack will support
half-pedaling. If half-pedaling is enabled,
you can connect a damper pedal (such
as the DP-10; available separately) and
use the pedal to control subtle nuances
of the piano sounds you play.