TASCAM DP-03 49
Editing on a conventional tape recorder in the past
required advanced techniques, but with this unit editing
tracks is easy and accurate. Moreover, with a tape
recorder, an editing error could not be undone, but this
unit uses nondestructive editing, allowing you to edit
without altering the original data. This means that the
undo function can be used to correct an edit easily (see
“Undoing the last operation (single undo)” on page 41).
Overview of track editing
This unit has the following track editing functions.
COPY/PASTE (copy and paste)
•
COPY/INSERT (copy and insert)
•
MOVE/PASTE (move and paste)
•
MOVE/INSERT (move and insert)
•
OPEN (insert a silent section)
•
CUT (remove part of a track)
•
SILENCE (erase part of a track)
•
CLONE TRACK (duplicate a track)
•
CLEAN OUT (erase a track)
•
Editing points
Among the track editing functions, COPY/PASTE, COPY/
INSERT, MOVE/PASTE and MOVE/INSERT use the IN and
OUT points as editing points. They also use the current
position when the editing operation is begun as the TO
point. SILENCE, CUT, and OPEN use the IN and OUT points.
These IN and OUT points are the same IN and OUT points
used during repeat playback. See “Using IN, OUT and TO
points” (on page 46) for instructions about how to do this.
IN point
The IN point is the starting point for the part of the track
subject to track editing.
The IN point is set at the time when you begin pressing
the IN [SET IN] button.
OUT point
The OUT point is the ending point for the part of the track
subject to track editing.
The OUT point is set at the time when you begin pressing
the OUT [SET OUT] button.
TO point
The TO point is used as the PASTE destination point for
COPY and MOVE operations.
The TO point is set at the time when you begin pressing
the TO [SET TO] button.
The IN, OUT and TO points can also be changed on various
editing screens.
Basic editing procedures
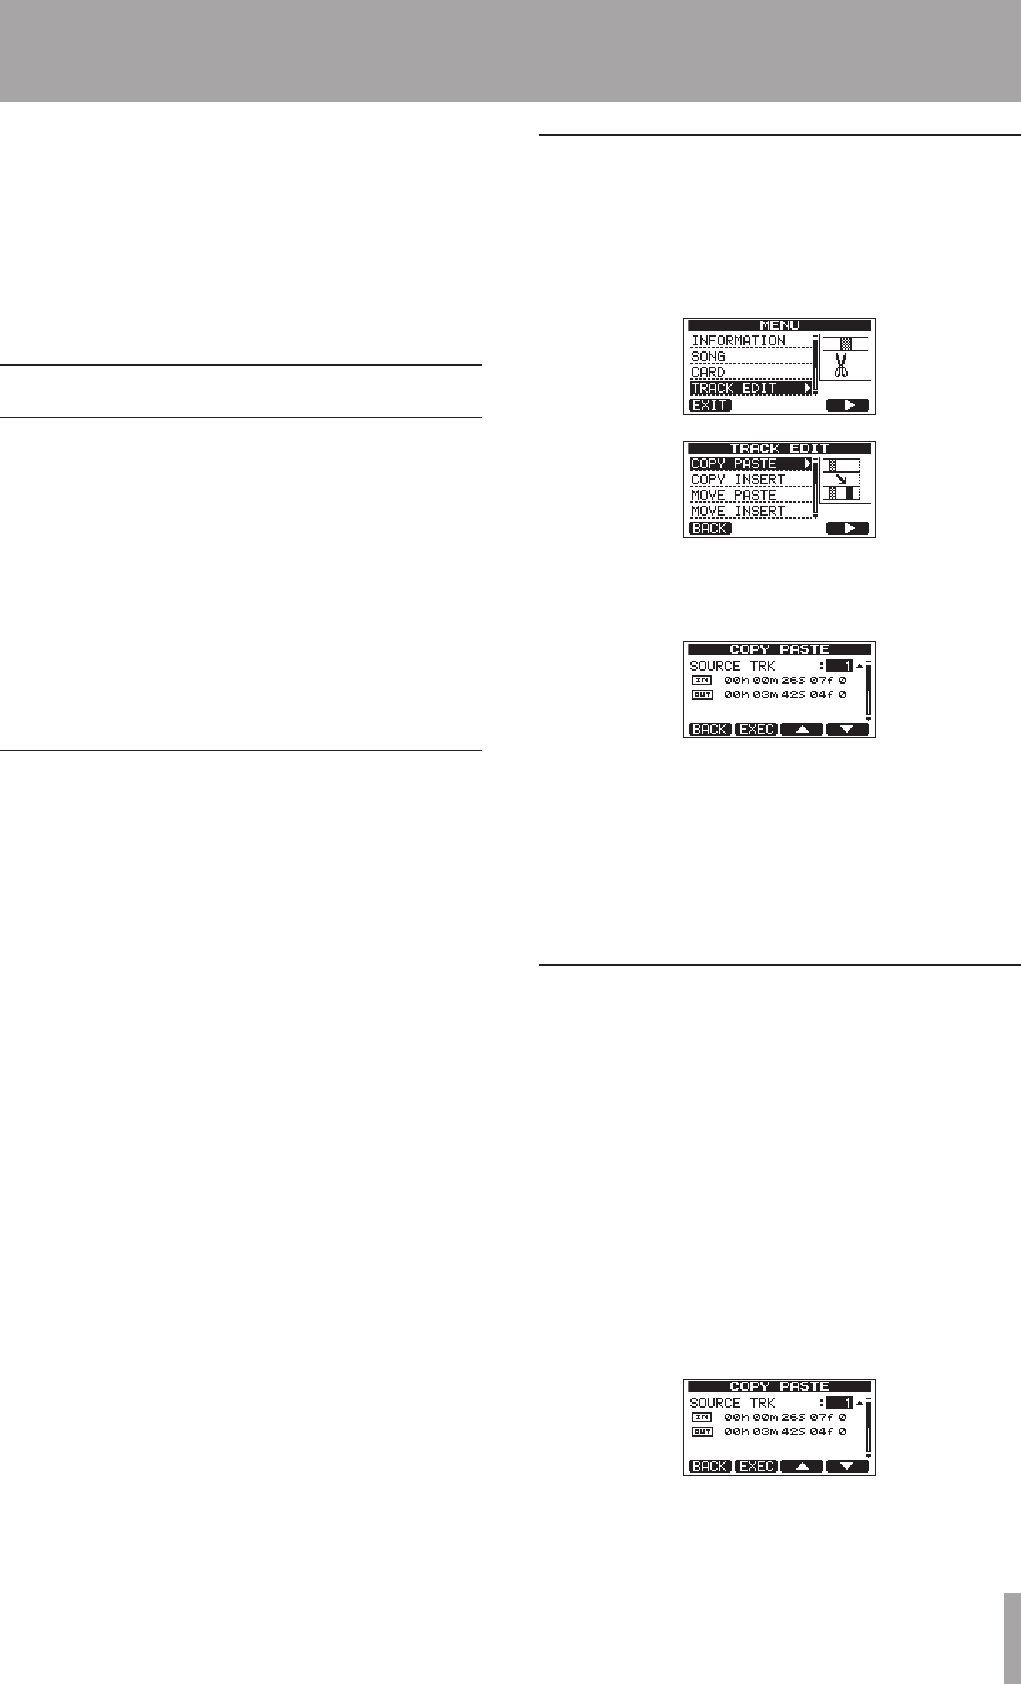
1 When the recorder is stopped and the Home Screen
is open, press the MENU button to open the
MENU
screen.
2 Use the DATA wheel to select the
TRACK EDIT
menu, and press the F4 (¥) button to open it.
3 Use the DATA wheel to select the desired track
editing function, and press the F4 (¥) button to
open that function’s screen.
4 Select the setting item value. If there are multiple
setting items, use the F3 (§) and F4 (¶) buttons
to select one. Turn the DATA wheel to set an item’s
value.
5 Press the F2 (
EXEC
) button to execute the function.
Press the F1 (
BACK
) button to return to the
TRACK
EDIT
menu screen without executing the function.
Explanation of items
SOURCE TRK
•
OPEN TRK
•
CUT TRK
•
SILENCE TRK
•
CLEAN OUT TRK
•
This is the track to be edited. The choices available
depend on the editing function.
1
•
to
8
: single tracks
1
•
/
2
,
3
/
4
,
5
/
6
,
7
/
8
: track pairs
1
•
-
8
: all tracks
MST
•
: stereo master track
ALL
•
: all tracks or the stereo master track
SOURCE TRK screen
8 – Editing Tracks


