


Section 6 – Basic operations
6-2 – 1.00 – 06/97
However, we do not recommend interrupting the
formatting process, but suggest that you let the
tape run to the end.
If you interrupt the formatting (or the formatting
is interrupted by a power cut or events beyond
your control), rewind the tape and start the format
from the beginning of the tape again.
6.1.2 Recording while formatting
If you have armed any tracks (you have pressed its
REC FUNCTION
switch [28] and the indicator is
flashing), any audio signal routed to that track will
be recorded while formatting is in progress.
6.2 Recording the first tracks
There are a number of different ways of recording
the first tracks. However, all follow the same basic
principles.
6.3 Preparing to record
1) If you have not already loaded a formatted
blank tape, do so now.
2) Make sure that varispeed is turned off (check
the
VARI SPEED
indicator [2] and see 8.5.2,
“Resetting the speed to standard” if necessary).
3) If you are recording from a digital source, press
the
DIGITAL IN
switch [15]. The indicator will
light.
4) Select the input which will be routed to each
track on which you will be recording.
This may involve the use of an external patch bay
(analog), but the DA-98 also incorporates a “vir-
tual patch bay” which can be used for signal rout-
ing; both digital and analog. This is accessed
through the Track Copy function (see 8.11.1,
“Track Copy (channel-to-track routing)”).
With a digital recorder such as the DA-98, track
crosstalk is almost negligible (better than 90dB at
1kHz). For this reason, you do not have to worry
so much about the constraints of choosing physical
track locations as you do with analog recordings.
If you need to copy a track to another track later in
the recording process, remember that track copy-
ing in the digital domain will add no noise or dis-
tortion. A digital copy is a “clone” of the original,
and no loss of quality is incurred.
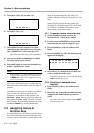
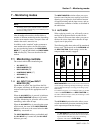
6.3.1 Write-protecting cassettes
If you attempt to record on a cassette where the
write-protect tab has been closed, an error mes-
sage will appear on the screen as you press the
RECORD
key. Recording is, of course, not possi-
ble on a write-protected cassette.
Hi8 cassette write tabs work in the opposite man-
ner to DAT cassettes, and “closed” means “write-
protect”.
If the tape is write-protected, the
REC INHI
indica-
tor to the left of the tape counter will be lit. Eject
the tape, open the write-protect tab, replace the
cassette, and try again.
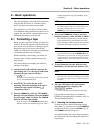
6.3.2 Recording the basic tracks (i)
1) Arm the tracks on which you wish to record.
Press the
REC FUNCTION
key of these tracks; the
indicator will start flashing.
NOTES
• If you have recorded and formatted part of a tape, and
you wish to continue formatting and recording on the
rest of the tape (“assembly”), you should rewind to a
pre-formatted, blank section of the tape and resume for-
matting and recording from there.
• Recording and formatting will continue at the sampling
frequency used on the first part of the tape.
• Avoid re-starting recording and formatting from an
unformatted section of the tape.
NOTES
• When using a newly-formatted tape, we suggest that
you record a blank “leader” about 30 seconds long,
starting from the beginning of the tape, to avoid dropout.
Leave a similar recorded blank “trailer” at the end of the
recording. You can use the Rec Mute function as a con-
venient way of recording silence (see 8.12, “REC
MUTE (recording silence)”).
• If the tape counter shows a negative value, you cannot
record on the tape at that position.
NOTE
Sony Hi8 cassettes (and those from some other manu-
facturers) have the words “SAVE” (write-protected) and
“REC” (write-enabled) molded into the cassette shell by
the protection tab.