


Section 10 – Operations related to timecode
06/97 – 1.00 – 10-9
together, keeping a strict relationship between the
audio and timecode tracks.
In all other cases, we suggest using either the DA-
98’s internal generator or timecode from tape. If
you use these as sources, there will be no jitter
problems, and any problems of synchronization
with the digital audio clock are eliminated.
When recording timecode from a timecode
generator, make sure that there is a common
video reference for both the DA-98 and the gener-
ator (set the
CLOCK
of the DA-98 to
VIDEO
).
When recording timecode from another DTRS
unit, synchronize the two units using ABS chase
(setting the timecode/audio source unit to be a
slave unit as described in 9.2.3, “Master/slave set-
tings (CHASE mode)”). After the two units have
been synchronized in this way, timecode and
audio can be transferred together.
When recording timecode from a digital source
(audio or video), make sure that the DA-98 and
the other unit are locked to a common word (audio
recorder) or video (video recorder) clock refer-
ence. After the two machines have been synchro-
nized in this way, timecode and audio can be
transferred together.
When recording timecode from an analog
recorder, feed the analog recorder or its external
synchronizer and the DA-98 with a common video
source, and use the video resolve function of the
analog recorder or synchronizer, if this is
provided.
If the analog recorder has no video resolve func-
tion, it may have a timecode chase function, which
can be driven by any timecode source from the
following list:
• timecode already recorded on an audio track of
the DA-98
• timecode recorded on other DTRS units, using
ABS chase with the DA-98
• timecode recorded on any other recorders syn-
chronized with the DA-98
• a timecode generator, video-synchronized with
the DA-98.
If your analog recorder cannot chase to external
timecode, you must first record the timecode from
the analog recorder on an audio track of the DA-
98 and then transfer the timecode to the dedicated
timecode track.
Timecode recorded on the audio track in this way
is synchronized to the audio clock, and can subse-
quently be transferred (through patching) to the
timecode track.
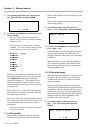
10.5.6 Recording timecode from external
sources
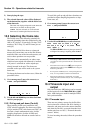
1) Set the to (see 10.1.3,
“Selecting TC or ABS timing”).
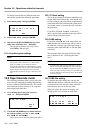
2) Set the timecode record source to
(see 10.5.1, “Selecting the timecode
source”).
3) Press the
TC REC
switch to arm the timecode
track.
4) Start the external source to check the status of
the external timecode.
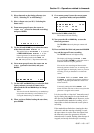
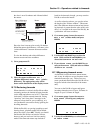
If no external timecode has been received since the
DA-98 has been switched on, the tape counter will
show all hyphens.
If external timecode has been received since the
DA-98 has been switched on, but is not currently
being received, the tape counter will flash.
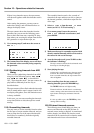
If the external timecode is currently being received
at normal (play) speed, the tape counter will show
the value of the timecode currently being received.
If the external timecode is being received from a
NOTE
When recording timecode from an external digital
source, make sure the digital clock of the DA-98 and
that of the external source are synchronized, as
explained in 4.2.3, “Word clock connections” and 4.2.2,
“Video connections”. A warning message will appear if
the timecode source and the DA-98 are not synchro-
nized, but timecode can still be recorded. However, the
resulting timecode recording will probably cause syn-
chronization problems in the future.
NOTE
Do not use any timecode recorded on the DA-98’s dedi-
cated subcode track as the timecode master when trans-
ferring timecode from an analog recorder.