


Section 8 – Advanced operations
8-10 – 1.00 – 06/97
input bits, as in the case of the DA-98) to a lower
number (for instance 16, the DA-98’s tape word
length) to improve quantization.
Paradoxically, this technique of adding noise
removes quantization noise and distortion at low
signal levels and improves the overall distortion
figures.
1
Though quantization noise is reduced, there is a
loss of a few dB in the signal-to-noise ratio. For
this reason, the DA-98 does not implement dither
as a standard, but allows you to choose between
no dither, rectangular or triangular (the shapes
refer to the distribution of values in the digital
noise). Rectangular gives about 3dB better signal-
to-noise ratio than triangular, but there is noise
modulation, which may be audible when record-
ing and playing back low-level program sources.
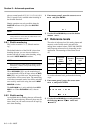
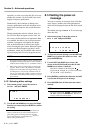
8.13.1 Selecting dither settings
1) Select menu group 1, move the cursor to
and press
ENTER
.
2) Use the
UP
and
DOWN
keys to select the dither
function you want, and press
ENTER
to confirm
the setting.
1
A full discussion of dither and other digital audio tech-
niques is outside the scope of this manual. However, a
good starting point for learning about this, and other
aspects of digital audio, is John Watkinson’s
The Art of
Digital Audio
, pub Focal Press.
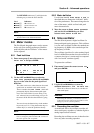
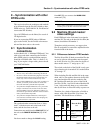
8.14 Setting the power-on
message
You can set a power-on message of up to 20 char-
acters (letters, numbers and some punctuation)
which will be displayed when the DA-98 is turned
on.
The default message is
.To set a message
other than this:
1) Select menu group 2, move the cursor to
and press
ENTER
:
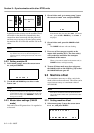
2) To clear the current message, use the
LEFT
and
RIGHT
keys to move the cursor to and
press
the ENTER key
.
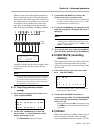
3) Use the
LEFT
and
RIGHT
keys to move the
cursor to the left field, and press the
UP
and
DOWN
keys to select a character.
Characters available are: through , , ,
[space] and
through (you can use the letter
“
” for the “ ” (zero) character).
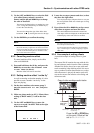
4) Press
ENTER
to confirm the character and add
it to the end of the power-on message.
5) Press
ESCAPE
when all characters have been
entered.
NOTES
• We suggest using the confidence mode of off-tape mon-
itoring when recording using dither in order to be able to
check the effect instantly (see 7.2, “Confidence mode”).
• Dither can be turned on and off while recording is tak-
ing place. However, there will probably be an audible
change in the sound quality. We suggest making a test
recording before a session using confidence mode. In
this way you will be able to make an instant assessment
of the effects of the different dither settings on your pro-
gram material.
NOTE
To reset the message to
, move the cursor
to
and press the
ENTER
key. The
current
message will be erased and replaced.