


Section 6 – Basic operations
06/97 – 1.00 – 6-3
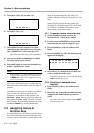
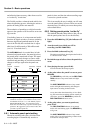
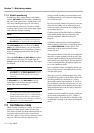
2) Adjust the input signal levels so that the track
meters read high, but the
OVER
segment does
not light.
3) Hold down the
RECORD
key, and press the
PLAY
key. The tape will start moving and
recording will start.
The
REC FUNCTION
indicators of all tracks will
light steadily.
When you start recording, the point at which
recording starts is automatically stored into mem-
ory for punch-in purposes.
4) To stop recording and stop the tape, press the
STOP
key. You can also press the
PLAY
key,
which will continue the tape movement, but
stop recording.
6.3.3 Recording the basic tracks (ii)
This is an alternative method of recording basic
tracks on a blank, formatted tape.
1) Arm the tracks and adjust the levels as
described in [1] and [2] above (6.3.2,
“Recording the basic tracks (i)”).
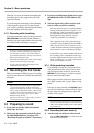
The
REC FUNCTION
indicators of all armed
tracks will flash.
2) Press the
PLAY
key. The tape will start moving.
3) When you reach the point at which you want to
start recording, press the
RECORD
key.
The
REC FUNCTION
indicators of all armed
tracks will light steadily.
The point at which recording starts is automati-
cally stored into memory for punch-in purposes.
4) Stop recording as described above.
6.3.4 Replaying the first tracks
When you have positioned the tape at the begin-
ning of the recording you have just made (or at the
pre-roll point), you can start playing back the tape.
1) Turn off the
RECORD FUNCTION
switch of the
track you have just recorded.
We suggest turning off the
RECORD FUNCTION
.
This will prevent you from accidentally hitting the
RECORD
key and going into record mode, over-
writing what you have already recorded.
2) Make sure that the
INPUT MONITOR
of the track
you have just recorded is turned off (see 7.1.1,
“ALL INPUT [18] and INPUT MONITOR
[29]”).
3) Rewind the tape to the point that you started
recording and press
PLAY
.
6.4 Overdubbing
Overdubbing subsequent tracks is carried out in a
very similar way to recording the first tracks.
If you are unsure about the difference between
monitoring modes as implemented on the DA-98,
now is a good time to read the section 7, “Moni-
toring modes”.
Obviously you will want to record while you lis-
ten to the off-tape signals from previously-
recorded tracks and the input source on tracks
where recording is taking place.
Note, however, that the use of confidence mode
when overdubbing (see 7.2, “Confidence mode”)
is not recommended, as the off-tape replay signals
will be delayed, making it impossible to provide
accurate cues.
6.5 Track bouncing
Though the DA-98 provides a method of copying
tracks digitally (see 8.11.1, “Track Copy (channel-
to-track routing)”), there is no way of combining
tracks within the DA-98.
If you need to combine tracks, this must be done
through an external console, routing all tracks to
be combined through an output group, and routing
that group to the appropriate track input.
6.6 Punch-in and punch-out
There are a number of ways in which the DA-98
can be used to perform reliable punch-in and
punch-outs automatically. Punch points can be set
NOTE
Use the reference level you have chosen (see 8.7, “Ref-
erence levels”) to be your “nominal” level.