83
Other Operations
Transposing Entire Parts/Tracks
You can transpose the specied part or track.
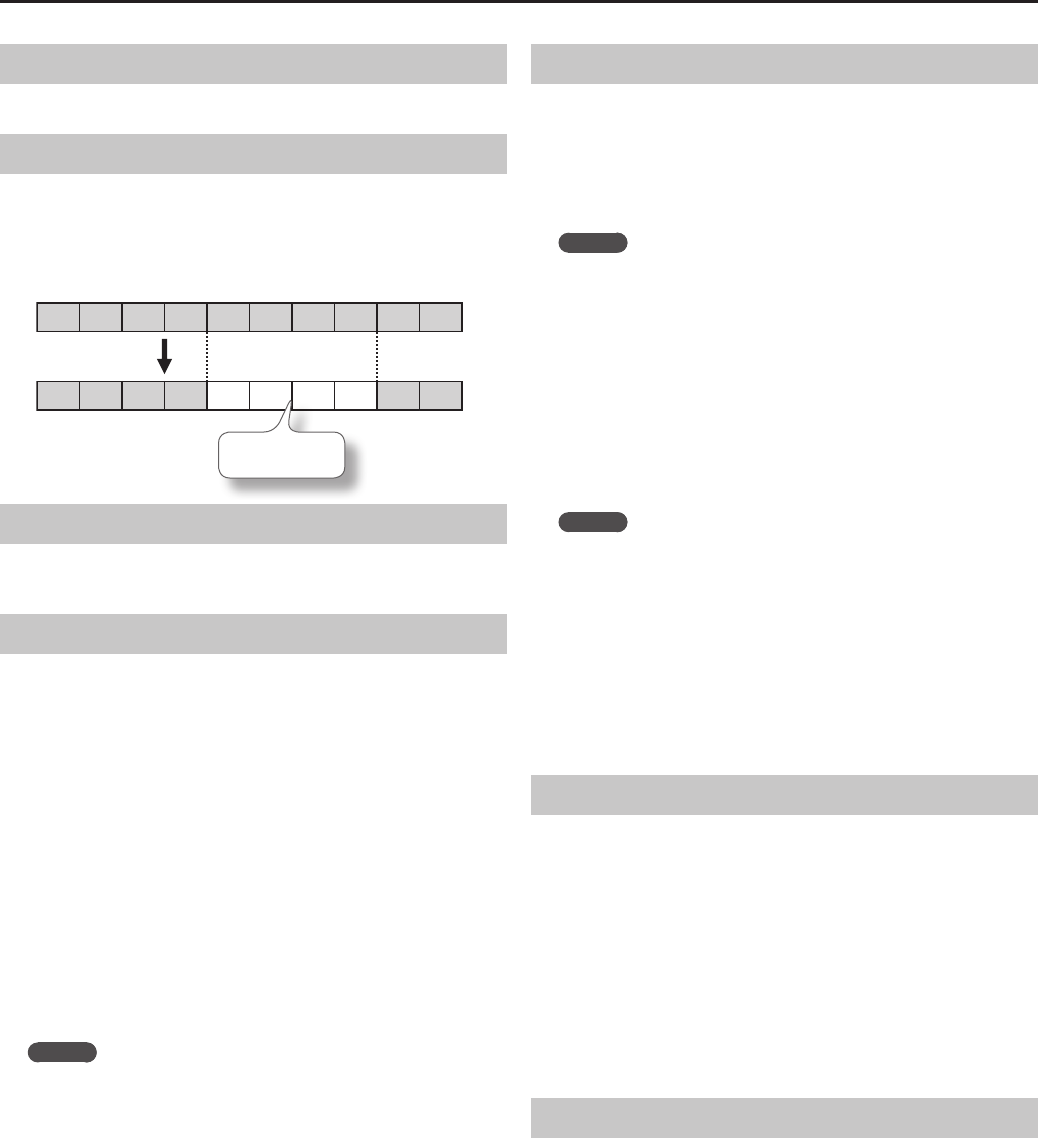
Erasing Measures
You can erase a specied range of measures, causing those measures
to be blank.
Erasing performance data will not aect the length of the song.
Example: Erasing the performance data from measures 5–8 (make blank)
1 2 3 4 5 6 7 8 9 10
1 2 3 4 5 6 7 8 9 10
Blank measures
Exchanging Parts
You can exchange the notes recorded for one part with the notes
recorded for a dierent part.
Editing Individual Notes
You can edit the individual notes of a recorded performance. This
function is called “Note Edit.”
You can use Note Edit to make the following changes.
• Delete an unintended note
• Change the pitch of a single note
• Change the playing strength (velocity) of a single note
• Change the ngering number
1. Use the cursor left/right buttons to select the part that
contains the note you want to edit.
The number of the selected part is shown in the center of the screen.
2. Use the [Bwd] [Fwd] buttons or the cursor up/down buttons
to select the note that you want to edit.
Make the note you want to edit appear in the center of the screen.
The location of each note is shown in terms of “measure: beat: tick.”
MEMO
A “tick” is a ner division of timing than a beat. There are 120 ticks
in one beat.
3. Press the [O] button.
The edit screen will appear.
4. Use the cursor left/right buttons to select the note’s “pitch,”
“velocity,” or “nger number,” and then use the cursor up/
down buttons to edit it.
If you want to delete the selected note, press the [O] button.
5. When you’re nished editing, press the [×] button.
Editing Tone Changes During the Song
Songs in which the instrumental sound changes during the song (i.e.,
when the tone used by a part is switched during the song) contain
commands that specify when the tone should change.
These commands are called “program changes (PC).” You can use
“PC Edit” to delete a program change or to change the tone that is
selected.
MEMO
You can’t insert a program change into a measure or beat that does
not already contain a program change.
1. Use the cursor left/right buttons to select the part
containing the program change you want to edit.
The number of the selected part is shown in the center of the screen.
2. Use the [Bwd] [Fwd] buttons or the cursor up/down buttons
to select the program change that you want to edit.
Make the program change you want to edit appear in the center of the
screen.
The location of each note is shown in terms of “measure: beat: tick.”
MEMO
A “tick” is a ner division of timing than a beat. There are 120 ticks
in one beat.
3. Press the [O] button.
The edit screen will appear.
4. Press a tone button to select the tone group, and use the
cursor buttons to select a tone.
If you want to delete the selected program change, press the
[O] button.
5. When you’ve nished editing, press the [×] button.
Inserting Notation Marks
You can insert a variety of notation marks to be displayed in the
notation.
1. Use the [Bwd] [Fwd] buttons or the cursor left/right buttons
to select the location at which you want to insert a notation
mark.
2. Use the [A] [B] buttons to select the type of notation mark
that you want to insert.
3. Use the cursor up/down buttons to select a notation mark.
4. Press the [O] button.
The notation mark will be inserted.
Deleting a Notation Mark
1. Use the cursor up/down buttons to select a notation mark.
The notation mark will be shown in red.
2. Press the [O] button.
The selected notation mark will be deleted.
