62
Practicing
1.
Press the [Menu/Lesson] button.
2.
Press the cursor button to select <Functions>, then press the [ ]
button.
3.
Press the cursor button to select <Transpose>, then press the [ ]
button.
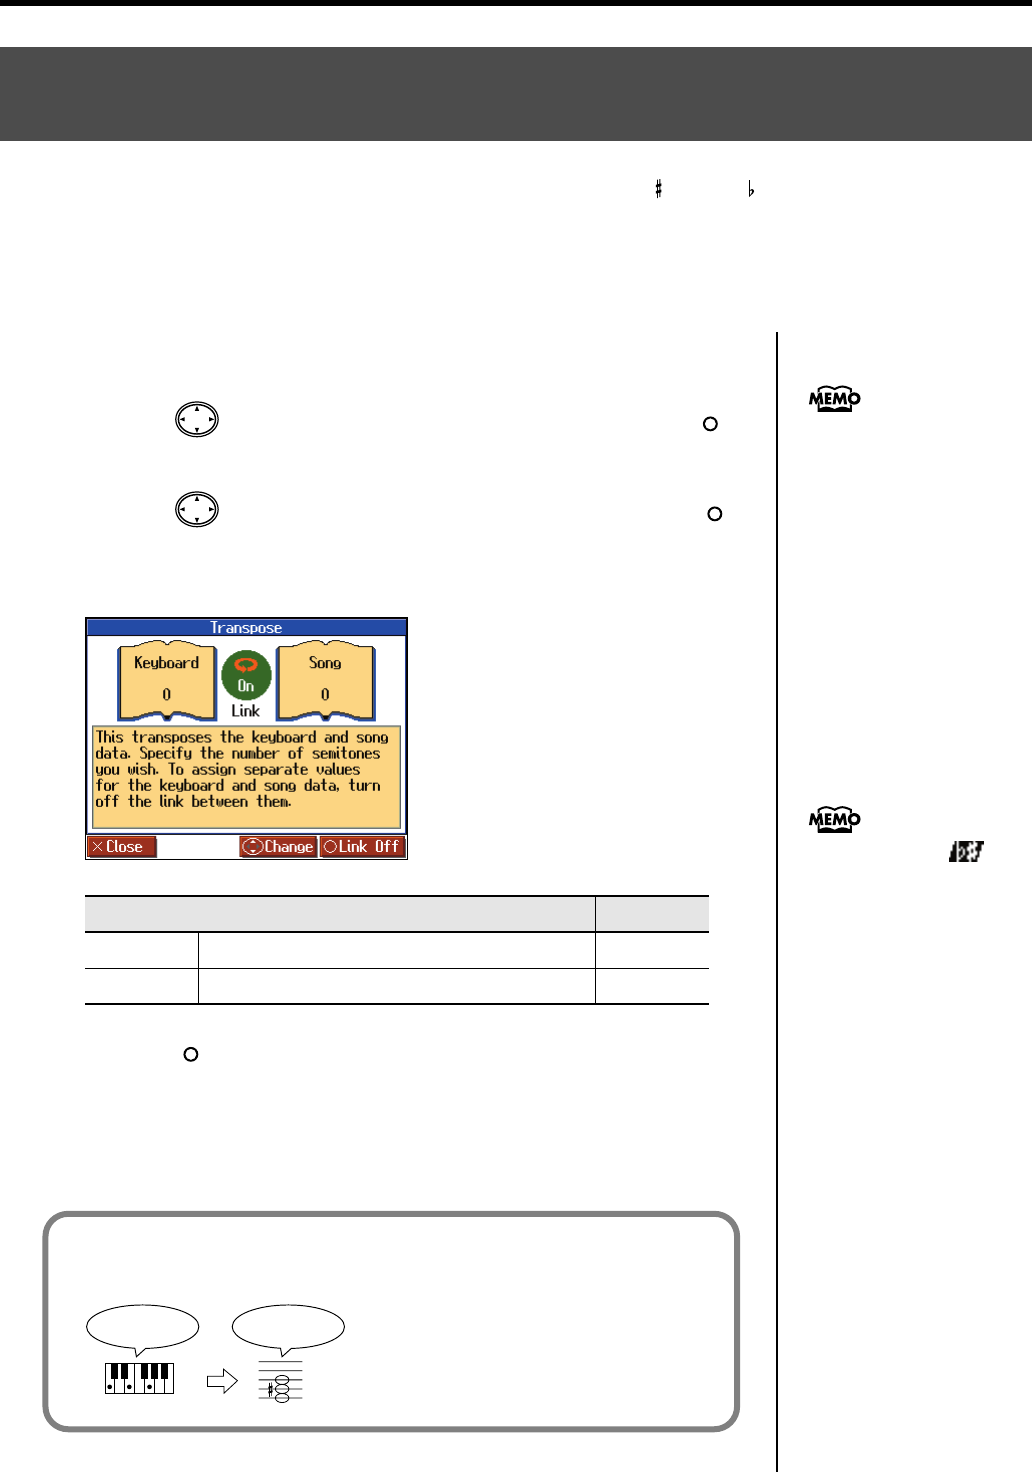
The “Transpose” screen appears.
fig.d-Transpose-e_50
4.
Press the [ ] button to switch the link on or off.
When set to Link <On>, the values for the keyboard and the song data are the same.
When set to Link <Off>, the values for the keyboard and the song data can be set
separately. To cancel the transposition, set Transpose to “0.”
The transposition setting returns to “0,” when you choose another song.
Changing the Key of the Keyboard or Song Playback
(Transpose)
By using the “Transpose” function, you can transpose your performance without changing the notes you
play. For example, if a song is in a difficult key with numerous sharps ( ) or flats ( ), you can use this
function to play it in an easier key.
You can also use this function to play back a song in a different key.
When accompanying a vocalist, you can easily transpose the key to a range that is comfortable for the singer,
while still playing the notes as written (i.e., with the same fingering positions).
Item
Setting
Keyboard
Transpose the keys played by the keyboard.
-6–0–5
Song
Transpose the song playback.
-24–0–24
You can open the “Transpose”
screen by pressing the [Reverb]
and [Key Touch] buttons
simultaneously.
The Transpose icon
appears in the Notation screen
while the Transpose function is
on.
For example, if you want the E pitch to sound when you press the C key, set
the “Keyboard” transpose setting to “4.”
fig.trans-e
If you play C E G It will sound E G
#
B
HPi-6-e.book 62 ページ 2005年11月15日 火曜日 午後3時49分
