


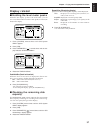

7. Rotate the TIME/VALUE dial. In this case, choose CV1.
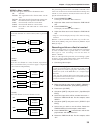
CV (Convert)
CV1=Tap ➝ S.Tr: Create a sync track from mark
points.
CV2=Tap ➝ T.Map: Create a tempo map from mark
points.
CV3=S.Tr ➝ T.Map: Create a tempo map from the sync
track.
CV4=Time ➝ S.Tr: Automatically create a sync track.
8. Press PARAMETER [ ].
The display will indicate ÒSYS CV:Beat=Ó.
9. Specify the number of beats in one measure. Rotate
the TIME/VALUE dial.
10.Press PARAMETER [ ].
The display will indicate ÒSYS CV:Tap Beat=Ó.
11.Specify the number of mark points in each measure.
Rotate the TIME/VALUE dial.
12.Press [YES].
A message will ask you to confirm that you wish to re-
create the sync track and tempo track.
13.Press [YES] one (or two) more times.
The sync track will be created.
Generating the tempo map from the
sync track
A tempo map can be created from the sync track recorded
by the VS-880.
This is convenient when you wish to convert the synchro-
nization signal of the sync track on the VS-880.
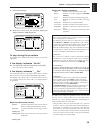
1. Press [SYSTEM] several times until “SYS
Sync/Tempo?” appears.
2. Press [YES].
3. Press PARAMETER [ ].
The display will indicate ÒSYS Syn:GenÓ.
4. Rotate the TIME/VALUE dial. In this case, choose
MIDIClk.
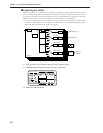
Gen (Sync generator)
This selects the type of synchronization signal that will be
transmitted from the MIDI OUT connector. When using a
synchronization signal from the VS-880 to synchronize
external MIDI devices, set this to the desired type of syn-
chronization signal.
Off: Synchronization signals will not be transmit-
ted.
MTC: MIDI Time Code will be transmitted.
MIDIClk: MIDI Clock will be transmitted.
SyncTr: MIDI Clock data recorded on the sync track
will be transmitted.
5. Press PARAMETER [ ] several times to get the
“SYS Sync.Tr Cnv?” display.
6. Press [YES].
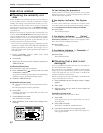
7. Rotate the TIME/VALUE dial. In this case, choose CV3.
CV (Convert)
CV1=Tap ➝ S.Tr: Create a sync track from mark
points.
CV2=Tap ➝ T.Map: Create a tempo map from mark
points.
CV3=S.Tr ➝ T.Map: Create a tempo map from the sync
track.
CV4=Time ➝ S.Tr: Automatically create a sync track.
8. Press PARAMETER [ ].
The display will indicate ÒSYS CV3:S.TrBeat=Ó.
9. Specify the number of beats per measure in the syn-
chronization signal that is recorded in the sync track.
Rotate the TIME/VALUE dial.
10.Press [YES].
A message will ask you to confirm that you wish to re-
create the tempo map.
11.Press [YES] once again.
The tempo map will be created.
Creating the sync track automatically
You can automatically create a sync track by specifying the
start and end times of the song, and the number of mea-
sures that it contains. This is convenient when you already
know the length of the song, such as for commercials.
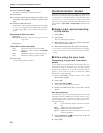
1. Press [SYSTEM] several times until “SYS
Sync/Tempo?” appears.
2. Press [YES].
3. Press PARAMETER [ ].
The display will indicate ÒSYS Syn:GenÓ.
4. Rotate the TIME/VALUE dial. In this case, choose
SyncTr.
Gen (Sync generator)
This selects the type of synchronization signal that will be
transmitted from the MIDI OUT connector. When using a
synchronization signal from the VS-880 to synchronize
external MIDI devices, set this to the desired type of syn-
chronization signal.
Off: Synchronization signals will not be transmit-
ted.
MTC: MIDI Time Code will be transmitted.
MIDIClk: MIDI Clock will be transmitted.
SyncTr: MIDI Clock data recorded on the sync track
will be transmitted.
5. Press PARAMETER [ ] several times to get the
“SYS Sync.Tr Cnv?” display.
6. Press [YES].
7. Rotate the TIME/VALUE dial. In this case, choose CV4.
CV (Convert)
CV1=Tap ➝ S.Tr: Create a sync track from mark
points.
CV2=Tap ➝ T.Map: Create a tempo map from mark
points.
CV3=S.Tr ➝ T.Map: Create a tempo map from the sync
track.
CV4=Time ➝ S.Tr: Automatically create a sync track.
Chapter 1 Trying out the expanded functions
41
Chapter 1