168
Recording/Playing Back What You Play
3.
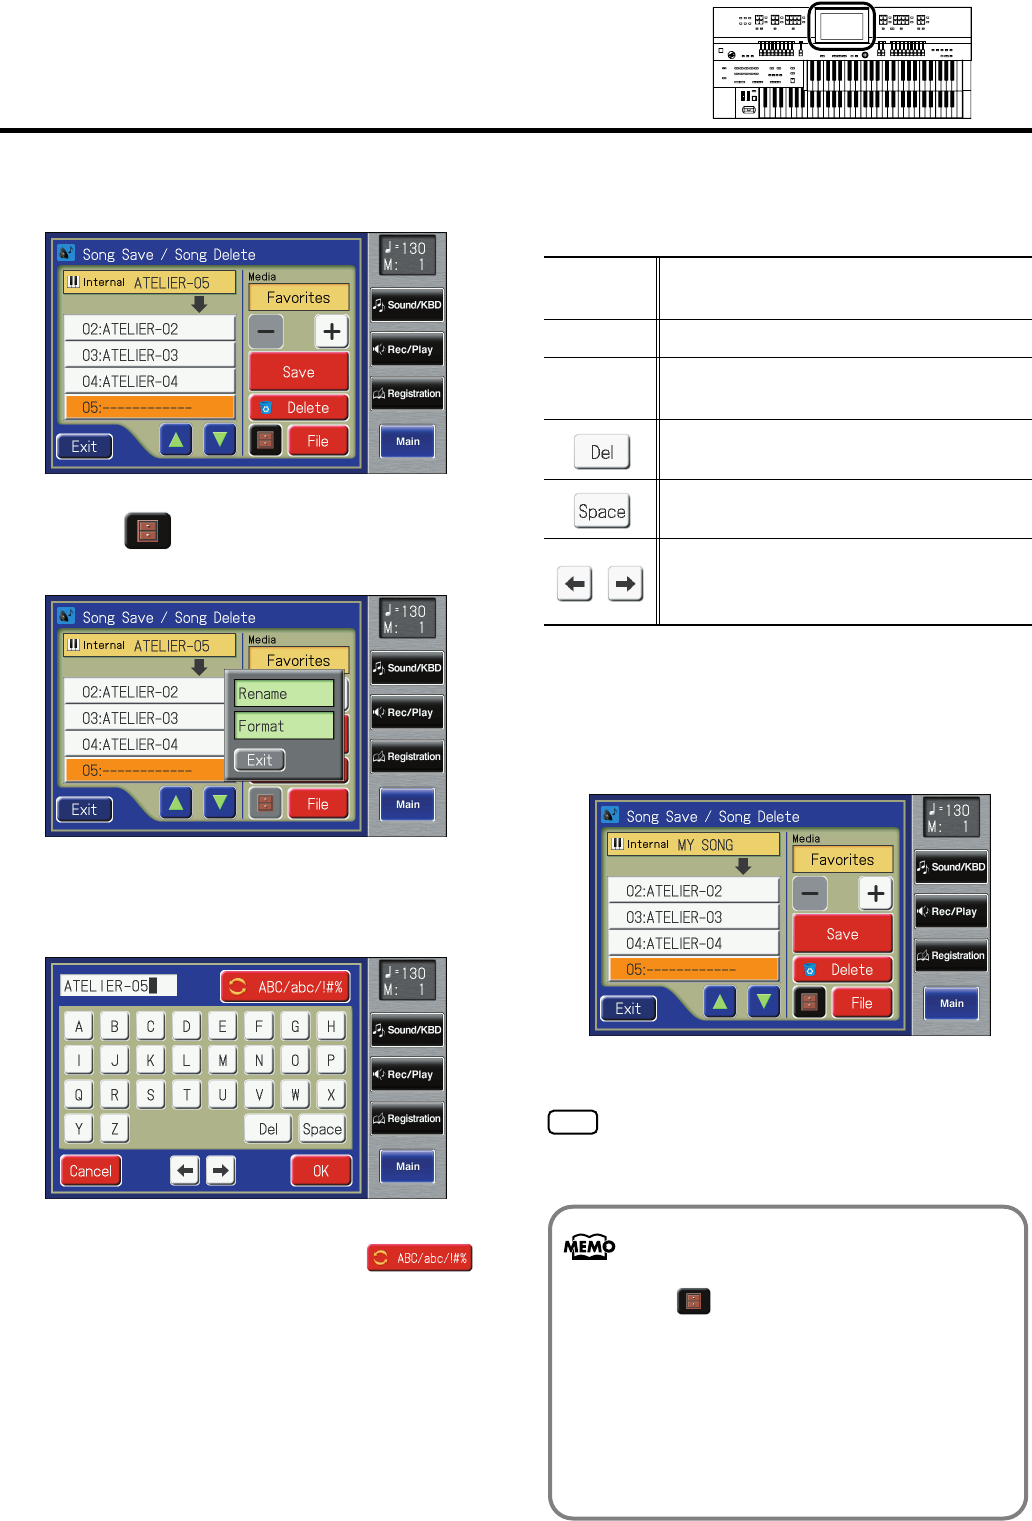
Touch <Save/Delete>.
The Song Save/Song Delete screen appears.
fig.07-23.eps
4.
Touch < > (Utility).
The Utility screen appears.
fig.07-24.eps
5.
Touch <Rename>.
The Rename screen appears.
fig.07-25.eps
6.
Touch the character select button ( )
to switch among uppercase/lowercase/
symbols.
Touch the character select button repeatedly to cycle
through the available choices, like this: uppercase
→
lowercase
→
symbols
→
uppercase...
7.
Touch the screen to specify the desired
character.
The following characters can be selected.
To cancel operation, touch <Cancel>.
8.
When you’re done making the settings, touch
<OK>.
The new name is now inserted.
fig.07-26.eps
You cannot directly change or edit the name of a
performance song stored on a USB memory or floppy disk.
The song must first be loaded (p. 170) into the instrument,
edited, and then saved to USB memory or floppy disk
again.
Uppercase
A B C D E F G H I J K L M N O P Q R S T U
V W X Y Z
Lowercase
a b c d e f g h i j k l m n o p q r s t u v w x y z
Symbols
! “ # % & ‘ ( ) * + , - . / : = ? ^ _ 0 1 2 3 4
5 6 7 8 9
Deletes a character.
Inserts a space (blank).
Move the cursor (the symbol that indicates the
location at which characters will be input) to
left or right.
You can also access the Rename screen as
follows.
1. Touch < > (Utility) on the Rec/Play screen.
The Utility screen appears.
2. In the Utility screen, touch <Edit>.
The Edit Menu screen appears.
3. Touch <Rename> on the Edit Menu screen.
The Rename screen appears.
AT-500_e.book 168 ページ 2008年7月28日 月曜日 午後4時17分
