31
Editing a sample
You can copy a sample from one pad to another pad. This
lets you create another sample based on an existing sample.
If you decide to cancel this operation during the procedure,
press [CANCEL].
1.
While holding down [DEL], press [RESAMPLE].
2.
The display will indicate “CPY.”
3.
Press the pad for the copy-source sample.
4.
Press the copy-destination pad.
When the two pads have been pressed, [SAMPLING]
will blink.
5.
When you press [SAMPLING], the copy will begin.
6.
When the indication of “CPY” in the display has
disappeared, the copy is complete.
If there is not enough free memory to perform the copy, the
display will indicate “FuL” and the copy cannot be performed.
Never turn off the power before the copy has been completed.
Doing so will destroy not only the samples being copied, but
may also destroy other samples or the CompactFlash card.
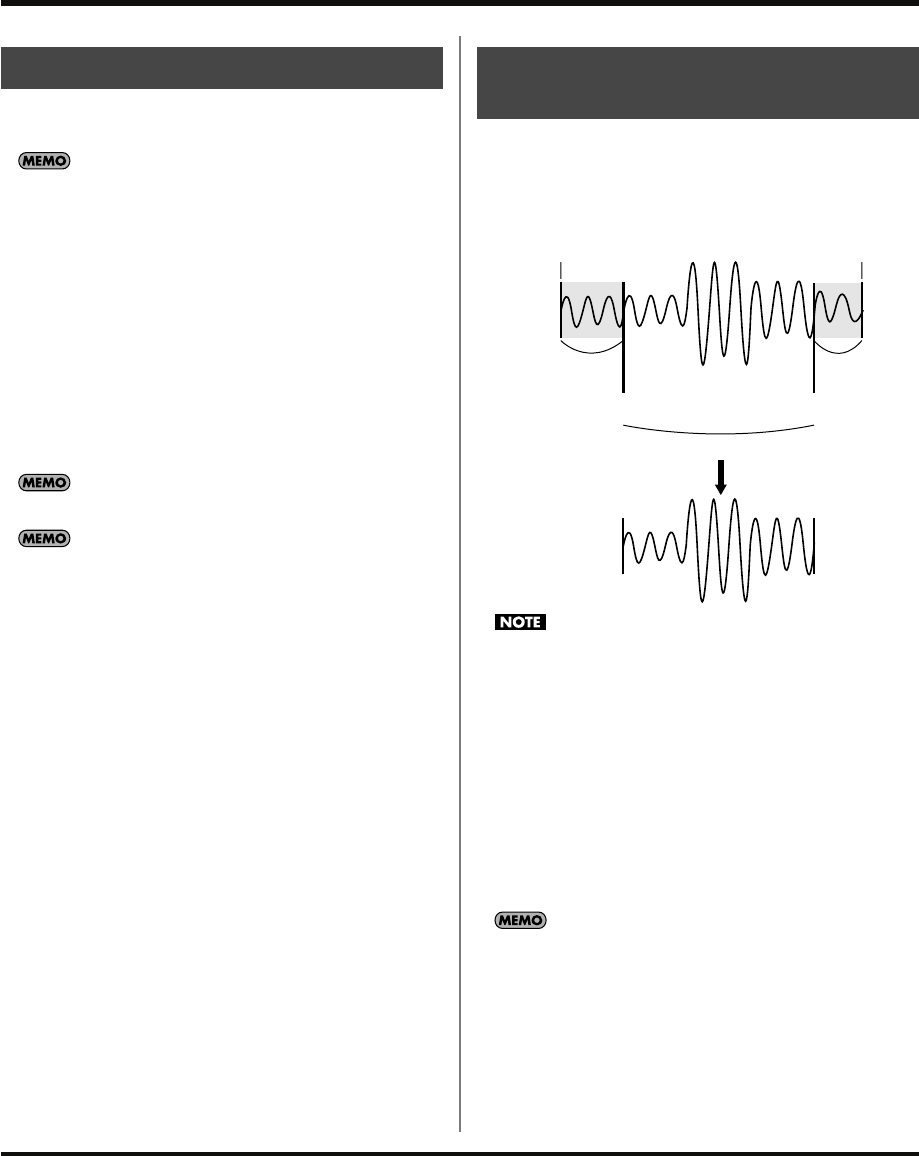
When you adjust the start point or end point, the unused
portions of the sample will be unnecessarily occupying
memory. By deleting (truncating) these unused portions, you
can make efficient use of memory.
This operation cannot be undone.
1.
Play the pad that you want to convert, making it the
current pad.
2.
Make sure that [MARK] is lit (indicating that the
playback region has been adjusted).
3.
Press [DEL].
4.
Press [MARK]. The display indication will change to
“trC.”
5.
Press [DEL] to begin the conversion. When “trC”
disappears from the display, the operation is complete.
Never turn off the power before this operation has been
completed. Doing so will destroy not only the sample being
truncated, but may also destroy other samples or the
CompactFlash card.
Copying a sample to another pad
Converting to a sample that has
a modified playback region
Start sampling Stop sampling
Unwanted Unwanted
Start point End point
This region will sound
Truncate
SP-555_e.book 31 ページ 2007年6月25日 月曜日 午前9時9分
