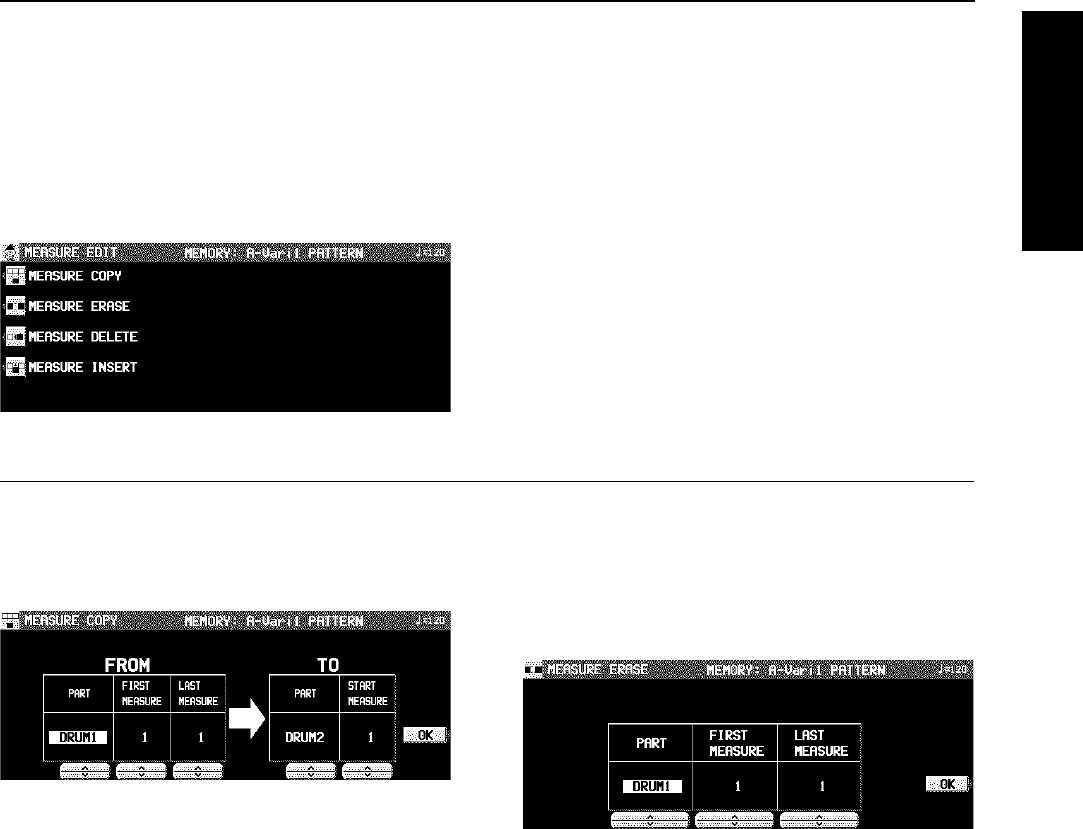
Measure Edit
You can edit the recorded data one measure at a time.
Select the function you wish to edit.
1. During recording, press the MEASURE EDIT
button.
• The display looks similar to the following.
2. Select the function.
3. Follow the procedure to edit the function (see
below).
• Only the contents of the same pattern can be edited.
MEASURE COPY
Copy recorded data of specified measures to a specified
point.
• On the destination track, the new data replaces the current
measure contents.
1. Specify the measures you wish to copy from
the source track (FROM).
• On the FROM side, specify the settings with the corre-
sponding buttons.
PART:
Select the part to copy from. (If ALL is selected, all
parts are copied.)
FIRST MEASURE:
Specify the first measure to copy.
LAST MEASURE:
Specify the last measure to copy.
2. Specify where you wish to copy the selected
measures to.
• On the TO side, specify the settings with the correspond-
ing buttons.
PART:
Select the part to copy to.
START MEASURE:
Specify the start point to copy the selected measures
to.
3. Press the OK button.
• The confirmation display appears. Press the YES button
to execute the function, or press the NO button to cancel
the function.
• If the FROM and TO parts are the same and the FROM
and TO measures overlap, copy is not possible.
MEASURE ERASE
Erase the recorded contents of specific measures.
• Note that only the contents of the measures are erased,
not the measures themselves; the length of the perform-
ance remains the same.
1. Use the PART ∧ and ∨ buttons to specify the
part.
• If ALL is selected, data is erased from the specified
measures of all the parts at one time.
2. Use the FIRST MEASURE ∧ and ∨ buttons
to specify the start point (measure number).
3. Use the LAST MEASURE ∧ and ∨ buttons to
specify the end point (measure number).
4. Press the OK button.
• The confirmation display appears. Press the YES button
to execute the function, or press the NO button to cancel
the function.
Composer
Part V Composer
91
QQTG0665
