13
Panel Descriptions
10.
Sampling frequency select switch
This selects the sampling frequency at which audio data will be recorded and played back.
In order for this setting to take effect, you must exit all applications and turn the power of the UA-1000 off, then on
again.
The sampling frequency select switch must be set to match the sampling frequency of the application you are using.
If you are using external clock mode, this must also match the sampling frequency of your external device.
* If you are using the UA-1000 in ADAT mode, set this to 44.1 kHz or 48 kHz. If this is set to anything other than 44.1 kHz or
48 kHz, ADAT mode will not be available; pressing the ADAT mode switch will not cause the ADAT mode switch to light.
USER SET
UA-1000 Control Panel (p. 36) lets you store the following settings in the UA-1000's internal memory.
• ADAT mode switch • External clock switch
• Sampling frequency select switch • STEREO/MONO select switch
• Direct monitor soft control switch • Output volume select switch
• Monitor mixer and patch bay settings
To call up the settings stored in USER SET, set the
sampling frequency select switch
to
USER SET
, then cycle the
power to the unit.
For more about the internal monitor mixer and patch bay, refer to
“Various settings”
(p. 36).
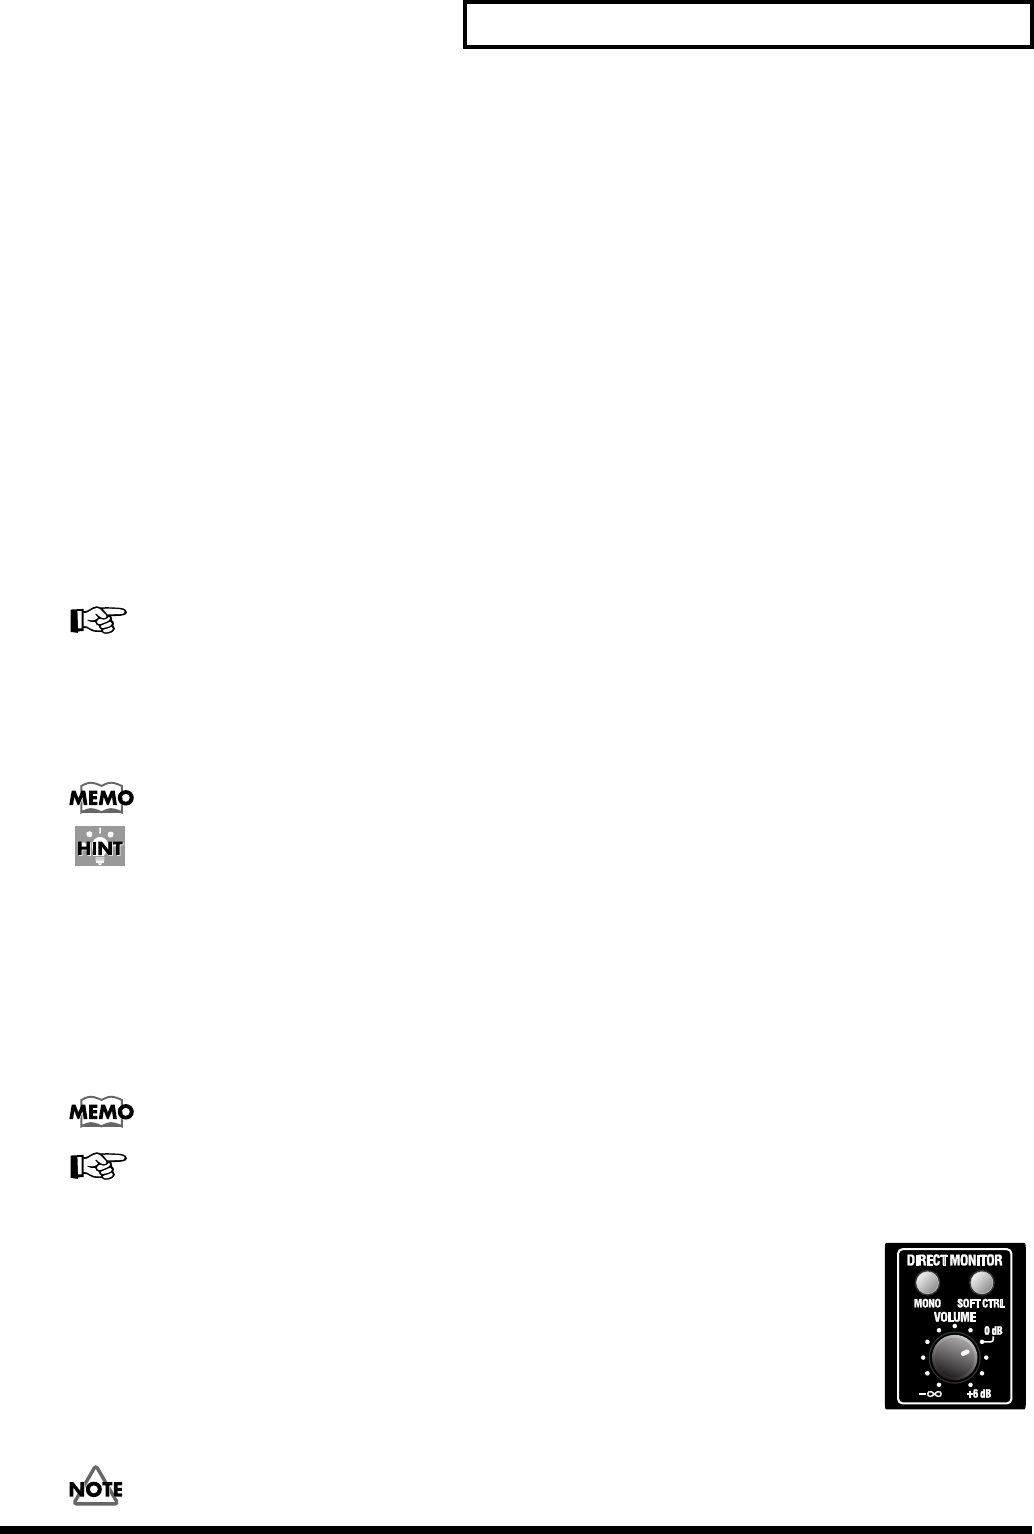
11.
STEREO/MONO select switch (Direct monitor section)
This selects whether the input signal will be monitored in stereo or in monaural.
Even if
MONO
is selected, the audio signal sent via USB to your computer is stereo.
Turning off the power of the UA-1000 will not change the setting of this switch.
If you have connected a mic or guitar to only one of the
combo input jacks
, it is convenient to use the
MONO setting.
12.
Direct monitor soft control switch (Direct monitor section)
This selects whether the INPUT MONITOR will be controlled by your software. When lit, the monitor volume, pan,
and on/off settings of each input jack can be controlled from your software. When unlit, signals will be output
without being affected by any settings of the INPUT MONITOR.
This lets you temporarily disable the settings of your software in order to check the state of connections.
For details on controlling the UA-1000 from your computer, refer to
“UA-1000 Control Panel”
(p. 36).
Turning off the power of the UA-1000 will not change the setting of this switch.
For details, refer to
“UA-1000 Control Panel”
(p. 36).
fig.0db
13.
Direct monitor volume (Direct monitor section)
This adjusts the volume at which the input signal is sent to the INPUT MONITOR. If you set the knob
to the
0 dB
position, the volume will be the same as the signal that is being recorded.
* For details on the INPUT MONITOR, refer to
“UA-1000 Control Panel”
(p. 36).
If this knob is turned all the way to the left, the signal level sent to the INPUT MONITOR will be
zero
.
If you are “thru-ing” the audio data within your computer, or have connected a mixer and are
outputting the input signal directly from the mixer for monitoring, leave this knob turned all the way
to the left.
You can adjust the
direct monitor volume
even when the
direct monitor soft control switch
is turned
off.
UA-1000_e.book 13 ページ 2003年8月6日 水曜日 午前11時52分


