


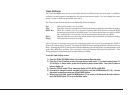

Recording a Song
P. 55
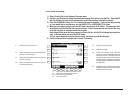
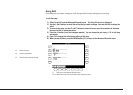
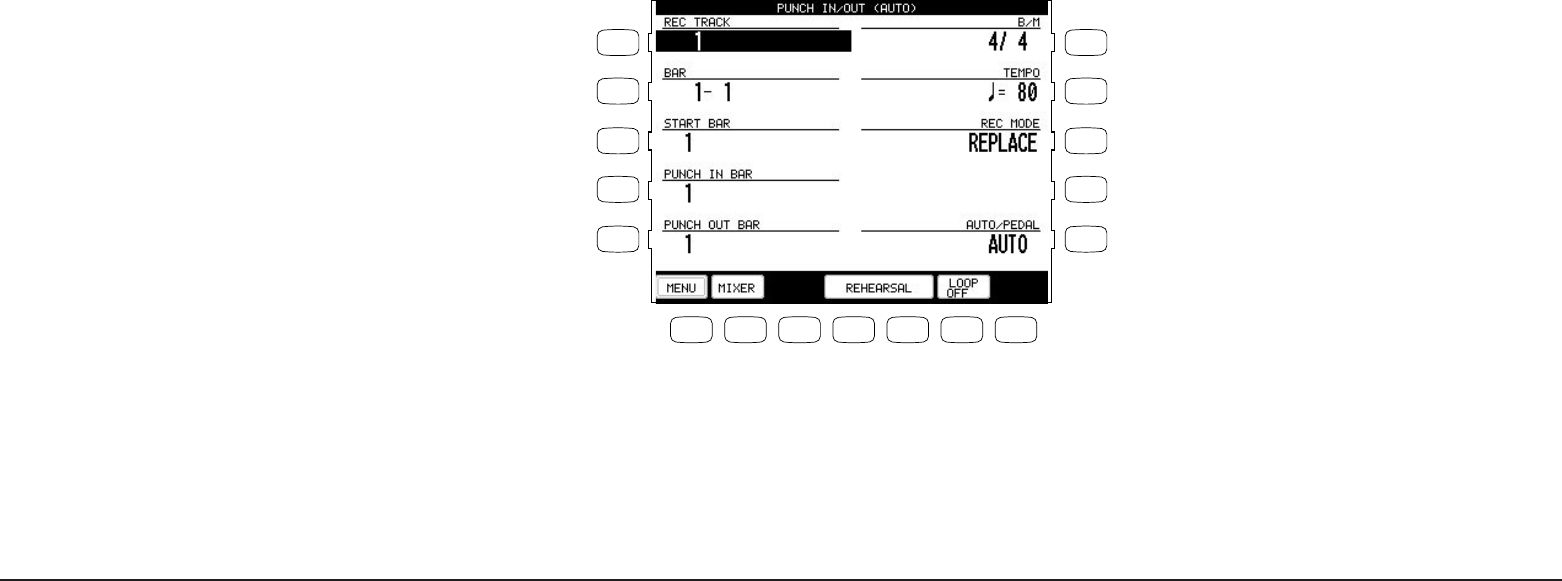
To use Punch-in recording:
1) Select Punch In/Out in the Advanced Recorder menu.
2) Use the L and R buttons to select the options and change their values using the Dial. Select AUTO
with the R5 button to have the CP automatically handle the punching in/out while you play.
3) Press the REHEARSAL button (F4, F5) to listen to the song for rehearsal. If you need to adjust mixing
or if you would like to loop the song, use the MIXER (F2) or LOOP ON/OFF (F6) button.
4) When you are ready to record, press the REC button and then the PLAY button. The music will start
immediately from the Start Bar that you have chosen. Once the song reaches the Punch In Bar, any
notes that you play on the keyboard will be recorded.
Recording will stop when the song reaches the Punch-Out Bar, but the CP will keep playing back the
song to the end unless you press the STOP button.
You can repeat the punch-in/out section by turning the looping on with the F6 button.
5) Listen to what you have recorded and re-record if necessary.
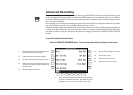
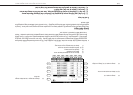
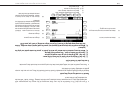
F1 Takes you to the Advanced Recorder menu.
F2 Takes you to the Mixer Settings menu.
F4, F5 Plays the song for rehearsal.
F6 Turns Loop on/off.
L 1
L 2
L 3
L 4
L 5
F 1 F 2 F 3 F 4 F 5 F 6 F 7
R 1
R 2
R 3
R 4
R 5
R1 Changes the time signature.
R2 Changes the tempo.
R3 Selects the recording mode. REPLACE
erases the previous data and records the
new data in its place. OVERDUB mixes the
new data with the previous data so that both
are heard together. Repeatedly pressing the
R3 button switches between the REPLACE
and OVERDUB.
R5 Selects the Punch-in method, Auto or Pedal.
Repeatedly pressing the R5 button switches
between the Auto and Pedal.
L1 Selects the track to Punch in on.
L3 Selects the measure in the song from where you
want the CP to start playing.
L4 Selects the measure where the CP will punch-in
and start recording.
L5 Selects the measure where the CP will punch-
out and stop recording.