104
Convenient Functions
■
Modifying the Tone Changes in a Song
(PC Edit)
In some songs, the instrument sound changes during the course of the
song (that is, the Tone changes in the middle of a Part). In such songs,
an instruction to switch the Tone is inserted at the place where you
want the sound to change. This instruction is called a “Program
Change” (PC), and actions such as deleting program changes, or
changing the selected Tone by them are called “PC Edit.”
* It is not possible to insert a program change into a measure or
beat that does not contain a program change.
Refer to “Basic Operation of the Editing Functions” (p. 100) for
instructions.
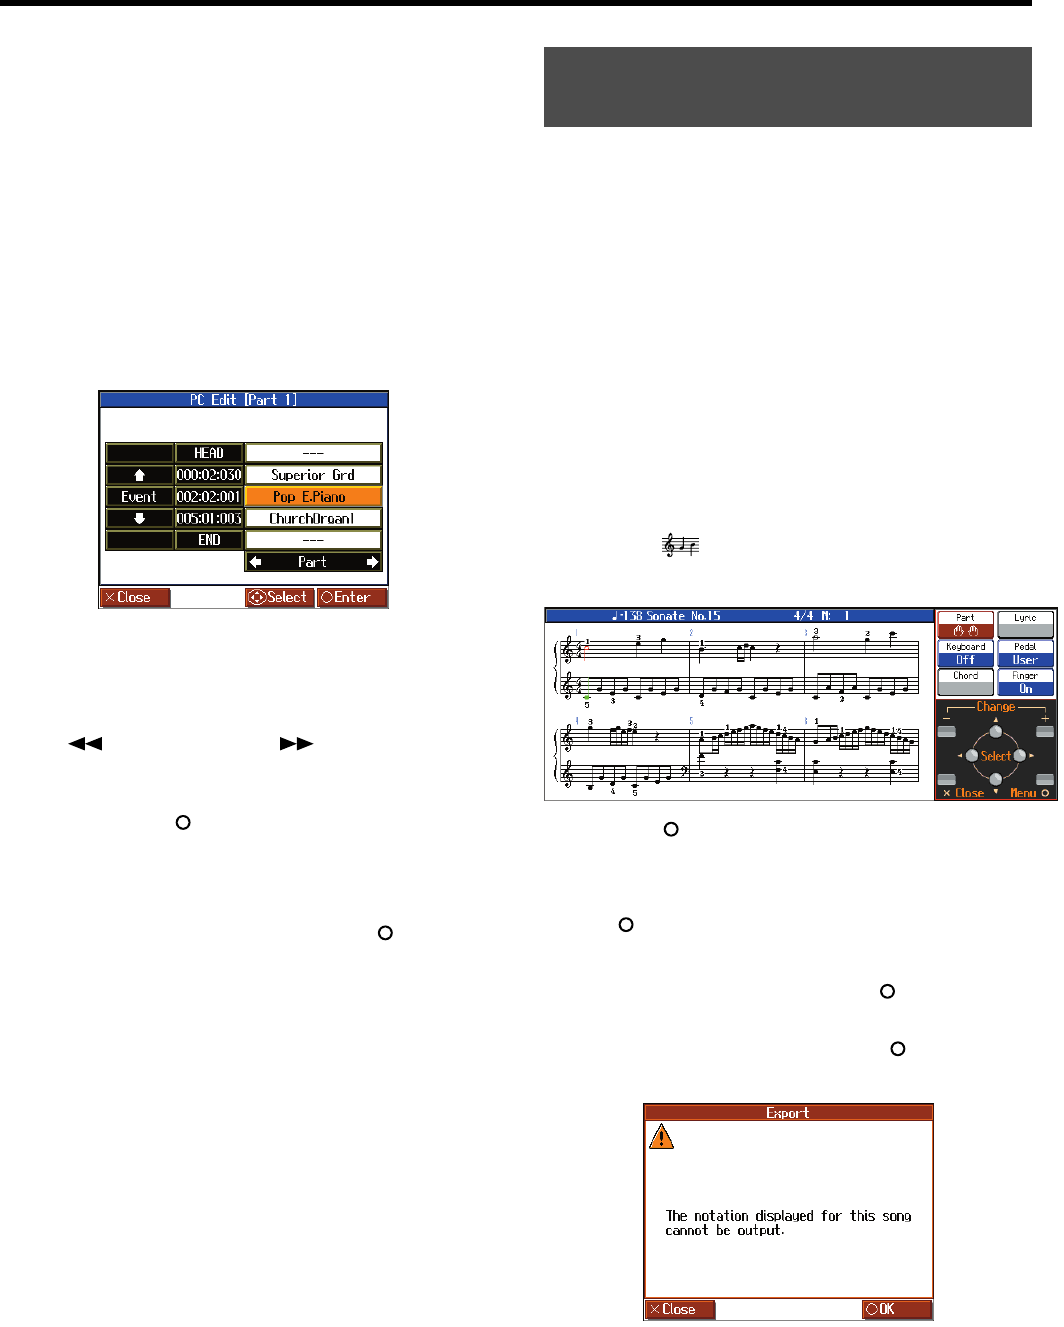
fig.d-edit-PCEdit-e_45
The PC-location display uses “Measure: Beat: Tick” as the format.
A tick is a unit of time that’s shorter than a beat.
Use the cursor buttons to select the part with the program change to
be edited. The Part number appears at the top of the screen.
Use the [ (Bwd)] button and the [ (Fwd)] button or use
cursor up or down button to find the program change to be edited.
Once the Program Change you want to edit is displayed in the center
of the screen, press the [ ] button to display the settings screen.
In the settings screen, press a tone button to select a tone group, then
select a tone with the cursor buttons.
When selecting Part 10 or 11, select the drum set or effect sound.
If you want to delete the Program Change, press the [ ] button.
You can take notations that are displayed on the HPi-7S and save
them to USB memory (sold separately). You can also use saved image
data to your computer.
* You cannot save copyrighted song data.
* Other than for your own personal enjoyment, use of the notations
that are output without the permission of the copyright holder is
prohibited by law.
* For more on indicating note names when outputting notations as BMP
files, refer to “Changing the Notation Screen Settings” (p. 99).
1.
Connect the USB memory to the External Memory
connector.
2.
Select the song you want to save (p. 41, p. 44).
When making notation data from a song you have performed,
first record the song ahead of time (p. 69).
3.
Press the [ (Notation)] button one or more times to
display a screen like the following.
fig.d-Score1+Options-e_45
4.
Press the [ ] button; the “Notation Menu” screen is
displayed.
5.
Press the cursor buttons to select <BMP Export>, then press
the [ ] button.
A message screen appears.
6.
After reading the message, press the [ ] button.
The following screen appears when you select a copyrighted
song. When this screen appears, press the [ ] button at this
point to return to Step 2 and select a different song.
fig.d-BMPExport2-e_45
Saving the Notation Data in BMP
Format
HPi-7S-e.book 104 ページ 2007年8月27日 月曜日 午後2時39分


