


24
Panel Descriptions
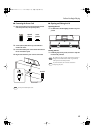
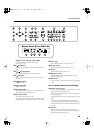
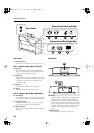
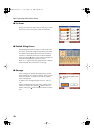
Rear Panel
1.
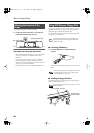
LCD Out connector
Connect the LCD cord of the music rest to this connector (p. 16).
HPi-7S’s Bottom Panel (Rear Left Side)
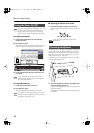
2.
Input jacks
These jacks can be connected to another sound generating
device or an audio device, so that the sound of that device will
be output from the HPi-7S’s speakers (p. 106).
3.
Output jacks
These jacks can be connected to your audio system to enjoy more
powerful sound. They can also be connected to a tape recorder
or similar device in order to record your performance on a
cassette tape (p. 106).
4.
Pedal jack
Connect the pedal cord of the stand to this jack (p. 16).
5.
AC Inlet
Connect the included power cord to this inlet (p. 17).
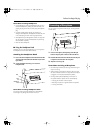
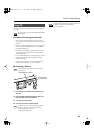
HPi-7S’s Bottom Panel (Rear Right Side)
6.
Video Out jack
Connect a television here (p. 111). This allows you to display the
lyrics, notations and slide show on the connected television set.
7.
Ext Display connector
Connect a external display here (p. 111). You can display the
lyrics, notations and slide show on the external display.
8.
Speaker connector
Here is where you connect the speaker cable from the dedicated
stand(p. 16).
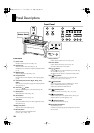
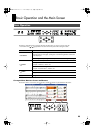
Music Rest
fig.MusicRestFront
fig.MusicRestRear
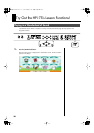
9.
Display
This displays notations for the internal songs and performances
recorded to the HPi-7S, in addition to a variety of settings.
* The explanations in this manual include illustrations that depict
what should typically be shown by the display. Note, however,
that your unit may incorporate a newer, enhanced version of the
system (e.g., includes newer sounds), so what you actually see
in the display may not always match what appears in the
manual.
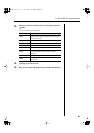
10.
[Contrast] knob
This knob adjusts the contrast of the screen (p. 20).
9
10
Bottom Panel (Rear Left Side)
Rear Panel
Bottom Panel (Rear Right Side)
2 3 4
6 7 8
5
1
HPi-7S-e.book 24 ページ 2007年8月27日 月曜日 午後2時39分