


74
Use MIDI functionality
■
RPN / NRPN ASSIGN
Here’s how you can assign an RPN or NRPN message to a controller.
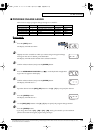
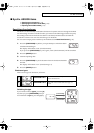
fig.edt2
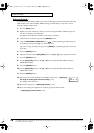
1
Press the
[EDIT]
button.
The display will indicate “EDT”.
fig.r-1
2
Slightly move the controller to which you want to assign an RPN or NRPN
message. In the case of a button, press that button.
The display will indicate the number of the selected controller.
3
Confirm what’s indicated, and press the
[ENTER]
button.
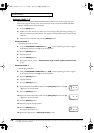
fig.rp0
4
Press an
ASSIGNABLE FUNCTION
key ( ) on the keyboard enough times
to get "RP0" to appear in the display.
fig.np0
* If you want to assign an NRPN message, press the
[NRPN]
key. The following procedure
is the same as for RPN.
fig.c
5
Confirm what’s indicated, and press the
[ENTER]
button.
The display will blink “C–”.
6
Input the channel. Use the
[DEC] [INC]
buttons or the
[0]
–
[F]
keys to specify the channel.
7
Press the
[ENTER]
button.
fig.BANK-2
8
Use the
[DEC] [INC]
buttons or the
[0]
–
[F]
keys to specify the RPN MSB
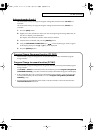
(CC#101) or NRPN MSB (CC#99).
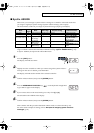
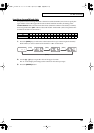
Mode Keyboard
Data entry MSB
(CC#6) range
Data entry LSB
(CC#38) range
Port
Basic mode 0 0-127 (00–7FH) Not transmitted PORT 1
Advanced mode 1 1 Assignable 0-127 (00–7FH) Assignable
*1 Reference
*1 Reference
*1 The -- area displays the currently set value. If it has not been set, the default setting will be displayed. Even if you change the type or mode
of the MIDI message that is assigned, the default setting will be displayed. This will be lit if the value is the same as the currently set value,
or will blink if the value is different.
PCR-1_e1.book 74 ページ 2003年11月20日 木曜日 午後3時22分