


r
E-200/E-100
18
Note: In certain cases, [‰] and [º] may not be available. This is
only the case for very large songs, however.
Note: By pressing [|√], [º] or [‰], you also recall the song’s pre-
programmed tempo value.
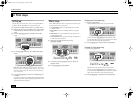
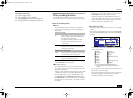
Loop playback (Repeat)
Another clever feature of the E-200/E-100’s Recorder is that
you can program playback loops. You can do so during playback
or while the Recorder is stopped.
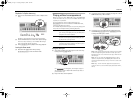
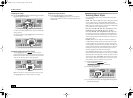
(1) Press [MARKER¥A–B] where you want the loop to begin
(the icon appears in the bottom right corner of the
display).
(2) Fast forward to the measure where you want the loop to
end and press [MARKER¥A–B] again (the icon appears).
You can also program loops on the fly. Remember, however,
that the Recorder always memorizes the beginning (down-
beat) of the next measure.
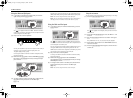
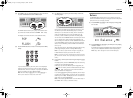
(3) If the icon isn’t already displayed, press the [REPEAT¥A–B]
button to activate the loop you have just programmed.
This button allows you to switch the E-200/E-100’s Repeat
function on and off.
(4) To play back the loop, press the [START÷STOP] button (now
called [®÷ª]).
The Recorder jumps to measure “A” and starts playing. At the
end of measure “B”, the Recorder immediately jumps back to
the beginning of measure “A” and continues playing back
the passage.
If necessary, repeat steps (1) and (2) to set other marker
positions.
Note: The playback tempo is reset every time the Recorder
reaches the “A” measure.
Note: In certain cases, the Marker function may not be avail-
able. This only happens with very large songs, however.
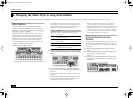
Live performance with song backing (Minus One)
Your E-200/E-100 allows you to mute parts you wish to play
yourself or don’t need in a given situation. This is called “Minus
One” playback.
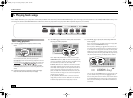
(1) Press the [SONG] button if it doesn’t light.
You can now select a Song, if you like (see p. 16).
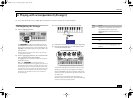
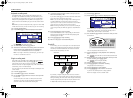
(2) Press the [MINUS¥ONE] button (the “MinusOne” mes-
sage appears in the display).
The 5 STYLIST buttons light to indicate that all tracks will be
played back.
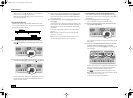
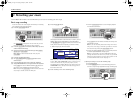
(3) Press one of the STYLIST buttons to switch off the corre-
sponding track(s). The assigned track icon flashes.
(Example: if you switch off the [DRUMS] button, the [10] icon
starts flashing.)
When a button lights, the corresponding track(s) is/are audi-
ble (i.e. not muted). You can also mute several tracks by
switching off the corresponding STYLIST buttons.
The icon appears and the selected part is muted.
Note: The Main part does not automatically adopt the Tone and
related settings of the melody part.
If you like, you can also mute several parts.
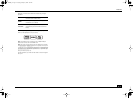
A
MARKER
A–B
SYNC
START
B
REPEAT
A–B
INTRO
MINUS
ONE
ENDING
MINUS ONE
E-200_US Page 18 Tuesday, January 27, 2004 4:01 PM