


r
E-200/E-100
50
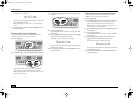
Deleting files on disk
The Delete functions allow you to erase files from the inserted
floppy disk. This may be necessary to make room for new files
(e.g. when the “Disk Full” message appears). Be careful, though,
to only delete files you are absolutely (positively) sure you will
never need again. Once a file has been deleted, it is gone for-
ever.
Note: As a rule, you should first make a backup copy of your disk
on your computer. After all, files really only become indispensable
once they are no longer available…
DEL Upr: Use this function to delete a User Program Set
from disk. Be aware that by doing so, you actually erase 10 User
Program settings.
DEL Sng: This allows you to delete a song file on disk.
(1) Insert the disk with the file you want to delete into the
drive.
(2) Press [DISK] to select the Disk mode.
(3) Use SELECT [√][®] to select “DEL Upr” or “DEL Sng”.
(4) Use SELECT [√][®] to select the file you wish to delete
(example: “USPR_005”). The Yes message starts flash-
ing.
(5) Press the [YES÷+] button.
To be on the safe side, the E-200 now asks you whether you
really want to delete the file (“Sure?”).
(6) Press [YES÷+] to delete the file, or [NO÷–] to abort the oper-
ation.
If you pressed [YES÷+], the display now shows the message
“Deleting”. Once the data have been deleted, the
“Complete” message briefly appears.
(7) Press another “big” button in the DATA ENTRY section to
leave this function.
Possible error messages
Format
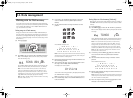
Before being able to save files to a disk, you need to prepare a
floppy disk. This is called “formatting”. If the floppy you are
about to use is IBM PC formatted, there is no need to format it,
though disk access is faster with disks formatted on the E-200.
Otherwise proceed as follows:
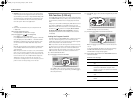
(1) Insert a disk into the drive.
Every floppy contains a square tab that allows you to “close”
a little window. With the tab in that position, you can format
the disk. Do not forget to write-enable the disk by closing
this little window prior to inserting the floppy disk.
(2) Press [DISK] to select the Disk mode.
(3) Use FAMILY [√][®] to select “FORMAT”. The “Sure?”
message appears and the Yes message starts flashing.
(4) Press [YES÷+] to format the disk.
Note: If you do not want to format your floppy, press [NO÷–].
Note: By formatting a disk, you erase all files it contains. It
would be a good idea to first check what it contains (e.g. on
your PC).
The value to the left of the “Formatng” message now
counts from “1” to “100” while the disk icon flashes to indi-
cate that the disk is being accessed. When the disk is format-
ted, the message “Complete” is briefly displayed.
No Disk You forgot to insert a floppy disk into the drive.
Protect You forgot to switch off the disk’s Write pro-
tection. Press the EJECT button of the disk
drive, remove the floppy and close the tab,
insert the disk again and press [YES÷+].
NoFormat The floppy disk is either not formatted or uses a
format the E-200 doesn’t recognize. Press
[YES÷+] to format it now (careful: this will erase
all data on disk).
Disk Err The disk is probably damaged and cannot be
used.
No Files The disk contains no files of the selected type.
Insert another disk.
E-200_US Page 50 Tuesday, January 27, 2004 4:01 PM