


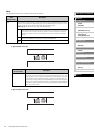


Internal Design of the CP5 & CP50
Reference
Left & Right Parts
[VOICE]
[PRE-AMP]
[MOD-FX]
[PWR-AMP] (CP5 only)
[LEFT1]/[LEFT2]/[RIGHT1]/
[RIGHT2] (CP5)
[LEFT]/[RIGHT] (CP50)
[COMMON]
Song Setting Area
[SONG SETTING]
[RECORD]
TRACK Part
[TRACK]
MIC INPUT Part
[MIC INPUT] (CP5 only)
Settings for All Parts
[REVERB]
Settings for All Performances
[MASTER COMPRESSOR]
[UTILITY]
[FILE]
Appendix
50 CP5/CP50 Reference Manual
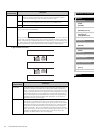
Save
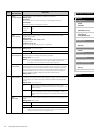
The parameters to be set on the Save screen are as follows.
If Type has been set to “All”:
If Type has been set to “Ext”:
On-screen
name
(and full name)
Description
Type This parameter is used to specify the type of file to be saved on the USB flash-memory device.
When you have specified the appropriate type, press the [ENTER] button to proceed. To return
to Page 1 of the File screen without saving data, press the [EXIT] button.
Setting values: All, Ext (External), or SMF (Standard MIDI File)
All
All User Performance memory data, all User Songs, and system settings (i.e., from the Utility
area, the Master Equalizer block, and the Transpose area, etc.) will be saved as a single file.
The extension .C5A is used for CP5 data; the extension .C6A, for CP50 data. The External
Performance memory is not part of the User Memory and will not, therefore, be included in
this file.
Ext
All External Performance memory data will be saved as a single file. CP5 data will be given
the file name EXTBANK.C5E; CP50 data, the filename EXTBANK.C6E.
SMF
The selected User Song will be saved as a MIDI file with the extension .MID.
On-screen name
(and full name)
Description
Name This parameter is used to specify a name for the All file to be saved. You can
turn Knob 1 (Cursor) to move the cursor within the displayed name. Then, using
Knob 2 (Data), you can change the character at the cursor position. The name
of an All file can contain upper case letters, numbers, and symbols. After you
have finished naming the file, press the [ENTER] button. When asked to confirm
that you wish to proceed, press either Knob 1 (YES [PUSH]) or the [ENTER] but-
ton to save the data, or press either Knob 3 (NO [PUSH]) or the [EXIT] button to
return to the Name screen.