


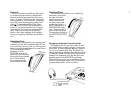

FUNCTION MODE:
SETTING OVERALL PERFORMANCE PARAMETERS
NOTE Yamaha reserves the right to continue to refine
and update factory preset voices. For this reason,
some ROMs may have this voice in a different loca-
tion, or may have a different voice altogether. Refer to
the notes which are packaged with the ROMs.
4. Play the keyboard, and explore this voice.
Observe the change in the sound when you
press the key gently and when you hit it hard
(not all voices have this touch sensitivity pro-
grammed into them). You'll probably want to
play all the voices in Bank A of this ROM car-
tridge. You can do this by pressing selector but-
tons [1] through [32]; you don't have to press
[MEMORY SELECT-CARTRIDGE] each
time.
NOTE At this point, the voice may not sound
"fight" or some of the features of the synthesizer
may not appear to work. This is likely to be due
to the settings of the FUNCTION controls, as
explained in the following section. WHAT
YOU'VE HEARD SO FAR MAYBE DRAMATI-
CALLY CHANGED BY MOVING JUST A FEW
CONTROLS. This is demonstrated in the next sec-
tion of the manual.
5. If you want to explore the "Keyboard & Plucked
Group" voices that are stored in Bank B of this
cartridge, slide the switch on the cartridge down
to "B" position, and again press the voice selector
buttons [1] to [32]. The same procedures apply
to the "Orchestral & Percussive Group" voices in
Bank A, and the "Complex & Effects Group"
voices in Bank B of the DX7 VOICE ROM
#
2 car-
tridge.
IMPORTANT NOTE
In order to provide meaningful examples as we explain
the various buttons and functions on the DX7, we will
refer to specific pre-programmed voices that are pro-
vided in the "MASTER GROUP", which is found in bank
A of the DX7 VOICE ROM
#
3 cartridge that comes with
the instrument. (These procedures are virtually the same
for the internal voices, but since we don't know what
particular voices are loaded in the instrument, we are
using a known set of voices for now. Then our exam-
ples should match what your instrument actually does.)
Some control functions have no effect unless the voice
with which they are used is already programmed to be
sensitive to the control.
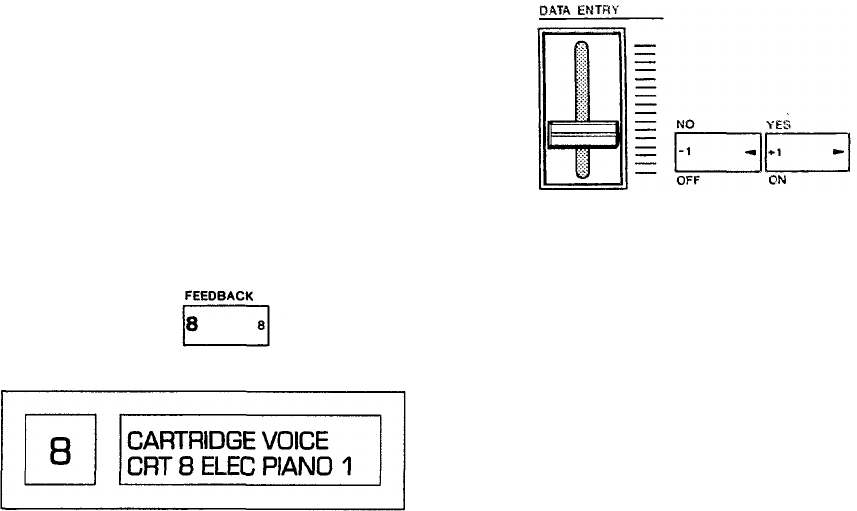
To play the voice we are using in this portion of the
manual as an example, you will need to set the DX7 to
select the cartridge voice called "ELEC PIANO 1" (Elec-
tric Piano 1), which is in location A-8 of the DX7 VOICE
ROM
#
3 cartridge. From the previous instuctions we'll
assume that cartridge is installed, the [MEMORY
SELECT- CARTRIDGE] button has already been
pressed and the top line of the LCD display already indi-
cates "CARTRIDGE VOICE" (if not, do so now). There-
fore you should only have to press the [8] button.
Press this
The display will change to show the voice
NOTE There is no "right way" or "wrong way" to
approach programming of the DX7, although some
methods may be rather inefficient. This chapter is pro-
vided to familiarize you with the use of some of the
programming functions. If something isn't perfectly clear
to you at first, don't spend too much time on it; it will
eventually make sense as you play the instrument and
become familiar with its basic features and functions. We
suggest
you
re-read
these instructions after
you've
gained
a certain degree of confidence with the DX7.
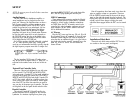
[DATA ENTRY]
A slider and two buttons at the left side of the control
panel are marked [DATA ENTRY]. This group of con-
trols is used for adjusting the settings of almost all the
programmable levels and modes. Moving the slider
down and up may turn one item OFF and ON, set
another for a level of from 0 to 7, and set still another
for a level or rate of from 0 to 99, and so on. For now,
just remember that [DATA ENTRY] is an assignable
group of controls that you use to change whatever you
have selected with other controls on the DX7.
Whatever EDIT mode or FUNCTION mode program-
ming parameter value happens to be displayed may sud-
denly "jump" to a different value as soon as the [DATA
ENTRY] slide control is operated, or it may change
gradually, depending on the specific value and the posi-
tion of the slider. Think of the slider as having a scale
(from bottom to top) of 0-3, 0-7, 0-12, 0-99 or OFF-ON,
depending on the function. If the slider is positioned at a
different point on its relative scale than the value dis-
played in the LCD window, then as soon as the slider is
moved at all, the displayed value will jump to the slider-
position value. In most cases, the two buttons next to
the slider will increment or decrement the displayed
value by 1 unit, with no "jump." The last selected FUNC-
TION parameter can be adjusted while in the PLAY
mode.
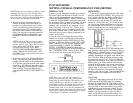
[FUNCTION]
There are 3 main modes of operation: PLAY mode,
EDIT mode and FUNCTION mode. The parameters
which can be adjusted in FUNCTION mode are those
that affect the overall sound, no matter which voice you
select (provided, in some cases, that the voice itself is
programmed to accept the function control). This in-
cludes such parameters as the tuning of the keyboard,
whether or not the portamento is active and how it
works, and the effects of the modulation wheel, foot
control, breath control, and the pressure sensitivity of
15