


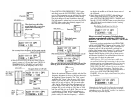
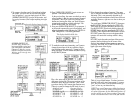
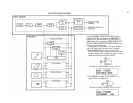


9. To compare what the sound is like with and without
the carrier, you don't have to turn down the output
level of operator 1; you can simply turn it off. Press
[OPERATOR ON/OFF 1] to turn off the carrier, and
try to play few notes. (Don't adjust anything else right
now.)
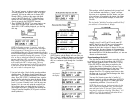
And see the display change from this
NOTHING HAPPENS! NO
SOUND! That's because you
just turned off the carrier, and
you cannot hear a modulator
(Operator 2) directly; you can
only here its effect on a carrier.
With the carrier shut off, there
is no sound.
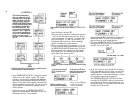
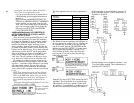
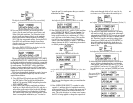
10. Press [OPERATOR ON/OFF 1] again to turn on
operator 1 and restore the sound.
In the previous Step, the reason we asked you not to
adjust anything is that the current operator changed
to operator 2, and if you were to try pressing edit
buttons and moving the slider you would be repro-
gramming the modulator without realizing it. You
would not hear what you were doing.
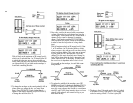
11. Now press [OPERATOR SELECT] to set operator 1
as the current operator (the one to be adjusted), and
adjust its frequency to be 0.50 using the [OSCILLA-
TOR- FREQUENCY COARSE] parameter.
The display should look like this
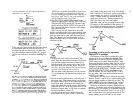
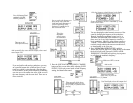
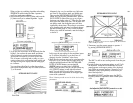
12. To make the sound more interesting, you'll want to
change the envelopes of the two operators. Begin-
ning with the current operator (1), change its initial
attack rate (Rate 1) and its release rate (Rate 4) using
the [EG RATE] button.
Play a few notes and see how the sound is some-
what more clarinet-like. The square envelope of the
modulator causes the note to become "pure" when
you release the key We'll correct that situation next.
(There is no need to change the EG levels for now.)
Operator 1 levels
remain unchanged
Initialized levels
for Operator 1
EG LEVEL 1 = 99
EG LEVEL 1 = 99
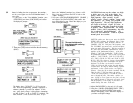
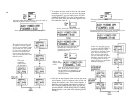
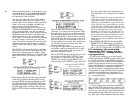
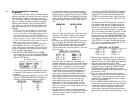
13. Now change the envelope of operator 2 the same
way so that the modulator has the same envelope as
the carrier. This is not necessarily desirable in all
voicing. In fact the modulators usually have different
envelopes. However, right now we want to show you
something.
You could press [OPERATOR SELECT], then press
the [EG LEVEL] button and adjust the [DATA EN-
TRY] slider all over again, but there's an easier way.
Use the [EG COPY] function by holding down the
[STORE] button and then pressing the [EG COPY
2] button. (The 6 Operator ON/OFF buttons are also
EG COPY buttons that you use to designate which
operator will receive the envelope which is being
copied.)
EG COPY copies the entire envelope of the current
operator (the one displayed in the corner of the
window) into whatever other operator or operators
you specify. BE SURE YOU START WITH OP1 in the
upper right corner of the display.
That's it, let go of both buttons. You have just trans-
ferred 4 levels and 4 rates from operator 1 to opera-
tor 2. Play a few notes. Now the timbre doesn't go
"pure" as soon as you release the key
NOTE There are still many more editing functions to
explore, and we'll use the settings you've just created
as a point of departure for the additional functions. If
you are ready to go on, please continue, ffyou want
to take a break and relax or have some fun with the
37
EG LEVEL 2 = 99
EG LEVEL 3 = 99
EG LEVEL 4 = 0
EG LEVEL 2 = 99
EG LEVEL 3 = 99
EG LEVEL 4= 0