


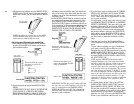


a RAM cartridge before submitting the instru-
ment for a new battery or repair. See page 49
for Cartridge Save and Load descriptions and
directions. Please do not try to change the
battery yourself ; expensive damage that is not
covered by your Warranty may result.
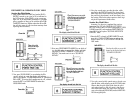
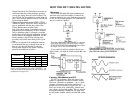
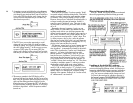
MODULATION WHEEL
FOOT CONTROL
BREATH CONTROL
AFTER TOUCH
When we arrange these four groups of FUNCTION
controls above one another on this page (for the Modu-
lation Wheel, Foot Control, Breath Control and After
Touch), you can see the groups are essentially identical.
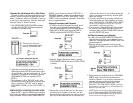
There are three main components of a voice to which
LFO modulation can be applied: to the PITCH, to the
AMPLITUDE, or to the EG (envelope generator) BIAS.
(Actually each operator or "sub-component" of a voice
may or may not be internally programmed to be sensi-
tive to these modulation sources.) The fourth button,
RANGE, lets you set the maximum amount of modula-
tion that can be applied to each of the adjacent three
voice components.
The only difference between the four groups of four
FUNCTION controls is the means you use to control the
LFO modulation. It can be introduced:
A) when you move the modulation wheel at the left of
the keyboard,
B) when you tilt an FC-3A foot controller plugged into
the MODULATION jack,
C) when you blow into the BC-1 breath controller
plugged into the BREATH CONT jack, or
D) when you press hard on a key (or keys) to activate
the after touch sensors within the keyboard.
Because the four groups of modulation controls all
operate similarly we will concentrate primarily on just
one modulation source: the MODULATION WHEEL.
First, make sure all modulation is OFF
NOTE While you may not be using a given source of
modulation, it can still affect the voice if its FUNC-
TION control parameters are inappropriately set.
SOME SETTINGS COULD RESULT IN LITTLE OR NO
AUDIBLE OUTPUT FROM THE SYNTHESIZER.
Therefore, to simplify the operation as we go through
the following explanations, we first instruct you to turn
off all the modulation sources except the MODULA-
TION WHEEL. Later when you actually play the
instrument, you can turn on the modulation as you
wish.
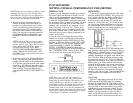
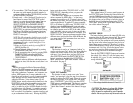
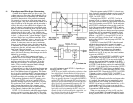
1. If the instrument is not still in FUNCTION mode
(upper line of the LCD display showing "FUNCTION
CONTROL), press the [FUNCTION] button. Then
press [MODULATION WHEEL-PITCH] and see
whether the modulation is on.
(The ??? will either be "OFF" or "ON")
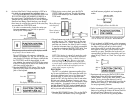
2. For now, the object is to turn off all modulation.
Therefore, if the display shows "WHEEL
PITCH = ON", use [DATA ENTRY] to turn if off.
More slider down
or
press
this
button to turn off the modula-
tion
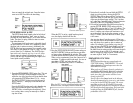
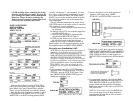
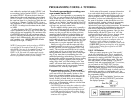
3. Repeat steps 1 and 2 above, but instead of pressing
[MODULATION WHEEL PITCH], press [MODULA-
TION WHEEL- AMPLITUDE] and then [MODULA-
TION WHEEL-EG BIAS]. In each instance, use
[DATA ENTRY] as required to turn OFF the modula-
tion.
And press this if necessary to
ensure all the modulation
sources are turned off
4. Now repeat steps 1 through 3 above for the Pitch,
Amplitude and EG Bias functions of the FOOT CON-
TROL, BREATH CONTROL, and AFTER TOUCH
groups; in each case. make sure the LCD display
indicates the function is OFF or else use (DATA EN-
TRY] to turn it off.
NOTE It is not necessary to press the [RANGE] but-
tons to set the range for any of these modulation
sources because the range has no effect when the
modulation is turned off.
21