


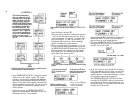
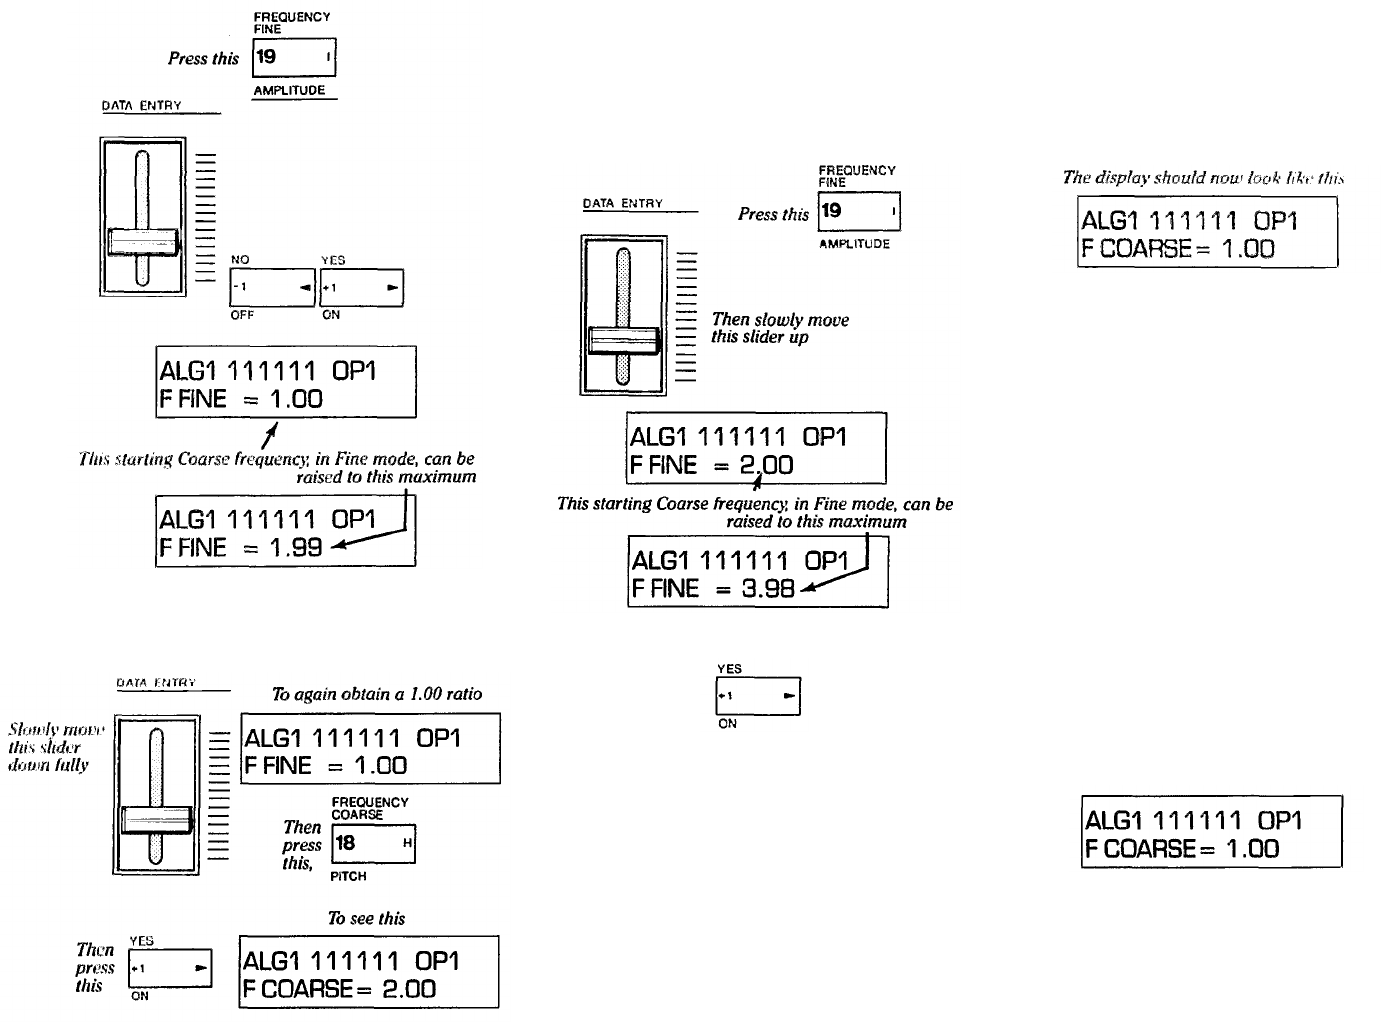
6. Slide [DATA ENTRY] all the way down so the fre-
quency returns to 1.00, and then press [OSCILLA-
TOR-FREQUENCY COARSE] and use DATA
ENTRY [+1] to set the frequency ratio to 2.00.
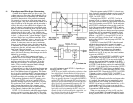
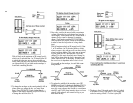
Then slowly move this slider
up and down fully, or use these
buttons while continuing to
play a note
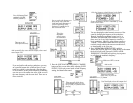
7. Press [OSCILLATOR-FREQUENCY FINE] again,
and slowly move the (DATA ENTRY] slider all the
way up. The increments you get with the Fine adjust-
ment will depend on the beginning Coarse setting.
The pitch change will seem continuous when the
Fine adjustment is selected and you move the [DATA
ENTRY] slider, rather than discretely stepped, as it
does with the Coarse setting.
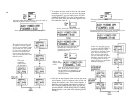
If the ratio does not quite reach 3.98 when you push the
slider up, press the increment button [>] once or more.
Notice the maximum increase available with the Fine
frequency adjustment is always a little less than twice
the beginning Coarse frequency The "Fine" control
multilplies the "Coarse" value by up to 1.99. For ex-
ample, if you start at a ratio of 1.00, the Fine adjust-
ment will go only as high as 1.99 (just under twice
1.00). Start at 2.00, and the Fine adjustment will go
only as high as 3.98. Start at 3.00, and the Fine ad-
justment will go only as high as 5.94. Start at 31.00,
and Fine will take you up to 61.69. Thus you can use
a combination of Coarse and Fine adjustments to
achieve anywhere from 1/2 the "normal" keyboard
pitch to nearly 62 times that frequency — which is
too high to be audible on all but the lowest notes of
the keyboard.
8. Slowly bring the [DATA ENTRY] slider all the way
down so the pitch returns to a ratio of 2.00. Then
press [OSCILLATOR-FREQUENCY COARSE] and
then the [-1] DATA ENTRY button to reset the ratio to
1.00. (This should now be identical to the "starting"
initialized voice.)
How to create Frequency Modulations
getting acquainted with the
OPERATOR
SELECT,
OUTPUT
LEVEL
and
ON
- OFF edit
featurec
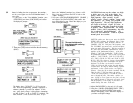
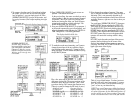
Up to now you have manipulated only OPERATOR 1
which, in ALGORITHM 1, happens to be a carrier. We'll
now leave Operator 1 set at the "square" envelope at a
frequency ratio of 1.00 (as initialized), and begin ex-
ploring what happens when Operator 2 is used to mod-
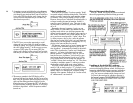
ulate Operator 1. For review, we again point out the
Operator On/Off display (which you are about to use)
and illustrate Algorithm 1, but with additional informa-
tion you may now begin to understand.
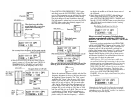
NOTE If you 're "lost" or if it has been a while since
you read and followed the instructions in the previous
sections, you can start "from scratch" here by pressing
[FUNCTION], then [VOICE INIT], then answering
[YES] [YES]. The DX7 will now be set as we assume
it is for the following instructions. The display how-
ever, may not match: if a different editing parameter is
shown, press [OSCILLATOR-FREQUENCY
COARSE]. Now your diplay should match the follow-
ing illustration.
Remember the display of 6 1 's tell you the correspond-
ing 6 operators are turned ON at this point in the pro-
gramming process. The On/Off "switches" are shown in
the following algorithm diagram.
33