


VL Version 2
17
2: Test Driving Version 2
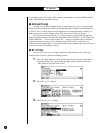
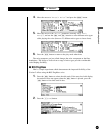
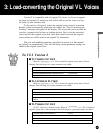
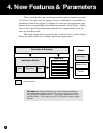
Rotate the breath controller OFFSET trimmer slowly clockwise, using the
supplied screwdriver, until the vertical cursors above and below the curve graph
move slightly to the right and the number below the graph is greater that “0”. Then
slowly rotate the trimmer carefully counter-clockwise until the number below the
graph just reaches “0” (the cursors will be lined up with the left end of the graph),
then stop.
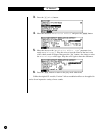
6. Adjust the Breath Controller Gain
Place the breath controller mouthpiece in your mouth and blow — notice that
the cursors move to right and the number below the graph increases according to
how hard you blow. Adjust the breath controller GAIN trimmer so that you can
comfortably vary your breath pressure between 0 and 127 on the graph. This com-
pletes the gain adjustment.
7. Readjust the Offset If Necessary
If adjusting the gain causes the offset setting to shift, readjust the offset as
described in step 5.
At this point you can use the “Curve Type” parameter to select the curve
type that best suits your playing style.
8. Return to the Play Mode
Press the P button to return to the PLAY mode.
●
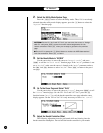
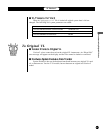
Foot Controllers
Although the VL1 Ver.2 and VL7 Ver.2 have
jacks for two foot controllers, it is not necessary to use
both. To begin with plug the supplied FC7 Foot
Controller into the rear-panel FOOT CONTROLLER
2 jack.
The VL1-m Ver.2 will responsd to MIDI foot
controller control change data received from the
controlling device.
NOTES ■ For more information on Foot Controller setup and operation, see the
instructions packed with the supplied FC7 Foot Controller.