


65
Owner's Manual
Owner's Manual
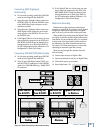
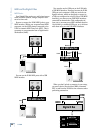
To use an internal effect on an Aux Send:
1. Adjust the Aux Send level on the individual
channel(s) you want to send to the internal ef-
fect (Windows > Auxes). Use Cue 1 (Aux 9/10)
or Cue 2 (Aux 11/12) if you want to use a stereo
effect.
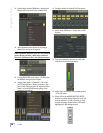
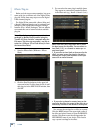
2. Open the Effects Rack (Windows > Effects
Rack) and, if you haven't done so yet, load the
effect into the Effects Rack using the New Plug-
in button.
3. Select the Aux Send as the input source for the
effect. If using the stereo feature of an effect,
select Aux 9/Aux 10 (or Aux 11/Aux 12) as the
left and right input sources, respectively.
4. On an unused channel, select the output of the
effect as its source. If using the stereo feature
of an effect, assign the effect's left output to
one channel and the right output to an adjacent
channel. Use the PAN control to pan the effects
return left and right.
5. Use the instrument or vocal channel's Aux Send
(touch the Auxes section of the channel strip to
open the AUXES window, or click and drag on
the horizontal bar in the Auxes section) to ad-
just the amount of signal going to the selected
effect.
6. Use the Aux Master (Fader Bank 4: MASTERS)
to adjust the overall level going to the selected
effect.
Note: The default setting for each Aux Master level is
0.0 dB (unity gain). This typically provides suffi cient
send level and doesn’t usually require adjustment.
7. Use the channel fader for the effect return(s)
to control the amount of processed signal
returning to the left and right bus (make sure
L-R is selected in the Assign section for the
channel(s).
To use an internal effect on a channel or master insert:
1. Open the Assign Window (Windows > Assign)
and select the effect in the Pre Insert or Post
Insert drop-down box.
Note: The effect must be loaded in the Effects
Rack before it appears in the drop-down box.
2. The signal is automatically routed to the ef-
fect's input and returned to the selected insert
point in the channel's signal path.
Note: See the instruction manuals for your plug-
ins for specifi cs on individual functionality.
Dynamics and EQ Applications
Dynamics and equalization are typically applied in
one of two ways:
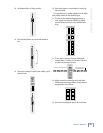
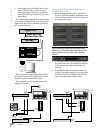
1. Processing Dynamics and EQ Before Tape
• Touch the Equalizer box on a channel that is
being routed to tape (Fader Bank 1) in the chan-
nel strip to open the EQUALIZER window (or
select Windows > Equalizer).
• Adjust the EQ to taste.
• Double-click the SELECT button on the channel
to open the on-screen Dynamics window (Com-
pressor and Gate).
• Set compression or gating.
2. Processing Dynamics and EQ After Tape
• Touch the Equalizer box on a channel that is re-
turning signal from the multitrack recorder for
mixdown (Fader Bank 2) to open the EQUAL-
IZER window (or select Windows > Equalizer).
• Adjust the EQ to taste.
• Double-click the SELECT button on the channel
to open the on-screen Dynamics window (Com-
pressor and Gate).
• Set compression or gating.
Since a tape return receives its feed from the mul-
titrack, dynamics and EQ changes made here don’t
affect what is printed to tape.
Other applications include applying dynamics and
EQ to an external effects send via a master Aux
Send channel (Fader Bank 4: MASTERS), or apply-
ing dynamics and EQ to an external effects return
(returned via an unused channel).
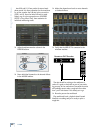
In addition, the eight master buses (Bus 1-8) and
the Mix Left and Right buses have dynamics and EQ
controls as well.
Dynamic and EQ control should occur only once
in any given signal path. Avoid subjecting any signal
path to multiple stages of dynamics or EQ processing.
As a rule, fewer circuits almost always result in more
pristine and accurate audio—even though the X.200
signal path is incredibly accurate and transparent.
Many engineers prefer to save all EQ for mix-
down, so as to include the least audio manipula-
tion for a more pure sound. Many recordists rough
the sound in when recording, using whatever EQ
and dynamics they feel the sound needs, then they
perfect the audio during mixdown. Many excellent
recordings have been the result of these techniques
and more. Experiment, and let your ears determine
what works best for you.