|
26
ProKeys Sono 88 User Guide
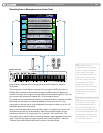
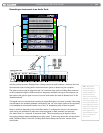
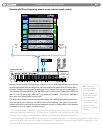
In a typical Direct Monitor scenario, plug your microphone into the Microphone input and guitar into the Instrument input on the
rear panel. Configure a mono track to record from input channel one, and a second mono track to record from input channel two.
Arm (record enable) both mono tracks in your audio software and set their recording levels using the gain controls on ProKeys
Sono. Next, set the Direct Monitor Level and you are ready to record. If you are recording your mic and guitar while listening to
tracks already recorded in your computer, you might want to listen once before starting the actual recording in order to set your
Direct Monitor Level relative to the tracks playing from your computer.
➜ IMPORTANT: The Direct Monitor knob enables monitoring of all audio signals that
enter any of the ProKeys Sono audio inputs. However, the ProKeys Sono outputs must be
selected within your recording software in order to hear sounds created by virtual (computer
software-based) MIDI instruments. Be sure “ProKeys Sono 88” or “USB Audio Device”
is selected as the audio output device within your recording software, and that you have
headphones connected to the headphone outputs on the front of ProKeys Sono or amplified
speakers connected to the 1/4” outputs on the back of ProKeys Sono.
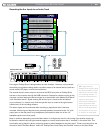
The Mono Button
When the Mono button is pressed, the Microphone input sends its signal to both
the left and right outputs, and the Instrument input also sends its signal to both the
left and right outputs. This means that you will hear these input signals centered
between both speakers (or your headphones). When this button is not pressed,
the Microphone input will be sent to the Left Output and the Instrument input will be
sent to the Right Output. This means that the microphone input will be panned hard
left (i.e., heard only on the left speaker or headphone) while your instrument input will
be panned hard right when you listen back using Direct Monitor.
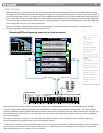
In its default state, the Mono button only affects how you hear signals from the
Microphone and Instrument inputs, but does not affect how these signals are
recorded. When recording to a stereo track, signal from the Microphone input will
appear as input channel one (referred to as the “left input” in certain applications)
whereas the instrument input appears as input channel two (the “right input”).
These signals can be recorded together on to a stereo track, but it is recommended
that you record the inputs on two separate mono tracks (since this will give you
more control over each individual track).
Tip: ProKeys Sono can be
configured so that signals from the
Microphone and Instrument inputs
are recorded exactly as heard when
monitoring in Mono. Enable the
MONO Input Record function in Edit
mode to use this feature. Once this
setting has been made, the Mono
button will not only affect the way
you hear yourself while recording
(monitoring), but also how the signal
is recorded by your computer. In
this scenario, if the Mono button
is active and you are recording to
a stereo track in your sequencing
software, any mono source (such
as a Microphone or a connected
instrument) will be recorded to both
channels of the stereo track (left
and right). As a result, both, the
microphone and instrument signals
will appear centered between both
speakers – essentially creating a
two-channel mono recording. See
the “Mono Input Record Key” portion
of the “Advanced ProKeys Sono
Functions in Edit Mode” chapter for
additional information on this.


