|
33
ProKeys Sono 88 User Guide
4. Program Change
Program change MIDI messages can be used to select any of the 128 built-in MIDI instrument sounds on ProKeys Sono, or
to select sounds on external MIDI synthesizers or sound modules connected to the MIDI output jack.
NOTE: When ProKeys Sono is set to Local On, program change messages are always sent to the
MIDI Out jack and the internal sound engine. Program change messages can be sent to just the
MIDI Out jack if the keyboard is set to Local Off. For additional information on Local On and Local
Off modes, see the “Local On/Off Key” section of this chapter.
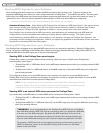
If the Data “<“ and “>” buttons have been assigned to control the program number, the LEDs above the buttons will not
change, since it is not possible to select a program with a negative value.
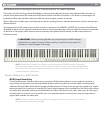
To assign the Data “<” and “>” buttons to send program change messages:
1. Press the Edit Mode button.
2. Press the black key above F3 (F#3).
Pressing both the “<” and “>” buttons together will recall Program 0, which selects the first sound patch on any synthesizer
capable of processing MIDI program changes. Program 0 corresponds to the Grand Piano sound on ProKeys Sono. An
additional method of sending Program Change messages is described in the “ProKeys MIDI Output Settings” chapter of this
User Guide.
5.and6.BankLSBandBankMSB
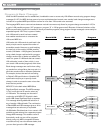
Program changes are the most commonly used messages to change instruments and voices. However, the number of
instruments accessible using only the program change MIDI command is limited to 128 (0-127). Since some devices
have more than 128 voices, they require a method to organize their large number of sounds into banks. Such devices use
Bank LSB (Least Significant Byte) and/or Bank MSB (Most Significant Byte) change messages to select between groups
of sounds (banks). These devices then access the sounds within these banks by using program change messages. See
the “MIDI Messages In-Depth” chapter of this User Guide for additional information. The Data “<” and “>” buttons can be
assigned to send incremental Bank LSB or Bank MSB messages.
13
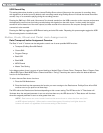
To assign the Data “<” and “>” buttons to send bank change messages:
1. Press the Edit Mode button.
2. Press the black key above G3 (G#3) or A3 (A#3), representing Bank LSB or Bank MSB respectively.
Now the Data “<“ and “>” buttons can be used to send Bank LSB or Bank MSB change messages. As with Program
changes, if the Data “<“ and “>” buttons are selected to vary the Bank LSB or MSB number, the LEDs above the buttons will
not change, since it is not possible to have a Bank with a negative value. Pressing both the “<” and “>” buttons together will
recall Bank 0. Bank 0 is the bank in which the internal ProKeys Sono sounds reside. An additional method of sending Bank
Change messages is described in the “ProKeys MIDI Output Settings” chapter of this User Guide.
13
NOTE: Bank change messages must be followed by a program change message in order to recall
a sound. Bank change messages by themselves do not activate a sound, but only locate and access
a predefined location of a set (bank) of 128 sounds.
7. Tuning
This key will assign the Data buttons to increment or decrement the Master Tune Setting of ProKeys Sono. The tuning range
is +/- 50 cents. This only affects the internal sound engine. Push and hold the Data < or > button while playing the keyboard
until the desired tuning is found.
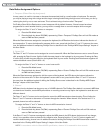
To assign the Data buttons to affect the tuning of the built-in ProKeys Sono sounds:
1. Press the Edit Mode button.
2. Press the black key above D4 (D#4), representing “Data = Tuning.”
Now the Data “<“ and “>” buttons can be used to adjust the master tuning of the sounds built into ProKeys Sono.
Pressing both the Data “<” and “>” buttons at the same time restores the tuning offset to zero.


