30
Execution of Effects
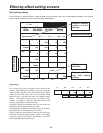
3) Pattern selection
Select the pattern using the direct transition button or
using the number keys. Patterns with numbers 3000 and
up are key patterns.
Perform the border, shadow, trail and other settings on
the LCD setting screen.
The separate border, trail and other settings are stored in
each direct button and read out.
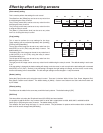
4) Key adjustment
Adjust the slice, slope and other settings on the LCD
setting screen.
5) Execution
Slide the transition lever to the B side or set the ME
transition time and press the Auto Take button.
DSK key
1) Preparation
Check that the DSK button’s lamp is neither lighted nor
flashing. If it is lighted or flashing, it means that the DSK
ON status is already established so press the DSK button
to turn off the lamp.
2) Setting
Select the input source of the transition destination using
the Preset bus cross point button.
The preview selection can now be set as ME and the
images of the transition destination can be previewed at
the Preview connector.
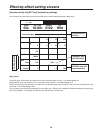
3) Execution
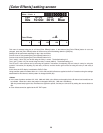
Press the DSK/Fade button and perform the DSK/Fade
settings.
Select the DSK source, and perform the slice and slope
settings.
Set the DSK transition time.
When the button is pressed again, the transition is
executed until the DSK ON status. To set DSK to OFF,
press the DSK button to turn off its lamp.
Fade
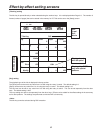
1) Preparation
Perform the fade destination color and audio fade settings
using the DSK/Fade settings.
2) Execution
Press the FADE button. When its lamp flashes, the fade-
out status is established. For fade-in, press the FADE
button to turn off its lamp.
AB transition
1) Preparation
Slide the transition lever to the A side.
2) Input selection and preview
Select the input source of the transition destination using
the B bus cross point button.
The preview selection can now be set as ME and the
images of the transition destination can be previewed at
the Preview connector.
3) Pattern selection
Select the pattern using the direct transition button or
using the number keys. Patterns with numbers 2999 or
lower are transition patterns.
Perform the border, shadow, trail and other settings on
the LCD setting screen.
The separate border, trail and other settings are stored in
each direct button and read out.
4) Execution
Slide the transition lever to the opposite side or set the
ME transition time, and then press the Auto Take button.
To execute a transition from B to A, set the A bus input in
step 2) and follow the same procedure.
Preset program transmission
1) Preparation
When the transition lever is slid all the way to one end, the
cross point button setting is switched over by Prog/Preset.
2) Input selection and preview
Same as for AB transition.
3) Pattern selection
Same as for AB transition.
4) Execution
Same as for AB transition.
The transition can be executed by repeating steps 2), 3)
and 4).
Key
1) Preparation
Slide the transition lever to the A side. The A bus now
becomes the background.
2) Input selection and preview
Select the input source to be inlaid using the B bus cross
point button.
The preview selection can now be set as ME and the
keyed images can be previewed at the Preview
connector. In the case of chroma keys, the colors are
selected using the cursor on the preview screen.


