


115
Sample Edit
Sampling
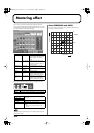
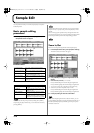
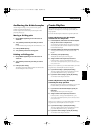
Setting the start/end points
of the sample
You can specify the portion of the sample that will actually sound.
You can also specify the region that is to be looped.
1.
Select the sample that you want to edit.
For details on how to select a sample, refer to Sample List (p.
115).
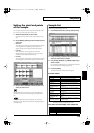
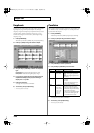
2.
Use [CURSOR (up/down)] to select the point that you
want to set.
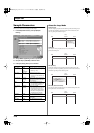
•
Start Point:
This is the point at which playback will start. Set this so that any
unwanted portion at the beginning of the sample will be
skipped, and the sound will begin at the desired moment.
•
Loop Start:
This is the point at which loop playback (second and
subsequent times) will start. Set this if you want to loop the
sound from a point other than the start point.
•
End Point:
This is the point at which playback will end. Set this so that any
unwanted portion at the end of the sample will not be heard.
3.
Use [VALUE] or [INC/DEC] to move the point so it's
where you want it to be.
You'll probably find it convenient to zoom-in when making fine
adjustments, and zoom-out when making major adjustments (p.
114).
After specifying the start point and end point, you can execute
Truncate (p. 117) to delete unwanted portions at the beginning and
end of the sample.
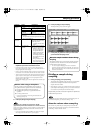
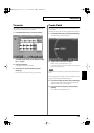
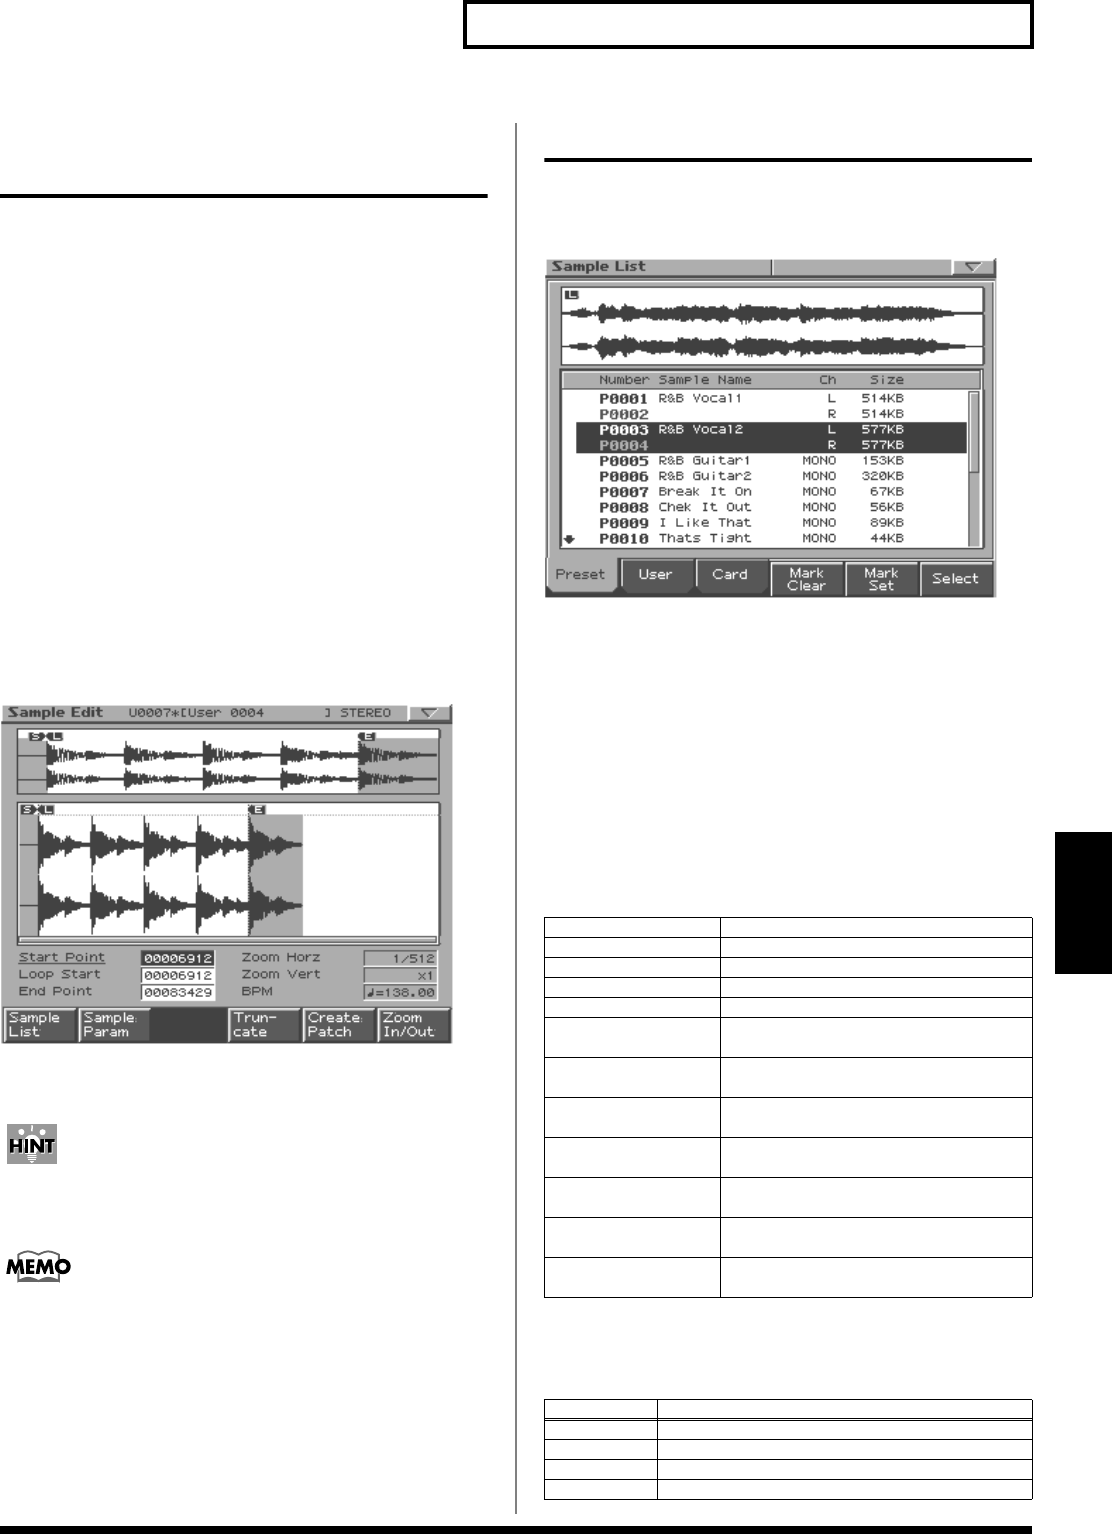
Sample List
Here’s how to select a sample from a list.
1.
In the Sample Edit screen, press [F1 (Sample List)].
2.
Use [F1 (Preset)]–[F3 (Card)] to specify the bank from
which you want to select a sample.
3.
Use [VALUE], [INC/DEC], or [CURSOR (up/down)] to
select a sample.
If you hold down [SHIFT] while you operate the above buttons,
the sample number will change in steps of ten.
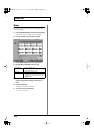
4.
Press [F6 (Select)].
The edit screen for the selected sample will appear.
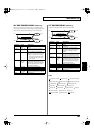
Function buttons
*1: If not even check mark is assigned, the operation will be
executed on the sample selected by the cursor.
The status of each sample in the sample list
[F1 (Preset)]
Select from preset samples.
[F2 (User)] Select from user samples.
[F3 (Card)] Select from memory card samples.
[F4 (Mark Clear)] Remove the check mark from the sample.
[F5 (Mark Set)] Add a check mark to the sample.
[F6 (Select)] Display the edit screen for the selected
sample.
[SHIFT] +
[F1 (Delete Sample)]
Delete all checked samples with their files.
(p. 124) (*1)
[SHIFT] +
[F2 (Erase)]
Erase all checked samples from memory
(p. 124). (The files will not be deleted.) (*1)
[SHIFT] +
[F3 (Load)]
Load the checked samples into memory.
(p. 124) (*1)
[SHIFT] +
[F4 (Mark Clear All)]
Clear the check marks from all samples in
the folder.
[SHIFT] +
[F5 (Mark Set All)]
Add a check mark to all samples in the
folder.
[SHIFT] +
[F6 (Create Rhythm)]
Execute “Create Rhythm” (p. 119) on all
checked samples.
Icon
Sample status
NEW
Sample has just been sampled or imported
EDIT Sample has been edited but not yet saved
UNLOAD Sample has not been loaded
None Sample has just been saved or loaded
MC-909_Ref_e.book 115 ページ 2005年3月1日 火曜日 午後3時29分