


118
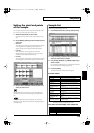
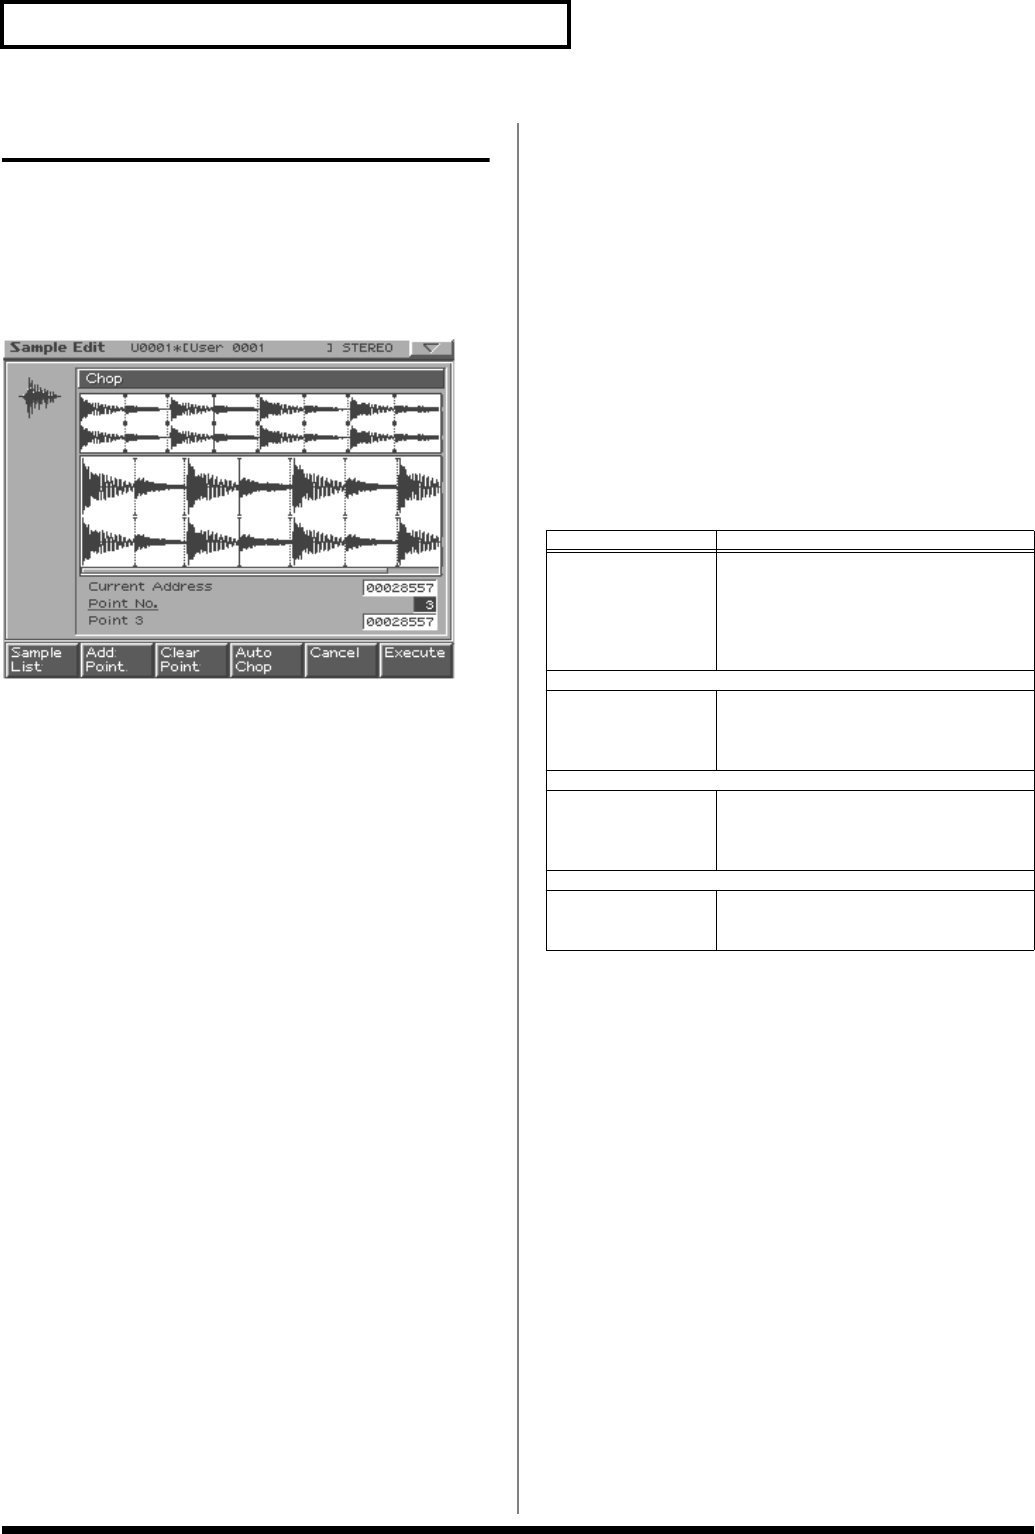
Sample Edit
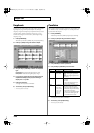
Chop
This operation divides the sample into two or more samples (a
maximum of 16 samples).
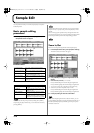
1.
In the Sample Edit screen, press [CHOP].
Alternatively, hold down [SHIFT] and press [F1 (Chop)].
2.
Press [F1 (Sample List)] and select a sample.
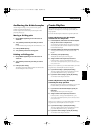
Procedure for dividing a sample
You can freely specify the point(s) at which the sample is to be
divided.
1.
Press [CURSOR (up)] to move the cursor to “Current
Address.”
2.
Use [VALUE] or [INC/DEC] to move the point.
3.
At the location where you want to divide the sample,
press [F2 (Add Point)].
The current location will be the dividing point.
4.
Repeat steps
2
and
3
to specify other dividing points
as desired.
The sample will be divided into a maximum of 16 samples.
5.
Press [F6 (Execute)].
A message will ask you for confirmation.
6.
To execute, press [F6 (Execute)].
The Chop operation will be executed, and the divided samples
will be saved. (Normally, they will be saved in consecutive
sample numbers.)
* To cancel, press [F5 (Cancel)].
When you execute the Chop operation, a message will ask
whether you want to execute Create Rhythm.
7.
If you want to execute Create Rhythm, press [F6
(Execute)].
• Create Rhythm -> p. 119
8.
If you don’t want to execute Create Rhythm, press
[F5 (Cancel)].
You will return to the Sample Edit screen.
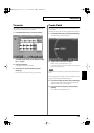
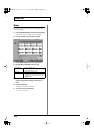
Automatically dividing a sample
(Auto Chop)
Here’s how you can automatically specify the points at which
the sample is to be divided, and then divide the sample.
1.
Press [F4 (Auto Chop)].
The Auto Chop sub-window will appear.
2.
Press [CURSOR (up)] to move the cursor to “Chop
Type.”
3.
Use [VALUE] or [INC/DEC] to select the method by
which the sample is to be divided.
4.
Press [CURSOR (down)].
5.
Use [VALUE] or [INC/DEC] to set the value.
6.
Press [F6 (Auto Chop)].
The dividing points will be automatically specified according to
the settings you made.
The sample will be divided into a maximum of 16 samples.
* To cancel Auto Chop, press [F5 (Close)].
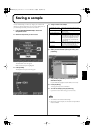
7.
Press [F6 (Execute)].
A message will ask you for confirmation.
8.
To execute, press [F6 (Execute)].
The Chop operation will be executed, and the divided samples
will be saved. (Normally, they will be saved in consecutive
sample numbers.)
* To cancel, press [F5 (Cancel)].
When you execute the Auto Chop, a message will ask whether
you want to execute Create Rhythm.
9.
If you want to execute Create Rhythm, press [F6
(Execute)].
• Create Rhythm -> p. 119
10.
If you don't want to execute Create Rhythm, press
[F5 (Cancel)].
You will return to the Sample Edit screen.
Parameter
Explanation
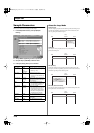
Chop Type
How the sample is to be divided
Level:
Divide according to volume.
Beat:
Divide at beats based on the BPM
(p. 116) of the sample.
Divide x:
Divide into ‘x’ number of
equal lengths.
If Chop Type is Level
Level
Level at which the sample is to be divided
Lower settings of this value will cause
the sample to be divided more finely.
Range:
1–10
If Chop Type is Beat
Beat Beat interval at which the sample is to be
divided
Range:
1/32, 1/16T, 1/16, 1/8T, 1/8,
1/4T, 1/4, 1/2, 1/1, 2/1
If Chop Type is Divide x
Times
Number of samples into which the sam-
ple is to be divided
Range:
2–16
MC-909_Ref_e.book 118 ページ 2005年3月1日 火曜日 午後3時29分