22
Editing an automix
1. Press [PLAY (DISPLAY)].
2. Hold down [SHIFT] and press [F6 (UTIL)].
3. Press [PAGE] so that [F5] indicates “A.Mix,” and then
press [F5 (A.Mix)].
fig.4-02
4. Press [F2 (Micro)].
5. Press [PAGE] so that [F1] indicates “In.”
fig.4-03
6. Make sure that the cursor is located at “Edit Target,” and
use the TIME/VALUE dial to select the type of automix
data to which you wish to apply the Gradation
operation.
7. Use [ ][ ] to move the cursor to the first marker of
the automix data to which you wish to apply the
Gradation operation, and press [F1 (In)].
8. Use [ ][ ] to move the cursor to the last marker of
the automix data to which you wish to apply the
Gradation operation, and press [F1 (Out)]. Check marks
will be added to the range selected for Gradation.
fig.4-04.e
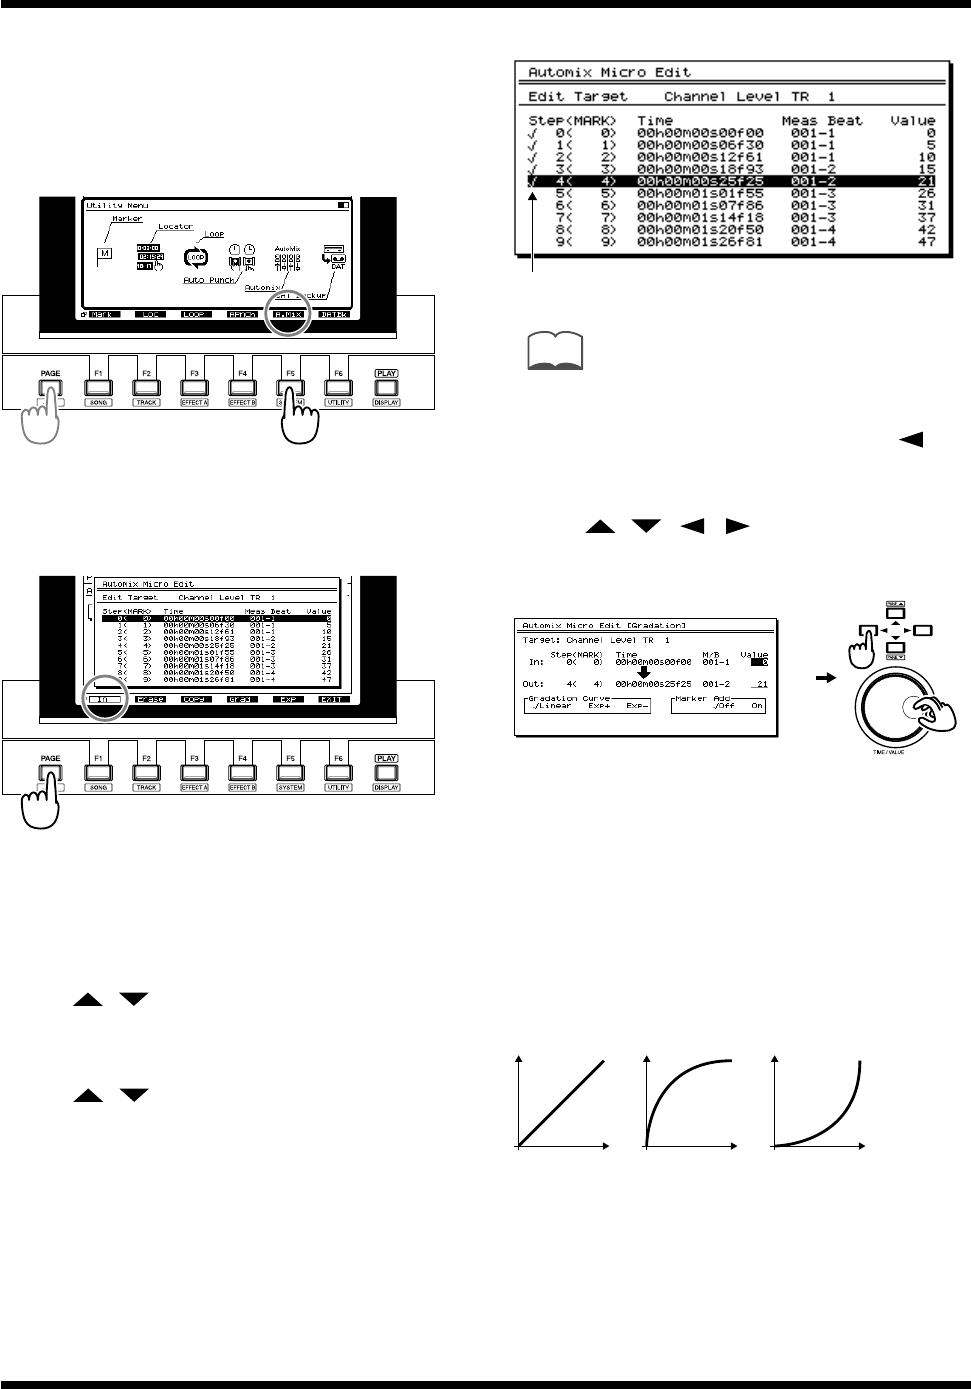
MEMO
You can rotate the TIME/VALUE dial to modify the automix
setting value at the cursor location. If you wish to re-select
the type of automix data that will be edited, press [ ].
9. Press [F4 (Grad)].
10. Use [ ][ ][ ][ ] to move the cursor. Rotate
the TIME/VALUE dial to set each parameter.
fig.4-16
Value
Adjust the beginning (In:) and end (Out:) of the Gradation
area.
Gradation Curve
Select the curve by which the gradation will be created.
Linear: Linear.
Exp+: Convex above (exponential curve).
Exp-: Convex below (exponential curve).
fig.4-17
Marker Add
If this is turned “On,” markers will automatically be added
to the area specified for gradation, in the optimal locations
for the curve that you selected in “Gradation Curve.” If this
is turned “Off,” markers will not be added.
Check marks
Linear Exp+ Exp-


