


12
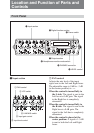
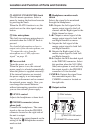
5 ADJUST (PUSH ENTER) knob
Used for menu operations. Select a
menu by turning the knob and execute
by pressing the knob.
When the SLATE function is on, this
switch acts as the slate signal output
button.
6 Slate microphone
This built-in condenser microphone is
activated when the ADJUST knob is
pressed.
For detailed information on how to
output voice from the microphone, see
“To output the voice from the
microphone or a 1-kHz reference
signal” on page 10.
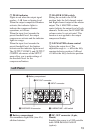
3 Power switch
Turns the power on or off.
When the power is on, the external
power supply is selected automatically
when the power is supplied externally.
If the internal batteries are inserted,
the power supply is not interrupted
even if you disconnect and re-connect
the external power supply. Also, you
can change the internal batteries
without interrupting operations when
you use the external power supply.
4 LEVEL control
Adjusts the headphones volume level.
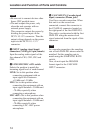
5 PHONES connector (stereo
phone jack)
Connects the headphones. The same
signal as the one from the PHONES
connector located on the right side of
the unit is output.
The signal to be output depends on the
setting of the 6 Headphones monitor
mode switch.
6 Headphones monitor mode
switch
Selects the signal to be monitored
through the headphones.
L/R: Outputs the Left signal of the
master output signal to the Left
channel and the Right signal to the
Right channel as stereo.
L+R: Outputs a mixed signal of the
master output signal to both Left
and Right channels as mono.
L: Outputs the Left signal of the
master output signal to both Left
and Right channels.
R: Outputs the Right signal of the
master output signal to both Left
and Right channels.
M-S: Outputs the M/S decoded signal
to the PHONES connector. Select
this position when the M-S (Mid-
Side) microphone is used and only
the output signal to the PHONES
connector is to be decoded.
CAMERA: Outputs the signal from
the camcorder input to the
CAMERA connector located on
the right side.
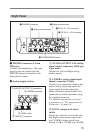
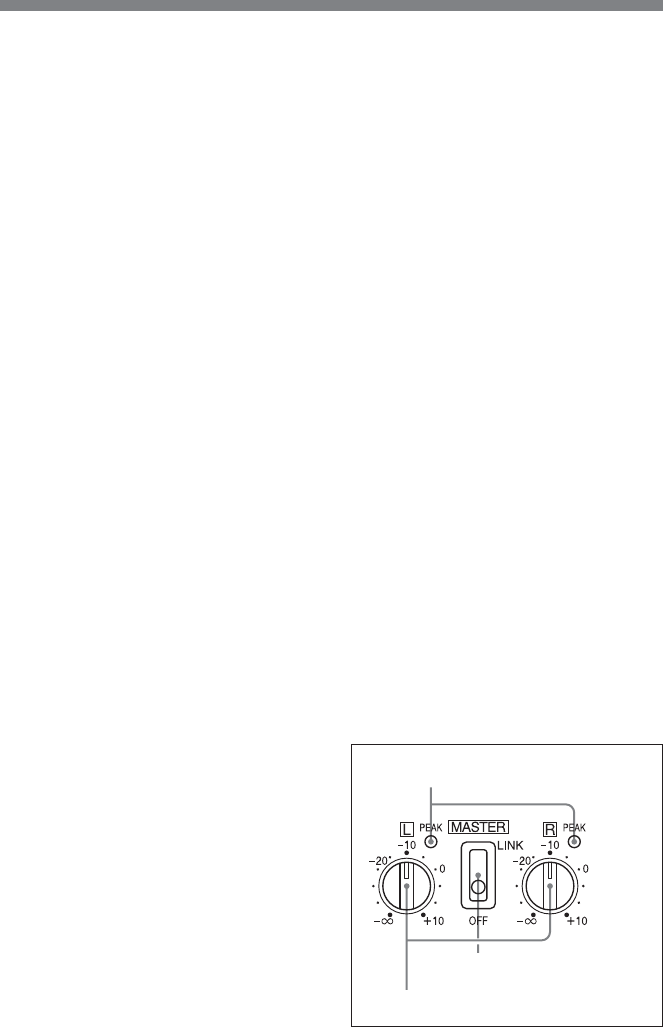
7 Output section
1 PEAK indicator
2 MASTER LINK switch
3 L/R MASTER volume control
Location and Function of Parts and Controls