


35
Checking the Status of
a Connection
The 3. CAMERA RETURN sub-menu
allows you to check for
misconnections of lines or other
problems between the unit and the
camcorder. This function can prevent
trouble.
To confirm the status of a connection,
proceed as follows.
1 Turn on the power of the unit and
the camcorder.
2 Match the reference level of the
unit and the camcorder.
Set the LEVEL switch on the right
panel of the unit and the input
level select switch on the
camcorder to the same value.
When connecting with a +4 dBu
reference output level:
Set the LEVEL switch of the unit
to +4 and the input level select
switch of the camcorder to LINE.
When connecting with a –60
dBu reference level:
Set the LEVEL switch of the unit
to –60 and the input level select
switch of the camcorder to MIC.
For detailed information on the
switches of the camcorder, refer
to the operations manual supplied
with the camcorder.
3 Send a 1-kHz reference signal
using the SLATE function of the
unit, and adjust the output level of
the unit to the reference value
using the L/R MASTER volume
control.
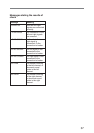
The following table shows the
reference position of each meter.
Output meter Reference position
VU 0
PPM1 4
PPM2 0
PPM3 0
PPM4 0
dBFS –20
For detailed information on how
to output the reference signal, see
“To output the voice from the
microphone or a 1-kHz reference
signal” on page 10.
4 Adjust the REC level of the
camcorder.
Adjust the level control of the
camcorder so that the level meter
of a camcorder points to 20.
The adjustment required for
checking the status of a
connection between the unit and
the camcorder has been
completed.
Now, perform a final check of the
connection status using the 3.
CAMERA RETURN sub-menu.
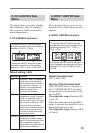
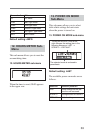
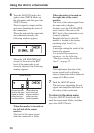
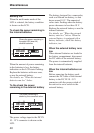
5 Display the 3. CAMERA
RETURN sub-menu, and then
push the ADJUST knob.
The CHECK window appears.
(continued)