


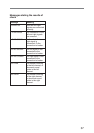

36
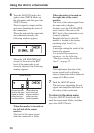
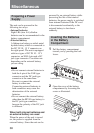
6 Turn the ADJUST knob to the
right so that CHECK blinks on
the sub-menu, and then press the
ADJUST knob.
The test signal is output and the
unit starts checking the status of
the connection.
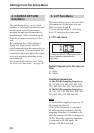
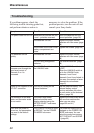
When the unit and the camcorder
are connected correctly, the
following window appears.
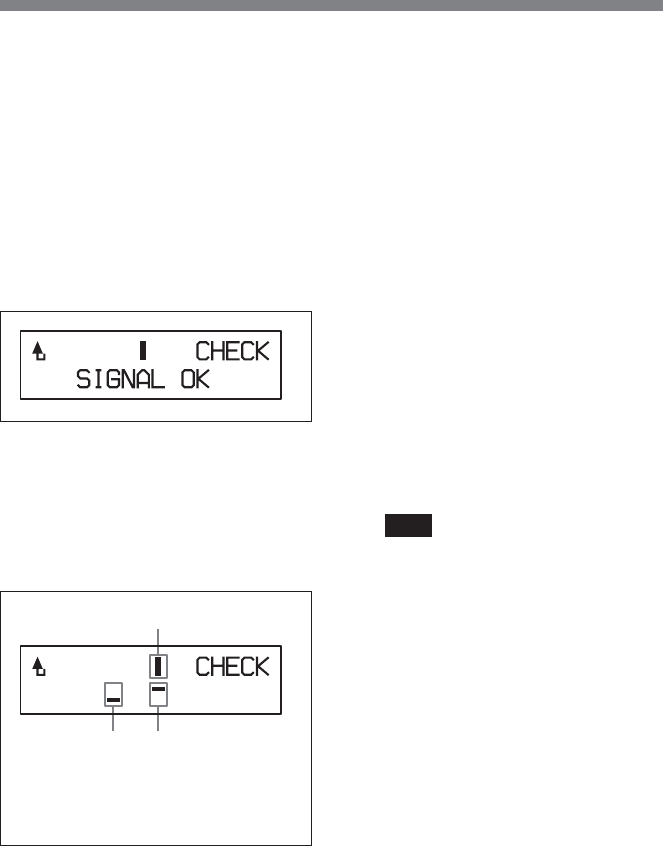
When the L/R MASTER level
control of the unit or the REC
level of the camcorder is not
correctly adjusted, the following
window appears.
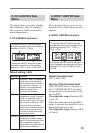
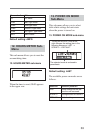
Center marker
When the marker is located on
the left side of the center
marker:
The level of the return signal
from the camcorder is lower.
Shows that the
level of the right
signal is shifted
away from the
correct position.
Shows that the
level of the left
signal is shifted
away from the
correct position.
When the maker is located on
the right side of the center
marker:
The level of the return signal from
the camcorder is higher.
In either case, the L/R MASTER
level control of the unit or the
REC level of the camcorder is not
correctly adjusted.
Readjust the level so that the
marker is located at the center,
repeating steps 2 and 3, as
necessary.
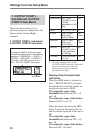
A message stating the result of the
check also appears.
For detailed information on
messages, see the following
“Messages stating the results of
check”, on page 37.
Note
This adjustment function of the
return signal level is effective
when a camcorder with a balanced
output of 0 dBu is used.
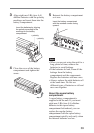
7 Push the ADJUST menu.
The unit stops outputting the test
signal and completes the check of
the status of the connection.
To return to the setup menu
Turn the ADJUST knob to the left
until the return mark blinks, and then
press the ADJUST knob.
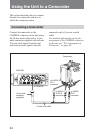
Using the Unit to a Camcorder