


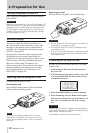

TASCAM DR-100
23
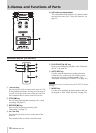
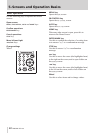
5–Screens and Operation Basics
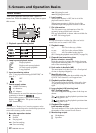
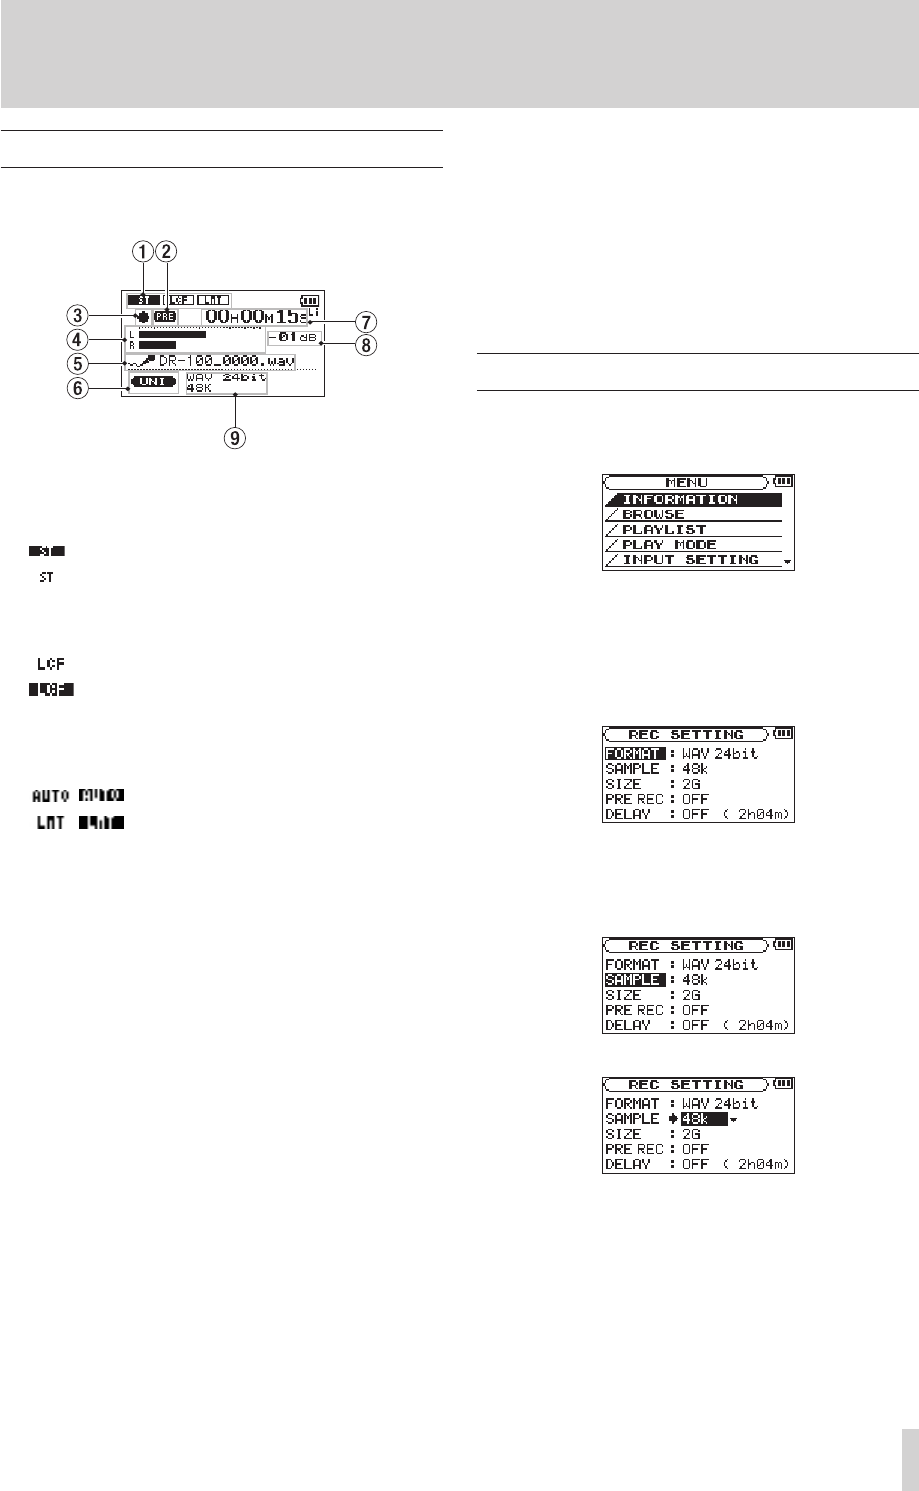
Recording screen
This screen appears when in recording standby
and during recording.
1
Input function setting status
TYPE
Stereo
Mono
(See “Setting mono input (TYPE)” on page 41.)
LOW CUT
OFF
ON
(See “Using the low cut filter (LOW CUT)” on
page 41.)
LEVEL CTRL
/ Auto gain control
/ Limiter
(See “Using the auto gain control and limiter
(LEVEL CTRL)” on page 42.)
2
Prerecording function status
“
PRE
” appears when the prerecording function is
ON.
3
Recorder operation
ª Standby
π Paused
º Recording
4Recording level meters
When overdubbing is off, the input signal level is
shown.
When over dubbing is on, the combined input and
playback signals are shown.
5
File name
The file name that will automatically be given to
recorded files is shown.
6
Input signal
The input signal is shown.
7
Elapsed time/remaining time
(hours: minutes: seconds)
Shows the amount of time that can be recorded
when in standby.
Press the HOME key to toggle between display of
elapsed and remaining time. A “–“ appears at the
start of the remaining time.
8
Peak value in decibels (dB)
Peak recording level values are shown digitally.
9
Recording mode/sampling frequency
Shows the recording file format and sampling
frequency.
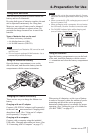
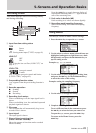
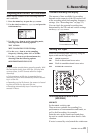
Using menus
Use the
MENU
screen to make various settings.
1 Press the MENU key to open the
MENU
screen.
2 Use the wheel to select a menu (selected items are
highlighted and appear as light letters on a dark
background), and press the ENTER/MARK key to
open a setting screen.
Example:
REC SETTING
screen
3 Use the wheel to select (highlight) a setting item,
and press the ≤ key (or the ENTER/MARK key)
to select the value of the setting.
Example: setting the sampling frequency
4 Use the wheel to change the setting.
5 Complete the change.
To set a different item in the same menu, press
the µ key to select the item you want to set.
To open the
MENU
screen, press the MENU key.
To return to the Home Screen, press the
HOME key.