20
Switching Between A Bus and B Bus
In the PGM-PST mode, before you perform a switch, you can check the video on the preview monitor, then use the
buttons to execute the transition. The preview picture is displayed on the preview monitor connected to the A/B MIX
PVW connector.
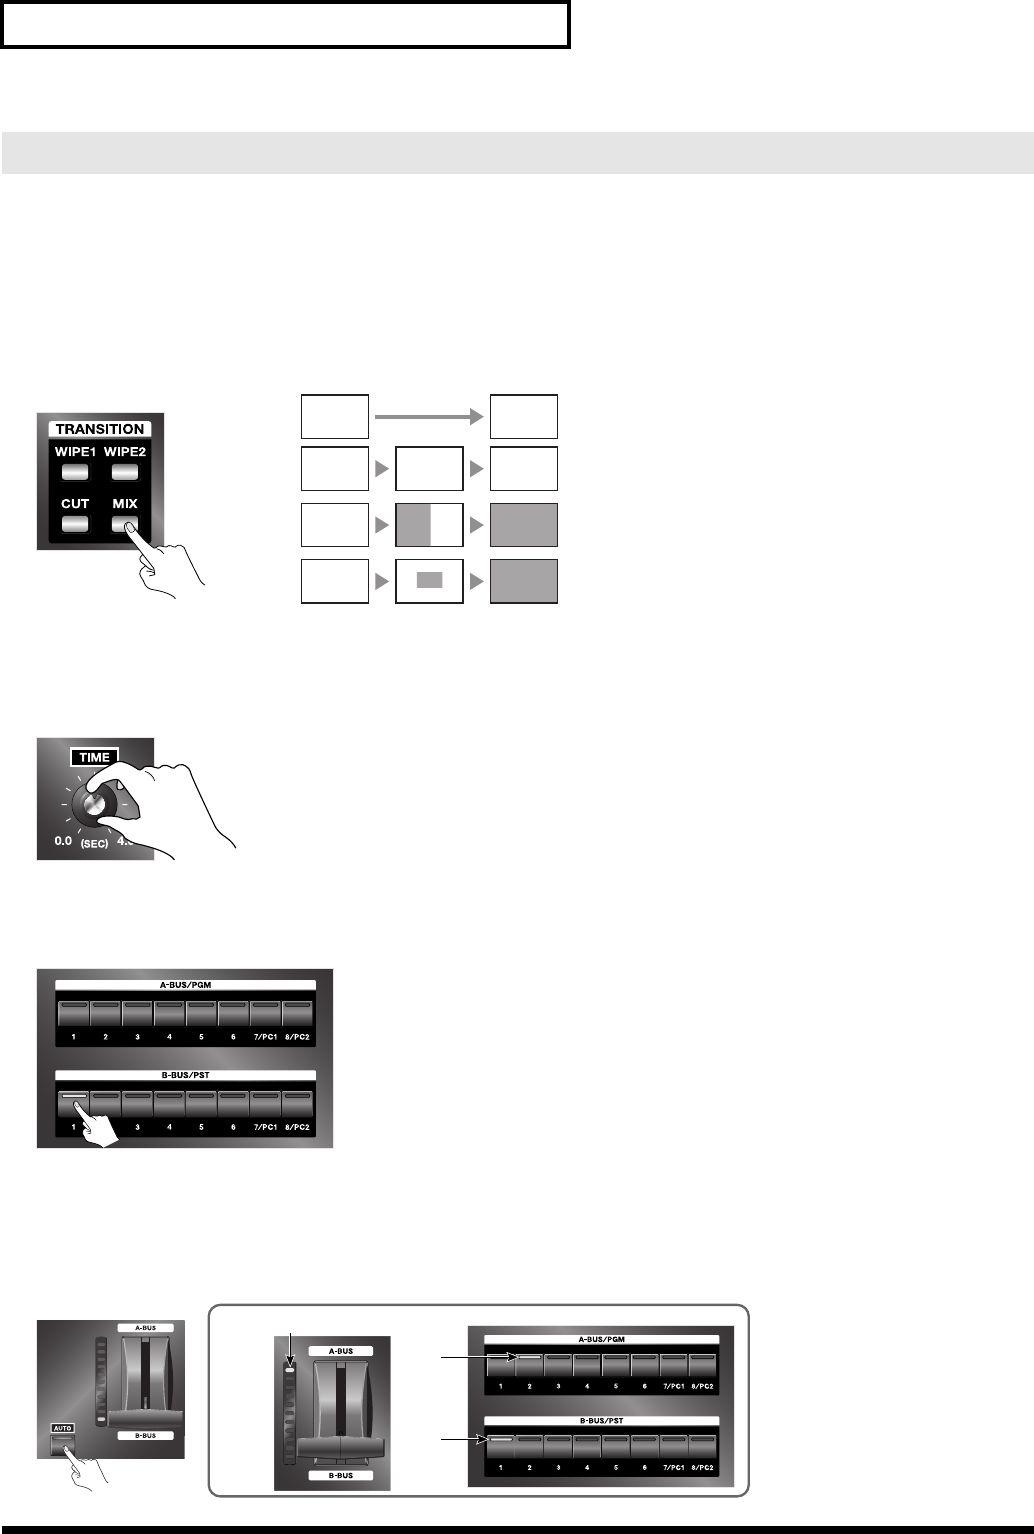
1. Choose the type of transition (transition effect).
If you want to apply a transition effect, use a [TRANSITION] button to choose [MIX], [WIPE1], or [WIPE2]. To apply no
effect, choose [CUT].
fig.select-transition.eps
2. Set the transition time.
Turn the [TIME] dial to set the transition time. You can set this anywhere within the range of 0 (zero) to 4 seconds. You
can set the transition time at any point along a stepless range.
*If you selected [CUT] in step 1, the time setting has no effect.
fig.time-dial.eps
3. Choose the video channel on the PST side.
The picture on the selected channel is output to the preview monitor connected to the A/B MIX PVW connector. The
selected video is not output to A/B MIX OUT or PGM OUT at this stage.
fig.PST-input.eps
4. Output the video.
Press the [AUTO] button for A/B MIX. The video you selected in step 3 is output from the A/B MIX OUT and PGM OUT
connectors. As this happens, the corresponding input LED is lit on the PGM Bus to indicate that the selected input is now
active. PGM Bus will always indicate the currently active input being sent to the PGM outputs. In the PGM-PST mode,
the TRANSITION indicator and the button LEDs work as shown below.
fig.auto-transition.eps
Switching After Monitoring the Preview Picture (PGM-PST Mode)
MIX
A BAB
Start Finish
WIPE1
A
WIPE2
A
A B
A B
CUT
A B
No transition effect is applied.
The pictures on A and B are blended together
as they are switched.
The video switches using horizontal wipe.
(factory default setup)
The video switches using box wipe from center
(factory default setup)
PGM side lights up after
movement between buses
PGM side
is red
PGM side
is green


