39
[ TEMPO SYNC] button
This button synchronizes the delay time to the GAIA
SH-01’s tempo, allowing you to easily create e ect sounds
that are synchronized to the tempo of your song.
Reverb
This e ect adds the reverberation that is characteristic of a
performance in a large hall.
[ REVERB] button
This button applies the reverb e ect.
Others
[ LOW BOOST] button
If you press this button so it’s lit, the low-frequency range
will be boosted for emphasis.
[ EFFECTS ON/OFF] button
This button turns all of the e ect blocks on/o in a single
operation.
If the [EFFECTS ON/OFF] button is lit, the selected e ects
will be on.
If the [EFFECTS ON/OFF] button is unlit, all e ects will be
o .
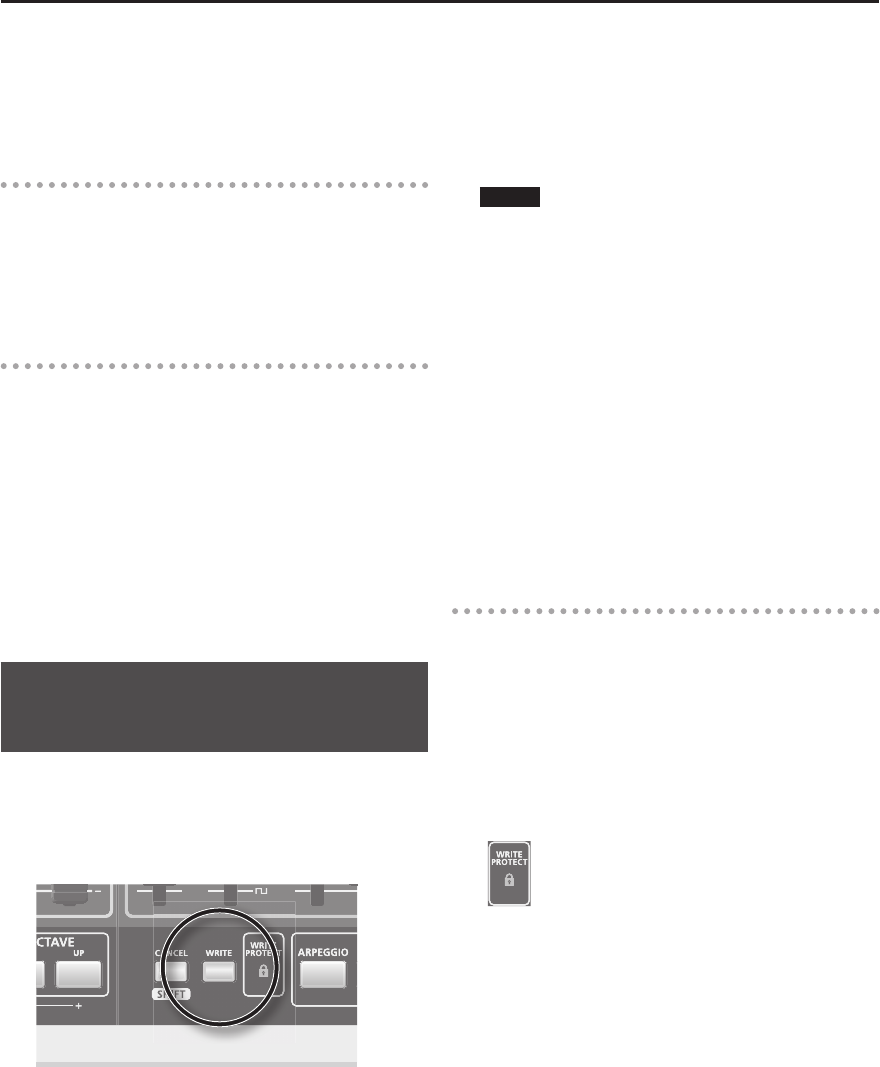
Saving a Sound You’ve Created
( WRITE)
The sound you create will change if you move a knob or
select a di erent patch, and will be lost when you switch
o the GAIA SH-01’s power.
When you’ve created a sound you like, you should save it
as a user patch.
1. Press the [WRITE] button.
The [USER PATCH] button will light; the [BANK] or NUMBER
button that was selected, as well as the [WRITE] button,
will blink.
If you want to save your patch to USB memory, press the
USB MEMORY [PATCH] button.
2. Press the [BANK] button and a NUMBER [A]–[H]
button to specify the save-destination bank.
The BANK button and NUMBER button you pressed will
blink.
3. Press a NUMBER [1]–[8] button to specify the
destination at which you want to save your patch.
NOTE
The sound settings that were previously in the patch you
selected as the destination of the save will be overwritten
by the patch you’re saving, and will be lost. Take care when
choosing the destination of the save.
4. Press the [WRITE] button once again.
The selected BANK and NUMBER button, as well as the
[USER PATCH] button, will light, and the [WRITE] button
will go out.
The sound you created has been saved.
* If you decide not to save your sound, press the [CANCEL/
SHIFT] button before you press the [WRITE] button in
step 4.
* You can’t save to a patch that is write protected. If you
attempt to do so, the WRITE PROTECT indicator will blink
rapidly.
WRITE PROTECT
This lets you prevent an important patch from being
accidentally overwritten and lost.
By holding down the [CANCEL/SHIFT] button and pressing
the current NUMBER button, you can “write protect” the
patch.
To disable the write protect setting, hold down the
[CANCEL/SHIFT] button and press the current NUMBER
button.
If you’ve selected a patch that is write protected, the WRITE
PROTECT indicator will light.


