


24
Button Operation and Displays
fig.00-009
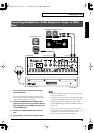
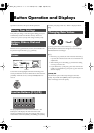
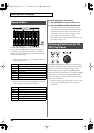
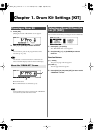
Use [GROUP FADERS] sliders to adjust the volume.
If you press the [FADER] button, the function of the faders
will change as is explained in the chart below. An LED will
light up at the upper and lower right of the faders to indicate
which set of sounds is active.
• When upper indicator is lit, you can adjust the volume of
following trigger inputs.
• When lower indicator is lit, you can adjust the volume of
following trigger inputs and sequencer parts.
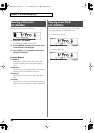
Example: Adjusting the Snare Volume
1.
Press [FADER] so the upper indicator is lit.
2.
Move the [GROUP FADERS] [SNARE] slider.
The slider position shows the current snare volume.
* After switching with [FADER], the values for the [GROUP
FADERS] sliders may not reflect the actual volume of the
sound assigned to that fader. So after switching, be sure to
move the faders a bit before making your setting.
* This will NOT affect the independent volume balance for each
kit in: Mixer Settings (p. 37).
fig.00-007_70
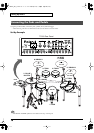
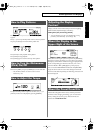
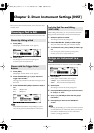
The ([TRIG SELECT]) buttons can be used to select the pad/
trigger input to be edited without needing to hit a pad. When
you press [1], the next lower-numbered trigger will be
selected. When you press [15], the next higher-numbered
trigger will be selected. When using a rim capable pad, [RIM]
lets you know you’re editing the rim. [PREVIEW] plays the
sound in the display. So it’s easy to edit with only the TD-20
and a pair of headphones.
* When you select the hi-hat (trigger number 7), you can sound
the closed hi-hat by holding down [SHIFT] and pressing
[PREVIEW].
Group Faders
KICK
1 KICK
SNARE
2 SNARE
TOMS
3 TOM 1, 4 TOM 2, 5 TOM 3, 6 TOM 4
HI-HAT
7 HI-HAT
CRASH 1
8 CRASH 1
CRASH 2
9 CRASH 2
RIDE
10 RIDE, 11 EDGE
AUX
12 AUX 1, 13 AUX 2, 14 AUX 3, 15 AUX 4
AUX 1
12 AUX 1
AUX 2
13 AUX 2
AUX 3
14 AUX 3
AUX 4
15 AUX 4
PERC
Percussion part (p. 55)
BACKING
Backing part (p. 54)
CLICK
Metronome click (p. 59)
Choosing Pads from the TD-
20’s Top Panel
TD-20_Ref_e.book 24 ページ 2005年5月25日 水曜日 午前9時49分